
A few weeks ago, I was reading a post on Ceri’s blog and stumbled across a picture of some Cuisenaire rods. I made a quick comment on the post, and Ceri asked me if I would like to write a joint post on how we use them. Ceri is a respected ELT writer and inspirational teacher and it’s an honour to be able to blog with her for a newbie like me. It’s the first attempt at cross-posting and blogging together for either of us: hope you like the results!
I bought my box of cuisenaire rods in 1989 when I was doing my induction to the Dip TEFLA (as it was known then) at IH Hastings. I was inspired by a silent way influenced lesson I observed at the school and bought my rods on the way out. I was fascinated by the atmosphere of engagement and focused attention, of the calm, controlling presence of the teacher and the concentration on the part of the students. I’ve carried the rods around with me ever since. They’re looking pretty good, despite their age, I think it’s something of the aura of care and respect from that first class I saw that’s rubbed off on them.
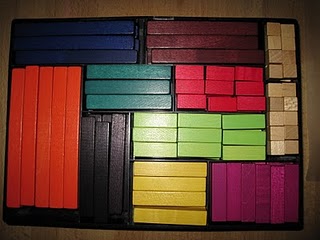
Recently I dusted them off and used them in class. But before I did, my kids got their hands on them. My daughter’s been using them at school for maths. She squealed with delight and pounced on them. “They’re made of wood!” (the ones in her school are made of plastic) and proceeded to build a “picture” showing all the number combinations that add up to ten. There’s a real pleasure in touching them and handling them and the colours are really attractive. The way they’re laid out so carefully in the box breeds a sense of respect and discipline. When she’d finished with her maths drawings, she very carefully put them all back in their rightful place (not something that happens very often with her toys!).
Inspired by her enthusiastic response , I took them into my adult class the next day. We’d been using a lot of internet, Web 2.0 and IWB materials in our classes and I’d taken the rods in as a change of focus. I wanted to use them first of all as a kind of show and tell activity. I also wanted to know if they too had used them at school and to see what kind of response I’d get. No-one had used them and they were interested to learn about them. We’d been discussing the power and associations of colours in the class before so we talked about how colours can aid memory and learning. And we conducted an experiment, associating specific rods to idiomatic expressions and explaining why. We put the rods away until the end of the lesson and brought them out to see if we still remembered the associations. No surprises, we did. We brought them out again the next lesson. We still remembered.
In the second lesson I introduced them to the rods for language practice using an activity I’d seen modelled back in that lesson in Hastings. It’s incredibly simple. Incredibly basic. And there’s much, much more that you can do with rods, but it caught their imaginations. This is how our class secretary described the activity in the lesson summary:
Ceri suggested a new game with the blocks.
First , she made a figure with some of them and with the explanations she gave us,we were able to make it without seeing it. It was very funny.
After this, everyone of us made a figure and we explained how to make it and the other classmates tried to find out .”

The students were focused, engaged, concentrated, paying attention to the careful choice of each word, especially the “small words” (prepositions, articles, pronouns). This is a comment one of the students made in her summary after the class:
We noticed our common mistake is when we say “take one block and put it in front of you”. We don´t usually say “it”.We eat “it”.
This seems to be a general pay-off with using rods; the level of attention and the focus on details and precision often help students value small insights, small “noticing” moments that then carry over as a shorthand for correction in less controlled production.
As an extension task I asked the students to write instructions to build a new shape with the rods and to post it on our class blog. Here’s what one of the students wrote (if you have a set of rods you may want to follow the instructions and see what you come up with):
Hi Ceri!
If you follow the instructions, you’ll reproduce a piece of art made with scaled-up Cuisenaire rods I found on the internet.
Take the rods: 1 orange. 1 blue, 1 brown, 1 black, 1 dark green, 1 yellow, 1 lime green, 1 red and 2 white.
Let’s go!
Take the blue rod and put it on the table in front of you, standing up.
Take the purple rod and put it standing up on the right, next to the blue one.
Take the orange rod and put it behind the blue one, standing up.
Take the brown rod and put it standing up behind the purple one and next to the orange one.
Take the black rod and put it carefully on top of the purple one, standing up.
Take one white rod and put it on top of the orange one.
Now take the red rod and put it standing up on top of the last one you have just placed.
Take the yellow rod and put it on top of the blue one in front of the two smaller rods.
Take the dark green rod put it standing up on the top of the brown one, next to the stack of orange, white and red ones.
Take the lime green and put it on top of the black one, standing up.
In the end, take the other white rod and put it on the top of the red one.
If I’ve given you the right instructions and you’ve followed them correctly, you should have got this sculpture: http://www.tetuhi.org.nz/exhibitions/exhibitiondetails.php?id=8
Bye
M
Follow the link, it’s worth it to see the photo!
Sandy’s story
When I was about four, my parents gave me a set of Cuisenaire rods. A couple of years later, I got a book showing how to do sums using the rods. I loved playing with them, and it’s possibly here that my primary school love of maths originated. Until I was about eleven, I used the rods all the time. Then, I grew up and they disappeared into the cupboard. If it weren’t for a CELTA session, I would probably not have thought about them again until I had my own kids. I came out with loads of ideas and the joy that one of my favourite childhood toys could have a role in my classroom. The next time I went home, out they came and into my bag of teaching tricks. Every time I’ve used them, the students have been engaged and enthusiastic, once they’ve got over the initial “What does the crazy teacher want us to do with THEM?” reaction, that is!
Re-enacting stories
After reading a story in a young learner textbook, the kids used the rods to represent the different characters and retell the story. There was a jack-in-the-box at the end of the story, and they really enjoyed throwing it across the room!
Grammar – phrasal verbs
Cuisenaire rods are great for showing sentence structure. This is a downloadable set of worksheets I created for word order in phrasal verbs (based on New English File Pre-Intermediate Unit 8).
Building models
My favourite activity uses the rods for model-building. It’s especially good for the vocabulary of houses and furniture, but I’m sure it could be used for many other things. I’ve used it at Elementary, Pre-Intermediate and Upper Intermediate levels, with groups ranging from 2-12 students, and it’s always gone down well. This is how to do it:
- Before the class starts use the rods to build a room in your house / your whole flat (however much you have time to do!). Add as much detail as you can.

- At the beginning of class, encourage students to guess what it is. They will probably get that it is a house / flat very quickly, but working out the exact details of what is there is generally more challenging. Depending on the level:
-Draw the outline of the house / room on the board. Students fill it in with the names of the objects. I also left a space for students to write words in Czech they wanted to know. Once we’d looked at the vocab list in their textbook they wrote the English on the board.

– SS use modals of speculation to decide what is where and perhaps why you bought it / put it there.
– SS describe the room to their partners, focussing on prepositions. - Teacher confirms or corrects the names of the furniture / rooms.
- You could expand the vocabulary, focus on the grammar or generally build on the student-generated language at this point.
- Students each build one room, without telling anybody which room it is or what objects they have put in it.


- Their partner then guesses what is in the room, and which room it is. One really creative student once created a garage, complete with chairs stacked on top of a table. Needless to say, neither his fellow student or I could work out what it was!


NOTE: If you don’t have enough Cuisenaire rods for the whole class, encourage students to use other small objects like coins, rubbers, pencil sharpeners… I also have a box of laminated shapes that comes in very useful for many things. Every time I have a bit of space in a laminating pouch, I put in a scrap of coloured paper and cut the result into random shapes.

Here are links to two great posts that follow on from this theme.
Emma Herrod wrote about using lego blocks on Barbara Sakamoto’s blog Teaching Village in a blog that appeared in two parts.
More Than Five Things to do with LEGO® in the EFL Classroom Part 1 (by Emma Herrod)
Teaching Village Rotating Header Image More Than Five Things to do with LEGO® in the EFL Classroom Part 2 (by Emma Herrod)
Michelle Worgan wrote about the power of colours and associating colours to words and language on her blog So This is English.
Colour Experience

Wow, I’m so impressed with how you used the rods to explain phrasal verbs! And that strengthens Ceri’s point about how associating something with color will help you remember it!
I’m so glad you wrote a joint post – the ideas go together well!
B.T.W – My pupils would recognize and criticize any attempt of mine to represent a room plan! Quite a few of them major in architectural draftmanship at the high-school! LOL!
LikeLike
I never thought about that side of flat-planning 😉 Think it might just make them laugh though – I’d be interested to see how accurate their Cuisenaire rod rooms would be, and how much time they would spend making them!
LikeLike
Great ideas! Thanks. Have just linked to this on http://www.facebook.com/TeachingEnglish.BritishCouncil and Twitter #teachingenglish, if you’d like to check fro comments.
Please post on fb directly whenever you want to share.
Best,
Ann
LikeLike
Hmmm…just noticed an incoming Google Search to our post looking for ‘pronunciation using Cuisenaire rods’. If you haven’t heard about this method before, here’s a quick list of ideas:
-use rods to show word stress – one colour for unstressed syllables, one for stressed
-do the same for sentence stress
-use rods for intonation – moving blocks to show how sentences go up or down at the end could be easier for kinaesthetic learners than simply drawing arrows
-use rods to show silent syllables – first, put down rods to show SS impression of how many syllables there are in a word (e.g. com-fort-a-ble = 4), then take the ‘silent’ rod away (e.g. comf-ta-ble = 3) and drill
Hope that helps!
Sandy
LikeLike
thanks a lotttttttttttttttttttttttt……………….:)
LikeLike
Hi Sandy,
Great post–I was thinking about ordering a set of Cuisenaire rods and the frugal side of me was saying “Find things to actually do with them before you buy them!” Looks like you’ve just beat that little bit of inner frugality!
Lots of good ideas here. It seems almost as if the rods have some sort of enchanting power over learners (I’ve been reading around on them for the past half hour or so and this point always seems to come up!) Also, over on Scott Thornbury’s blog, there’s a reference to research that suggests what you also pointed out–that using gestures, physical representations of ideas, etc. does make it stick in your brain longer. Maybe this notion is under-exploited in ELT, especially 1-to-1 where it can easily get into a 2-people-talking-around-a-table rut!
I’m bookmarking this page so I can come back to it once my Cuisenaire rods arrive!
Thanks and keep up the good work!
LikeLike
Thanks very much for that Christina. You’ve reminded me that I haven’t got mine out for a while too – I’ll have to visit them.
I’d be interested to hear what you end up doing with them.
Sandy
LikeLike
Am using cuisenaire rods for my experimental practice! And guess which page came up on google when I was having a hunt for ideas!!! 🙂 Thanks! 🙂 xx
LikeLike
Yay! 🙂 Hope the ideas come in useful, and if you have any other thoughts about how to use them, please share 😉 Good luck! My EP is tomorrow…
LikeLike
How did it go?? Mine is on Tuesday or Wednesday. I’m getting the ss to use the rods to retell a story from a newspaper article. See how it goes!! Need to get them out and have a play at some point this weekend hehe! 😀
LikeLike
It went well 🙂 gGood luck with yours!
LikeLike
Hi Sandy,
this is all very inetersting and pretty useful for our next DELTA mission! Great ideas THANK YOU 🙂
LikeLike
Just came across this discussion. There are several articles about ways of using Cuisenaire rods here: http://www.uneeducationpourdemain.org/english/silent-way/. Some are the same as above but others are different.
LikeLike
If you are interested in Cuisenaire rods, you’ll like this free book: Maths with rods – 40 excersise tabs to play with parents http://issuu.com/jmcuenca/docs/maths_with_rods
LikeLike
Hi Sandy,
I’ve “stolen” your floor plan photo and put it on my site here: http://www.glenys-hanson.info/silent-way-articles/ to illustrate a link to this blog article of yours. Is that OK with you? If not, just tell me and I’ll remove it.
Cheers,
Glenys
PS: I’ve never needed more than one, large, box of rods with groups of up to 25 students. How many did you have when you felt one box wasn’t enough? Maybe we do different sorts of activities…
LikeLike
Hi Glenys,
That’s no problem. The only time I needed more than a single box of rods was when they were all building their own rooms. The large blocks don’t go very far! I tend to top it up with things like laminated shapes and bits and pieces from around the room.
Thanks for linking to my article and for letting me know! It’s a great collection of articles.
Sandy
LikeLike
Thanks Sandy!
I see why you’d need something to supplement a single box with that activity.
I do it a little bit differently. I put the students in groups of 4/5 and one student creates their floor plan in interaction with the others:
S1: This is my house.
S2: Where’s the sitting-room?
S1: Here.
S3: How many windows are there?
Etc.
I get them to do it on a piece of paper so they can draw in bits if they run out of rods.
I also make sure it’s one of the weaker students that’s showing their house – otherwise they tend not to speak.
Glenys
LikeLike
I like that twist on it. The version I do is for them to ask questions, guessing what the furniture is and trying to work out which room has been modelled.
LikeLike