Adding movement to your online lessons (crowdsourced from IH Bydgoszcz teachers)

I’ve said it before and I’ll say it again: I’m absolutely privileged to work at International House Bydgoszcz. Our staff are motivated, engaged, and creative, and always willing to share their ideas. Everyone really cares about teaching and doing the best for our students.

For the last couple of weeks, our Friday workshops have become brainstorming sessions. We start a Google Doc on a specific aspect of teaching online, then head into breakout rooms to share ideas and add to the document. They add their names, and when we return to the main room we ask for clarification or explanations of anything we don’t understand. So far we’ve covered warmers, feedback and error correction, and now movement.

In just 30 minutes on Friday 8th May, IH Bydgoszcz teachers past and present produced this fantastic list of ideas for adding movement to online lessons, and they agreed to let me share it on my blog. I’ve organised them into categories and removed school-specific terminology, but apart from that, they’re as written during the session. Thanks to everyone who added to this list! If you have other ideas, please share them in the comments.

Please note: if you share this post (thank you!), please credit ‘IH Bydgoszcz teachers’, rather than me!

At the computer

Flash card, touch body – two flashcards on PPT or in hands. T says – word. If it is one flashcard – SS touch nose. If it is other flashcard, SS touch head. = receptive stage (Flash and touch – Jodie??) 

Debate – They show you how much they agree/ disagree with a statement physically i.e. how much they stand up. Then, you group them with people who have the same/ or very different points of view in BOR for activity.  (Jodie)

Body parts vocab: students stand up, T says show your ankle, S .. (Lotte)

Using mime to revise body / sports vocab using mime and the others guess. (Ranmal)

Use standing up/sitting down for feedback e.g. stand up if you agree. (Ranmal)

Storytelling- Ss suggest actions for parts of the story/ characters particularly repeating words that they do while you tell the story (Helen)

Alphabet actions- do an action for each letter of the alphabet (Jude G)

Mime a TV programme scenario to revise TV vocab (Jude G)

Simon says (Jude F)

True/false game (with kids): Come up with a random movement for true/false, e.g. stand up and wiggle for true, pat your head if false. The teacher or a student says a sentence about a picture. Ss do the movement for T/F. (Char)

“Board” slap > notebook slap – Ss write/draw words in notebook and touch. Or on post its to stick on walls in the house (Shannon, via Sandy a few weeks ago)

One student goes outside/behind the computer for 30 seconds with their sound off – the rest of the students make a shape/start doing an action. That student comes back and has to guess what the word is. You can do it with the waiting room function too, but this is potentially more fun. (Sandy)

Play some music for everyone to dance to. When it stops, they need to make a shape that represents a recent piece of vocab. Everyone then calls out what they can see: James is an elephant, Sandy is a lion, etc. (Sandy)

Away from the computer

Scavenger hunt- items, vocab, fun (Lee and Ash)

Mute mic and run – T has list of vocab on the board. Class is in 2 teams. T says ‘which one is…. + def’. Then, says two SS names. The ss run (by which I mean walk sensibly) and start the microphone and say. Fastest = points. (Jodie)

Vocab: Find something you can describe as ‘______’ i.e. ancient. (They go find one of their many ancient artefacts at home). (Jodie). 

Ask students to get something from different rooms in their house – practicing rooms in a house (Ranmal)

Let students get a book or another prop from their room or house. Give them a time limit (Lotte)

Birdwatching. I taught young learners the names of some birds & some bird vocab. Then they could go to their window/balcony, do a spot of birdwatching, and tell each other what they saw. (Gareth)

Show us your garden! Connections and gardens permitting (Helen)

Run and get something to introduce to the group related to grammar vocab for that lesson – this is my dog which I…, this is my sister who.. (Jude G)

Give Ss 3 mins to run and find something to explain a concept from the lesson. In my advanced adult group they had to find something to explain the concept of time (Katharine)

Go and find something to tell a story about and other Ss have to guess if it’s true or false (Katharine)

Find an object to describe using new vocabulary e.g. pretentious art adjectives (Katharine)

Go on Pet Safari to practise present continuous. Follow a pet around the house and narrate what they are doing. Can use a stuffed toy if they don’t have a pet (Ruth)

New vocabulary such as films or books – (adjectives for or categories) get ss to get up and find as many examples as they can in their house and show to each other on the camera. (Monica)

As mental breaks

Star jumps etc. as a little break for young learners. (Lotte)

Random brain breaks (for kids): (Char)

  • rub your belly and pat your head
  • try to lick your elbow
  • pinch your nose with your right hand and touch your right ear with your left hand, then swap
  • find something (green)
  • be a (cat, chair, rock)

Yoga for kids’ – share video via YouTube and Ss do at home (Shannon) 

Click your fingers: one hand click a triangle, one hand click a line (Lee)

Dance to a Super Simple Songs video (Sandy)

Get Ss to dance along to old 70s/80s aerobics videos (purely for teacher’s entertainment but also as an energy burner) (Connor)

Useful links

Here are two other posts about how to add movement to your online lessons:

https://sandymillin.wordpress.com/2020/04/10/adding-movement-to-online-lessons-guest-post/

https://jamesegerton.wordpress.com/2020/04/25/i-like-to-move-it-move-it-webinar-let-off-quaransteam/

Lessons you can watch online

For a lot of teachers, it can be hard to find the time or the opportunity to observe and learn from other teachers’ lessons. If that’s you, hopefully you’ll find these videos useful.

I’ve divided them into loose categories, with a sentence or two to help you decide which are the most relevant to you. Within the categories, they’re just in the order I found them! I’d like to thank the many people who’ve sent me links to these videos over the years (though unfortunately I can’t remember exactly who sent me what!)

Please feel free to tell me about other videos I may have missed in the comments, as well as any broken links. I’d particularly appreciate any VYL, YL or teen videos that may be out there, though I know they may be hard to find.

P.S. I’ll admit that I haven’t watched all of these from start to finish, just bits and pieces, so please proceed with caution…

Very young learners

Anka Zapart has a list of VYL lesson clips on her blog, some of which overlap with the ones I have below.

Hubert Puchta introducing vocabulary and using Total Physical Response (TPR) and telling an action story (7 minutes)

An American kindergarten teacher working in a French-language immersion school (27 minutes) (via David Deubelbeiss)

Teacher Allen singing a song and teaching a demo lesson with Chinese kindergarteners (10 minutes)

Another kindergarten lesson in China, this time with 33 children (30 minutes)

Michael Roxas working on adjectives, using TPR and introducing clothes with a kindergarten group, working with a Chinese teacher (27 minutes) Michael has other videos of him teaching kindergarten on his YouTube channel.

Mark Kulek has lots and lots of videos of him teaching. This one shows him working with 25 Japanese 3- and 4- year olds (15 minutes) They are mostly in two playlists: Live Children’s English Classes EFL and How to teach kindergarten English class EFL. A lot of the clips are less than 5 minutes long.

This one shows Mark working with puppets (3 minutes)

Paul Pemberton teaching kindergarteners in China (30 minutes), including a really nice routine for getting kids to put their hands up

Shaun teaching 3 year olds in China for a parents’ open day (15 minutes)

Hannah Sophia Elliot teaching kindergarten in China (41 minutes)

Ann teaching children using a story bag (9 minutes)

Watts English have a series of videos showing children in Prague kindergarten. Here’s the first (20 minutes) Look at the Czech playlist for more, as well as the games bank.

Here’s an example of a teacher using a puppet as part of their WOW! method (5 minutes)

Savannah building rapport with a brand new group of students (4 minutes)

Tony using role plays as part of a demo lesson (23 minutes)

Najmul Hasan (a.k.a. Peter) also has a range of videos of him teaching kindergarten. Here’s one (25 minutes)

Rebecca Eddy teaching shapes to a kindergarten class in China (13 minutes)

This video is designed to show teachers how to run a demo lesson, but there are also lots of useful tips in there and examples of how to set up activities (9 minutes)

Tanner Applegate teaching 3 year olds in China (6 minutes)

Marco Brazil teaching colours to very young learners (4 minutes)

Teaching weather to kindergarten children, with a Chinese teacher also in the room (15 minutes)

Introducing body parts (4 minutes)

Thanks very much to Lucy, who suggested in the comments that I look up kindergarten ESL teacher on YouTube, which led to most of the above videos!

Young learners

Adi Rajan suggested the Teacher Development films available on the British Council website, accompanied by workbooks. Here’s one example (52 minutes):

Marisa Constantinides playing the ‘please’ game, and thereby demonstrating total physical response (TPR) (8 minutes) She wrote about this activity, plus two more with accompanying videos (Thanks for letting me know, Marisa!)

Ashley Haseley teaching sensory reactions in China (12 minutes)

Kaila Smith talking about teaching children in China, with lots of clips from her classes (4 minutes)

Pass the bag, a video of a game shared by Ian Leahy (90 seconds)

Sam playing a days of the week game with Thai children (2 minutes)

This video shows you how to do guided reading with elementary learners – it’s mostly describing the technique, but there are various clips of the teacher at work (11 minutes)

A counting game for kids (2 minutes)

This is a video describing various classroom management techniques shared by Ian Leahy. Although there is a voiceover throughout the entire video, there are lots of clips of exactly what’s happening. (16 minutes)

Gunter Gerngross demonstrating TPR with young learners (3 minutes)

Karlee Demierre using a body parts song (3 minutes)

Introducing animal vocabulary in a demo lesson, with lots of flashcard games (32 minutes)

Teens

A shopping lesson with pre-intermediate students using Solutions Pre-Intermediate (17 minutes)

Ross Thorburn introducing the rooms in a school (6 minutes)…

…and showing how unmonitored group work ran (35 seconds)

Ross Thorburn using flashcards with beginner young learners (1:10)…

…and with elementary young learners (1:30)

Ross also has tips for behaviour management, including live examples from class (5 minutes)…

…and demonstrating routines (7 minutes)

In this video, Ross introduces vocabulary, then takes his class into a shopping mall (8 minutes)

Adults (coursebook-based)

Sarah Troughear teaching a group using Life Pre-Intermediate, based on the topic of transport (60-minutes, including post-lesson analysis)

Clive Brown teaching a group using Life Upper Intermediate, based on the topic of documentary film-makers (37 minutes, including post-lesson analysis)

Andrew Walkley using an image to get students interested in a coursebook topic and lead in to a discussion (6 minutes)

Hugh Dellar teaching listening lexically – part 1 (13 minutes)

and part 2…

Stacey Hughes teaching using an e-book – find out more (10 minutes)

Me 🙂 teaching upper intermediate students – working with gerunds and infinitives (8 minutes) – find out more

Me clarifying the difference between ‘borrow’ and ‘lend’ with upper intermediate (9 minutes)

Me teaching money vocab to intermediate students (15 minutes)

Adults (non-coursebook-based)

Billy Hasirci teaching a demo lesson for a CELTA course (he’s the tutor!) He’s working with intermediate students, listening to a song (41 minutes)

Lindsay Warwick teaching second conditional (1 hour)

Hugh Dellar demonstrating the lexical approach, including lots of whiteboard work (18 minutes)

Elizabeth Kuizenga Romijn teaching high-level beginners (I would say elementary) cooking vocabulary using realia (38 minutes)

John Bartik teaching beginners the phrase ‘I like ______’ (13 minutes)

Chris Westergaard teaching animal vocabulary to a group of intermediate students (14 minutes)…

…and movie vocabulary to another intermediate group (10 minutes)

Functional language to help students debate, I’d guess at intermediate or upper intermediate level. I don’t know the teacher’s name, but it was shared on the ELT Experiences blog (17 minutes)

You can watch Luke Meddings teaching a dogme [What is dogme?] lesson by going to the British Council website. (40 minutes) There is a video of him using dogme with another group (26 minutes) and reflecting on it (24 minutes) available on the English Agenda website.

Martin Sketchley experimenting with dogme (9 minutes)…

…and doing a dictogloss (14 minutes)

Dr. Frances A. Boyd demonstrating lots of error correction techniques (14 minutes) (via Matt Noble)

Laura Patsko demonstrating how to do a pronunciation needs analysis with a multilingual class – find out more (16 minutes)

You can watch a process writing lesson by going to the British Council website. (37 minutes)

Fergus Fadden working on reading with an elementary group as a demo lesson (23 minutes) (Thanks Lucy)

Ross Thorburn teaching an IELTS speaking class, working on describing a city you’ve visited (15 minutes)…

…and teaching an intermediate class to give advice (20 minutes)

Andrew Drummond demonstrating a present-practice-produce (PPP) lesson structure using jobs (a demo lesson for trainees)… (21 minutes)

…and using PPP to teach the functional language of interrupting, followed by an analysis of the lesson stages (28 minutes)

Paullo Abreu (?) teaching second conditional (1 hour)

Olha Madylus teaching vocabulary and grammar to elementary students as a demo on a CELTA course (15 minutes)

Very small groups

Lavender teaching vocabulary (5 minutes)

Short clips

4 clips of Hugh Dellar (I think with upper intermediate students)

  1. Monitoring a discussion

2. Upgrading and clarifying language (3:30)

3. Setting up a speaking activity (1:20)

4. Clarifying language (3:30)

Martin Sketchley doing an activity with Arabic students to help them with spelling (6 minutes)

Katy Simpson-Davies using jazz chants (3:30)

Ian Leahy demonstrating 3 games, 1 each with adults, young learners and teens (3 minutes)

Ross Thorburn teaching adults to accept and reject invitations (3 minutes)

Conveying grammatical meaning, focussing on ‘used to’ and ‘would’ on Ross Thorburn’s channel (3 minutes)

Ross Thorburn giving instructions (3 minutes)

Olya Sergeeva demonstrating how to teach decoding skills to help students understand connected speech (5 minutes 30 seconds). This blog post explaining a little more accompanies the video.

Online teaching

Fergus Fadden teaching a lesson on Google + (13 minutes)

Mark McKinnon working on connected speech – the clip is part of a full blog post explaining what’s going on in the lesson.

Hugh Dellar teaching a one-hour Skype lesson based on Outcomes Advanced with three students from Krasnodar, Russia. It includes examples of Hugh works with lexis, as an advocate of the lexical approach.

Angelos Bollas teaching a CELTA demo grammar lesson to upper intermediate students on Zoom, showing you what it’s like from the teacher’s perspective:

Angelos again, teaching another CELTA demo lesson, this time using task-based materials using the Fluency First blog:

Trainee teachers

CELTA TP7, as uploaded by English with Stephanie, intermediate students, restaurants (45 minutes)

And TP8, focussing on functional language, again with intermediate students (35 minutes)

David teaching during CELTA uploaded by Insearch LearningCentre (60 minutes) – I’m guessing it’s elementary or pre-intermediate students, talking about a trip to Japan

Anastasia, a Russian trainee who did her CELTA in 2012 (47 minutes)

Please feel free to suggest any extra videos or to tell me if there are any broken links.

Things I learnt in Torun today

Today I had the pleasure of attending the annual International House Torun Teacher Training Day, which consisted of pizza, twenty small workshops divided into four slots of five sessions each, a break with more pizza and some yummy Torun gingerbread, a walk to a local hotel, a plenary with Adrian Underhill, and a Q&A session with various experts, of which I am now apparently one 😉

Torun

Here are some of the things I learnt:

  • Growth mindset should be influencing the feedback I give students and trainees, by focussing on effort and process/strategy, rather than natural talent and results. James Egerton gave us examples like ‘You concentrated hard on my last comments, so well done.’
  • Yet‘ is really important in feedback, as it implies that something is achievable. Consider: ‘You haven’t learnt much Russian.’ and ‘You haven’t learnt much Russian yet.’ It turns out that even Sesame Street know the power of ‘yet’!
  • The reason the sentences ‘They just don’t have a language learning brain.’ and ‘You must be really good at learning languages.’ annoy me so much is probably because they imply a fixed mindset, whereas even before I had a term for it, I always believed that anyone can do anything with some degree of success if they have the motivation and put in the time.
  • I think it could be a very good idea to have a CELTA input session on mindsets very early in the course. I wonder what influence that would have on trainees’ ability to accept feedback?
  • It doesn’t matter how many times I see Kylie Malinowska do the elephant story, it’s still enjoyable, and I still can’t keep up! I discovered that it comes from Drama with Children [affiliate link] by Sarah Phillips.
  • There are at least 15 things you can do after doing a dictation when students have put the paper on their heads to draw the picture you describe. Before today I only ever got them to describe it to each other. Though the only one I can remember without asking Kylie for the slide is battleships!
  • Using MadLibs with children is actually incredibly useful, as it encourages them to solve problems and notice when language doesn’t fit, but also appeals to their love of the ridiculous. I’d always thought they were a bit pointless before!
  • You can bring language from a student’s family and friends into lessons through things like doing surveys, doing project work, writing biographies, sharing photographs or doing show and tell. Dave Cleary explained that even if students do these in L1 at home, they’ll bring them to class in L2, and they’ll have a real reason to use the language.
  • A great activity for playing with language is to take a photo of a famous person the students know, and get them to finish sentences like ‘He’d look really great/silly with…[earrings, a long ponytail, etc.]
  • Telling students the story behind an idiom, whether real or made up, can help them to remember the correct wording, and maybe also the context where you’re most likely to use it, according to Chris McKie.
  • There is a Hungarian idiom meaning something like ‘Let’s see what happens’ which translates as ‘The monkey will now jump in the water’.
  • Adrian Underhill may have been talking about the pronunciation chart for a long time, but he still considers it to be outside the mainstream of ELT.
  • He’s incredibly passionate about it, and it’s very entertaining and engaging to be taught to understand the chart by him. I knew bits and pieces about how it fit together and how to teach it before, but I now understand it in a lot more depth.
  • All pronunciation can be boiled down to four core muscle ‘buttons’: lips (spread and back or rounded and forward), tongue (forward or back), jaw (up or down) and voice (on or off). This helped me to understand how I produce some sounds in English in more depth, and even one in French that I managed to learn but had never been consciously aware of how to produce!
  • If he was a cheese, Adrian would be some form of blue cheese – he went into a lot more depth about this, and I’m glad I didn’t have to answer that question!

Thanks to Glenn Standish and the IH Torun team for organising such an enjoyable day. Lots of ideas to think about, as always!

Out of the window

A very simple activity, which works very well as a filler, as revision, or as the prompt for a whole lesson. All you need is a window with something going on outside.

The view from our classroom
The view from our classroom at IH Sevastopol

Ask the students to look out of the window and tell each other/you what they can see. With my elementary students I encouraged them to use a few structures they’d recently studied:

  • There is/are…
  • Present continuous
  • NOT: I can see… I can see… I can see… (which is what they started with!)

Feed in any vocabulary and structures that they might need, and make a note of them on the board. The students should focus on speaking as much as possible for now, rather than note-taking. Give them time and space to think of ideas – it took my students time to warm up, but then they came up with lots of ideas.

When they’ve run out of steam (after about ten minutes for my group of four elementary students), let the students make notes based on what you put on the board, as well as ask more questions about language.

I repeated the activity a week later, and the students managed to remember about half of the new vocabulary they’d used the first time, as well as adding adjectives and more description without any prompting from me at all. They had resorted to ‘I can see…’ again, but after a reminder from me started to use ‘There is/are…’ and present continuous again.

I’ve read many times about this kind of activity, but this is the first time I’d used it, and it definitely won’t be the last!

[I wrote this post nearly a year ago, but never pressed publish. Better late than never!]

Richmond Skills Boost: my materials

For the first time I’ve designed materials which have now been published. Richmond have put together a series of additional reading and listening materials for each level from A1-C1. At each level there are 12 reading and 12 listening worksheets available for teachers and students to download. To find them, you register on the Richmond ELT site. [Note: when I checked in July 2021, they don’t appear to be available any more.] This takes a few days as they approve your school. Once you’re in, go to the teacher’s area, and click on Skills Boost on the left. There you’ll find all of the worksheets, audio, tapescripts and answer keys. My contributions are the C1 listening worksheets 1-6.

SkillsBoost C1 Listening
My work 🙂 (and a few other people’s too!)

I’m so proud of how they’ve turned out, and I’d like to thank the people at Richmond who made it all look so good, Stephanie, Shona and Susan, along with all of my lovely friends who contributed ideas and materials to help me come up with the ideas I needed. Thanks particularly to Ela, for putting me in touch with Richmond in the first place 🙂

It was a lot of work, but it was totally worth it. I think the audio is a little slow and careful for C1 level (it would be useful for them to hear more natural speeds), but the range of topics are interesting, and a bit different to what’s in the coursebooks, as well as there being a range of accents. I’m looking forward to trying them out with my students when I get back to Sevastopol, and I’d be interested to hear your feedback if you get to use them.

Your challenge is to spot the bits I put in there to make me smile and to figure out the references to my friends in there 😉

Motivation, or why am I a really slow learner of Russian.

My mum is learning Russian because she wants to be able to be a little bit independent when she comes to visit me in Sevastopol. Her previous language learning experience is limited to French at school, so she’s quite like a lot of beginners we meet in EFL – a little bit of language a long time ago, and a lot of mental obstacles to overcome to build up the confidence to practise the language. Take a look at her post about why she is a slow learner of Russian: maybe it will echo some of the experiences of your learners too.

Mum at Stokesay Castle
My mum in the UK when I visited her 🙂 (not her castle…)

I am *super* impressed! (guest post)

This post appeared in my facebook news feed yesterday, and I immediately asked if Tereza would let me share it on my blog. In it, she questions the value of positive feedback.

Today I received my evaluation of the final project in my sports class and it motivated me for a little contemplation on one of the differences between American and Czech (or even European in this respect) culture. The task was to create my own workout and lead my classmates for the fraction of the lecture. Eventually, due to time reasons, it was ONLY 5 MINUTES. So basically, all I did was I came up with 6 exercises, explained and demonstrated them to my classmates and then we performed them for 40s each with 5s break in between. The whole time I commented into the microphone like ’15 seconds, almost there, you can do it!’ because that was one of the requirements. You can see my evaluation below. My teacher was SUPER impressed, I looked like a professional, I should be an instructor.

Tereza's feedback
Tereza’s feedback

And here comes my point – really? I did not do anything impressive, I have never led a sport lecture before so I definitely have no motivation or other techniques developed and yet, based on 5 mins of doing stuff we have been doing in almost every class this semester, I should be an instructor! Americans are just always mega super trooper supportive to students, to kids, to each other, to everyone. Whatever you do, no matter how good or bad, it’s amazing. If you ask a question, however dumb one, teachers always start their answer with ‘That was an excellent question! I’m so glad you’re asking that.’ Whatever you do, it’s awesome, whatever you say, it’s so smart, whatever you wear, it looks cute and wonderful on you. One might think that there is everything perfect in America and everybody is talented and smart here. And that’s exactly mine (and not just mine) observation – people here really do think that. People are convinced that they are all brilliant at everything they do and look great in everything they wear. This might be a too big generalization, I admit. However, I can see evidence that it is mostly true every day.

My boyfriend teaches a calculus class at university in Missouri and his students, all future engineers by the way, are used to being praised their whole lives, getting excellent grades for everything and being told they can do everything and they are the best and the like as you could see on my evaluation. So those students are all shocked when they don’t get partial credit for accidentally guessing the right result, they are all surprised that there is someone who wants them to work hard for excellent grades and does not tell them ‘great job’ if the job is actually not that great. Instead of feeling ashamed they did not learn something or did not do the homework and therefore could not solve some exam problems, they go to him to complain, to accuse him that it is actually his fault they could not solve it and beg for extra points because they are used to always do great. Some time ago I posted here a ‘proof’ which one of my classmates did in a graduate-level math class. It almost made me cry, in short, she factored ‘x’ out of the integral which depended on ‘x’, they would not have let me finish high school if I had done that in the Czech Republic. So this girl still happily attends the class and I got the honor to read one of her papers we had to turn it. It was a complete disaster, she copied every single thing from the paper which it was based on, she not just copied it but also made a lot of mistakes in copying it, her sentences did not make sense, you could not call her proofs ‘proofs’ even if you were drunk and for all that she got 15 points out of 20. I wouldn’t give her even 10. However, that might probably touch her self-esteem and that’s not desired here.

I am not saying that being supportive and appreciating someone is bad. Especially with kids you should do that a lot. However, here it is led to extreme and moreover, college students are not kids anymore. Or at least they should not be. I have already lost the sense of what is meant honestly and what is just ‘American-like’. I basically have no measure whether I did well or bad because I always get a perfect evaluation. You have no idea whether people like you or how high they think of you because they always say you did a fantastic job. At the beginning, it makes you feel good, like you are really special, you do really so well. But with time, you get tired of that because you already see through it. Again, don’t get me wrong, I do not think teachers should be harsh on students, it is good to give someone encouragement and ‘push’ but not the fake one. In the Czech Republic or Germany where I got a chance to study, or even in my family, we do not flatter each other all the time. I know my parents love me and are proud of me but they do not tell me how amazing and talented and extraordinary I am every time I do something. Therefore, when they do tell me that, when they appreciate something I achieved or succeeded in, I can be sure they mean it and I value it very much then.

Tereza Eliášová is from the Czech Republic, and is currently studying for a semester in the United States. She was one of my students in Brno

Tereza

Drawing dictations

I have no idea who I stole this idea from, but it worked really well so I’m going to share it here!

I used it with elementary students. They had done this exercise for homework:

New English File Elementary WB p53 Unit 6C
New English File Elementary Workbook, page 53, Unit 6C

We checked the answers in class, and they were fine, but I wanted them to really notice the language. One student drew a picture for each idea in the text, numbering them from 1 to 10 to help her. (She was early and this was a way to help her before the other students arrived!) These are the final five pictures:

Drawing dictation images

She’s a much better artist than me! By the time she had finished, the rest of the class had arrived. They used the pictures to reconstruct the text on the board. It’s a small group, so using the board enables them to easily change their mind about the text. Students could also use mini whiteboards, tablets/phones, or good old-fashioned pen and paper!

Reconstructing the drawing dictationOnce they were happy with their version of the text, they compared it to the original and asked me questions about differences they didn’t understand, particularly why ‘three-month-old’ had no ‘s’. They spoke a mix of English and Russian, and were engaged and motivated, arguing about whose memory of the text was better.

A homemade revision game

This is a very simple game which is perfect for revision, and requires almost no pre-class preparation. All you need is some small pieces of scrap paper, some kind of blutack to stick it to the table, dice for each group, and a counter for each student. The blutack is optional, but it does stop the paper from blowing away! You could use post-it notes instead, but sometimes they curl up making it easy to see the answers! It works best for revising grammar or vocabulary in closed questions.

Give a pile of pieces of paper to each pair/group of students. Ask them to go through the units of the book which you want them to revise. They should write questions for other students in the class, writing one question on each piece of paper, and write the answer on the back. They can create the questions themselves, or copy them directly from the book, along with any relevant instructions, like ‘Write the correct form of the verb.’ My students normally spend about 15-20 minutes doing this. Here are some examples from my intermediate group:

Examples of revision questions

Once you have a pile of questions, shuffle them all up (easier if you have scrap paper than post-it notes at this point!), then divide them evenly between all of the groups in the class. Each group should lay out a track of questions to create a board game, so it looks something like this:

The board game laid out

The groups then play the board game. When they roll, they should answer the question they land on. If they’re correct, they can stay there. If not, they have to go back to the question they were on at the start of the turn. The winner is the person who gets to the end first, or who is in the lead when they run out of time.

Creative students!
The board can even go up and down!

I got this idea from somebody at IH Brno, but unfortunately I can’t remember who. I use it almost every time I’m revising for a mid-year or end-of-year test, and it always prompts a lot of discussion. The group shown in these pictures even asked if we could keep playing it when I said the time was up!

IMG_6383

I like it because as well as reminding the students of the grammar and vocabulary areas likely to appear in the test, it always prompts a lot of discussion and shows them which areas they still need to revise.

Enjoy!

How to challenge yourself

Challenge considered

This was a lesson plan in the form of a presentation I put together for the weekly 90-minute English Speaking Club at IH Sevastopol. The notes for the plan are visible when you download the presentation (in the notes pane, normally found under the slides):

Here is the SMART goals jigsaw reading (jigsaw reading is where you divide a text into sections. Student A reads part A, B reads part B, C reads C and so on. They don’t see the other parts. They then work together, with or without the text, to build the meaning of the whole by sharing information from their own parts.):

There are also tapescripts to accompany the two videos, which could be mined for language if you choose (that wasn’t the purpose of this club):

It was the first topic for the speaking club for 2014, and hopefully we’ll revisit the goals the students set for themselves later in the year. Unfortunately I was ill, but my colleague taught it and said it went well. Let me know what you think!

Writing journals with students

When I was working at IH Newcastle, I taught the same group for 20 hours a week, four hours a day, divided into two two-hour lessons. That’s quite a lot of time with the same group, and yet I sometimes found it difficult to get to know the students with any kind of consistency or depth, especially because there was so much coming and going: new students could arrive Monday morning, Monday afternoon and/or Tuesday morning, and every Friday some students left.

I decided to try an idea I’d first heard about at TESOL France in November 2011: journal writing. By the time I left Newcastle I’d done it successfully with groups at three different levels, with slightly different approaches in each case.

For all three levels, students wrote in small A6 notebooks from the school. I think this is the perfect size, as they’re not too daunting and it’s relatively easy to fill a page. When I introduced the journals for the first time, I asked the students to tell me anything they thought I should know about them. They could also ask me questions, about life in the UK, about English, or about me. I think it’s only fair to give them the chance to ask about me, if I want them to talk about themselves in this way. They had time in class to write their response. I then collected the journals and spent about an hour each day responding to all of them, with some correction (depending on whether I wanted that particular student to focus on accuracy or fluency when writing). As far as possible, my response consisted of answering any questions they’d asked me, then asking further questions as a prompt for the next day’s journal writing. The questions could be linked to things the students had told me, or on a completely new topic. The topics we covered in the journals were incredibly wide-ranging, and differed from student to student. They also informed some of the lessons I taught, by showing me what my students were interested in. Here are some of the things I remember talking about:

  • why the English drink so much
  • why Tesco is so popular
  • the North Korea/South Korea divide
  • the riots in Turkey
  • how to become a state school teacher in Spain
  • films and TV series (a lot!)
  • books
  • places to visit in Newcastle/the UK/the students’ own countries/cities
  • language learning (including advice on how to practise outside class)
  • family
  • homesickness
  • computer games
  • card games/tricks
  • …and much, much more…

When the students left my class and/or the school, I gave them their journals to take away with them.

Pre-Intermediate

This was a group with a lot of Arabic students who were very reluctant to write generally, but who were very willing to write in the journals. I think this is because it was writing with a real purpose, and they could see that I was correcting them. It was also important for them that I was showing an interest in them as individuals, by responding to what they wrote on a personal level. There were non-Arabic students too, and the journals gave me a chance to see everyone’s writing regularly.

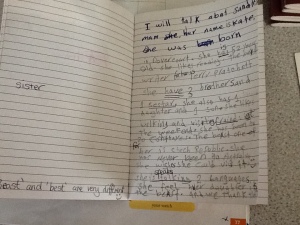
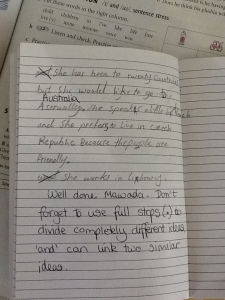
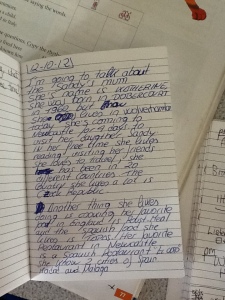
With this group, I did the journals at the end of the lesson, which meant we didn’t always do them if an activity ran over. I tried to leave about 20 minutes, with the first 10 being for a regular spelling test, as this was a real problem area. All of the spellings in the test were collected from the journals – I recorded the mistakes in a list in my notebook, which I then put onto Quizlet. Each time we did the journals, I would dictate five spellings for the students to put in the back of their notebook. After the spelling test, they had writing time to respond to my comments and questions and/or continue the conversation in any way they chose. Sometimes I would ask them all to write on a specific topic. Here are some examples of writing they did after my mum visited the class, in which you can see the kind of feedback I gave.

Pre-intermediate student journal sample Pre-intermediate student journal sample Pre-intermediate student journal sample Pre-intermediate student journal sample Pre-intermediate student journal sample

Intermediate

Despite the success of the journals with the pre-intermediate class, I didn’t start using them for a while with the intermediate group – I’m not sure why! When I did, I did a lot less correction with them. We also didn’t do a spelling test as part of the journal writing, although I did collect the spellings and do occasional tests and games with them in class instead. As soon as I started using the journals, the dynamic in the class changed and my rapport with the students really improved as we all got to know each other better. The quiet writing time at the end of most classes was also good for the more introverted students.

Advanced

Again, I didn’t start using the journals straight away, but I did use them for over two months. For the students who wrote them for that whole time, there was a marked improvement in the quality of their writing and in the length of their responses. What was quite noticeable with this group was that they really tried to incorporate new vocabulary and grammatical structures into their journals. Their written comments and questions were also sometimes language-related. For example, after a lesson on collocations with ‘get’, one student told me about all the phrases with ‘get’ he’d heard his host family use the night before.

I finally learnt from my pre-int/int experience and moved journal time to the beginning of the lesson. As students came in I gave them their journals and they started writing straight away. This was a great way to cater for latecomers, and gave the students the chance to write for as long as they needed to (normally 15-20 minutes) instead of being rushed by the end of the lesson approaching/arriving. While the students were writing, I would normally have a conversation with one or two of the students in a kind of mini tutorial. At this level I underlined problems/mistakes but didn’t correct them, so they had to ask me if they didn’t understand what the problem was. I could also use this time to talk about other areas to work on, unrelated to the journals, and to provide some intensive, targeted practice.

This was the class I was teaching when I left Newcastle, and in my final lesson with them I asked for some feedback on the journal writing process. I asked them:

  1. What did you think about writing the journals?
  2. Do you think writing the journals helped you?
  3. How could I improve this activity?

These are their exact responses:

J

In my opinion, it’s a very good idea to get them pupils to write.

It’s more interesting than other writing exercises, because it implies a conversation (between teacher and student).

In all my other classes I barely wrote. That’s not very good because it’s one of my sticking points in English and therefore it was the perfect exercise for me.

This student had been a bit frustrating for me, as I couldn’t seem to get through to him. Writing the journal improved my rapport with him, and gave us things to talk about. It also really focussed on his weak point, which was writing as he said. I was pleasantly surprised by his feedback.

K

The journals are a good way to test student’s writing and get to know them, so I think it is very useful.

R

What did you think about writing the journals?

It was a good experience. We tried to use the vocabulary we learned before so it was a good way to practise. It’s also interesting because we wrote about thing we like.

How could I improve it?

I have no idea.

L

1. I really liked writing the journal because it’s a way of knowing each other better and practicing my writing. It’s an interesting thing and I enjoyed doing it. The good thing is that now I’ve something to remember you!

2. As I said before I honestly think that it really helped me, because you corrected my mistakes and I hope I won’t make them again.

3. I’d say that you don’t need to improve it. It’s great the way it is!! It doesn’t need an improvement.

(As you see, I’ve used different ways of expressing my opinion) (something we’d practised in class that week!)

N

I’ve never done it before. For starters I was surprised, but got used to it.

– make language problems obvious. Sometimes I haven’t been aware of this à good to know so that I can work on it.

– Go ahead with these journals, a piece of individual teaching in a large group!!

– Definitely!

– Nothing to complain about J

T

1. Very positive. Please go on with it. I think it’s positive to learn about your students. You can immediately evaluate them for their writing skill. For the students is good to write about their daily life.

2. For me it was helpful. Actually I know my weak point and I will try to improve it.

3. The booklet should be bigger. Nothing else to add.

Your turn

As you can see, the journals made a real difference with these groups, and as one of the students said, allowed me to provide ‘a piece of individual teaching in a large group’. Although they probably took an hour or so of my time each day to check, the pay-off in terms of the improved rapport and needs analysis were worth it. When you’re teaching the same group all the time, you don’t necessarily need to do the journals every day, but it’s a good routine to get into (and provides 20 minutes of ready-planned lesson each time!)

I haven’t tried this with my groups in Sevastopol yet, but now that I’ve written this post, maybe I will. I could introduce it, with them making the first entry in class, then give the students the chance to write their journals at home if they want to continue with it. Hmm…

Another post you might be interested in: Writing and Marking

Itchy feet

A few days ago I shared a lesson plan which Claire Hart created based on a recording I did about Moving to Sevastopol.

Now Lizzie Pinard has got in on the act, and created another set of materials based on the same recording. You can find the post she wrote about how she will use the materials on her excellent blog, as well as the materials themselves (scroll down to number 3: Itchy Feet).

I hope you find them useful!

Another gratuitous picture of Sevastopol, this time at Chersonesus

What were you doing at 10 last night?

What were you doing?
What were you doing
At 10 last night?

I was sitting on the sofa.
I was sitting on the sofa
At 10 last night.

What were you doing?
What were you doing
At 10 last night?

I was watching the TV.
I was watching the TV
At 10 last night.

What were you doing?
What were you doing
At 10 last night?

I was listening to music.
I was listening to music
At 10 last night.

What were you doing?
What were you doing
At 10 last night?

I was looking at the sea.
I was looking at the sea
At 10 last night.

The entrance to Balaklava bay

What were you doing?
What were you doing
At 10 last night?

I was on vkontakte.*
I was on vkontakte.
I was on vkontakte
At 10 last night.

What were you doing?
What were you doing
At 10 last night?

I wasn’t doing anything.
I wasn’t doing anything
At 10 last night!

I made up this chant, inspired by Jane Harding da Rosa, to help my pre-intermediate students with the concept of past continuous to talk about ongoing events at a fixed point in the past. I had a few ideas for verses and they added more.

We also tried a variant where they asked:

What was she doing?**
What was she doing?
What was she doing
At 10 last night.

The verse was about a particular student, and the others had to choose a possible answer. For example:

She was listening to music.
She was listening to music
At 10 last night.

…to which the student who was being discussed had to respond with either:

Yes, I was. Yes, I was.
Yes, I was. You’re right.

OR

No, I wasn’t. No, I wasn’t.
No, I wasn’t. You’re wrong.
(followed by a verse of them saying what they really were doing)

Through the chant, the students had practice with the positive, negative, question, and short forms of the past continuous. It is also designed to help them with the rhythms of English, as they struggle with listening, especially with weak forms (something I identified using this post-listening reflection questionnaire from Mat Smith’s blog). They responded really well, and a week later were chanting it when they came into class. I tried it with my teens too, and they didn’t get it at all!

So, what were YOU doing at 10 last night?

*Vkontakte is a Russian equivalent of facebook, which is very popular among my students.

** Or ‘he’, of course!

Small talk

My Advanced level students are very good about talking about ‘topics’ like the environment or health but sometimes struggle to strike up conversation with native speakers in a natural way. I decided to teach them about small talk, but couldn’t find a handy lesson anywhere so made my own. 🙂

Before the students came into class I pushed all the tables back and put some party music on. As they walked through the door I asked them to put their bags on the tables and write their names on the board (we had some new students joining the class). I then gave them a card from a tin my friend gave me for my birthday (Thanks Kim!):

best_ever_dinner_party_ice_breakers

and said “Talk”. [This combatted my common problem of confusing the students with complicated instructions…even after working on it during Delta!] The cards had questions like “What’s your favourite holiday destination?” “What do you normally do at the weekend?”

Once all of the students had arrived and they’d chatted for about five minutes I switched off the music and the light, which stopped the conversations quickly. I switched the light on again 😉 and asked them how comfortable they felt speaking to people they didn’t really know in their own language and in English. Understandably, they said it was more difficult in English.

I elicited the term ‘small talk’ and asked them to discuss the first four questions on the sheet below. For every activity during the lesson they had to work with someone they hadn’t spoken to previously during the lesson. I left the tables at the side of the room throughout, so students perched on desks and moved around a lot.

(You can download it by clicking ‘slideshare’ and logging in – it’s free to create an account, and you can link via facebook if you want to.)

Students then completed the second task (You’re now going to read about…) by looking at five short texts stuck around the room. They are on the first two pages of this document. I adapted them from the Wikipedia entry about small talk.

As they finished reading, the students compared the things which they found interesting or surprising, and talked about whether small talk operates in the same way or a different way in their culture, for example, whether the same topics are considered taboo.

The students stood in a straight line across the classroom. I stood about 1.5m from each student in turn and asked them to move towards me until they were at a comfortable distance away from me for a conversation. We talked a bit about personal space and how, for the Brazilian students especially, this could often be quite different in different cultures. We also talked about how normal it is to touch other people when you’re talking to them, and how this differs when you know them or not. One of the Brazilian students was surprised that an English person wouldn’t normally touch the other person, for example on the arm, while speaking to them.

I divided the class into A, B and C groups and gave them each one section from the next three pages of the second document above, which were adapted from Wikihow. They read their section, helped each other with vocabulary and tried to summarise the ideas. They then regrouped so that the new groups had representatives from A, B and C. The students shared the tips they had read about and talked about whether they are useful or not.

Talking about the tips

Students then thought of two or three opening gambits and wrote them in the last section of the first worksheet. Taking those, they made small talk for the last 25 minutes of the 2-hour lesson at what I told them was probably the most boring IH Newcastle party ever! That meant they needed to liven it up by meeting as many people as possible, and making sure they ended at least one conversation during the time limit – it’s often hard to know how to escape from a conversation. I also told them it was their responsibility to make sure everyone had someone to talk to – nobody could be left out at the party. I didn’t correct them or collect errors. The aim was fluency and making sure that the students would be as comfortable as possible for the other 18 hours we would spend together during the rest of the week.

Their homework was to make small talk with a random native speaker at some point during the week, then tell me about it. They had to make an effort to do this – it couldn’t just be an extension of a transactional conversation. One of the students ended up having a very interesting hour-long conversation with an old man who happened to be Jehovah’s Witness, something which my student had never heard of before (and therefore had no cultural baggage about!).

Overall, the lesson seemed to go well, and for the rest of the week whenever students had finished a task early I could ask them to make small talk. Making small talk successfully can be a difficult skill to master, but it’s an important one, and one which I don’t think we examine enough in the classroom. It’s important for students to be able to start and end conversations themselves, as we tend to control any small talk that happens in the room. I’m looking forward to hearing about the small talk experiences of the rest of my class!

Update: Here are .doc versions of both worksheets: Small talk question sheet / Small talk

If you’d like more small talk activities, you could download the short book At Work by Paul Walsh, available via The Round. Alex Case also has lots of small talk worksheets.

Ways to practise your languages

One from the archives, from my first year of post-Celta teaching. I’ve just found this file on my computer, last opened on 1st April 2008. I’m still pretty happy with it, although I’d probably make it a lot longer now! What do you think?

(You can download it by clicking ‘slideshare’ and logging in – it’s free to create an account, and you can link via facebook if you want to.)

Valentine by Carol Ann Duffy – a lesson

It’s Valentine’s Day tomorrow, and although I don’t normally do anything for it, I thought that this year I would take the opportunity to share one of my favourite poems with my students. Here’s the plan in case you want to do it too.

A heart for you
Photo taken from http://flickr.com/eltpics by @vale360, used under a CC Attribution Non-Commercial license, http://creativecommons.org/licenses/by-nc/3.0/

Ask your students what day it is, and whether anything special happens on this day in their country. What do they know about Valentine’s Day in the UK?

What kind of gifts do people normally give for Valentine’s Day? Brainstorm them on the board.

Give each group the word cloud. They decide what links the words in the cloud and what she is sending her Valentine. They can also look up any words they don’t understand, so they are ready to appreciate the poem as a whole later.

Show them an onion. What connection could this have to Valentine’s Day and the poem?

Ask the students to close their eyes and put their heads on the desk (but try not to fall asleep!). Read them the poem – take your time and savour the words.

Ask them to discuss how similar the poem was to their ideas. They can then read it and decide whether they would like to receive an onion as a Valentine.

You can then do some pronunciation/speaking work. Read the poem again. This time students mark where you pause using slashes.

They talk about why you pause in those places – it’s because of line/stanza breaks, and also phrases within the lines.

They can chose whether to read Valentine, or an anti-Valentine poem. You can find lots of them on the net. This is the one I chose:

In groups with other students who have chosen the same poem, they practise reading it. They decide where the pauses should be, how fast to read it, how to space the phrases…and then some of the braver students perform it to the class, or the whole group performs the poem together (providing their patterns aren’t too different).

Happy Valentine’s Day!

Harry Potter and the Philosopher’s Stone (EFL activities)

This week my students have been reading the first chapter of Harry Potter and the Philosopher’s Stone. I took my students on a trip to Durham (where some of the first two films were filmed) last week because one of them is a huge fan of the books, and while we were there we talked about reading in English. 

My class in the cloisters in Durham
My class in the cloisters at Durham Cathedral, where some of the Hogwarts courtyard scenes from the first two films were recorded

I discovered that they don’t really read in English, partly because it’s daunting, and partly because they can’t be bothered 😉 so I decided I’d make them do it by bringing it to class. We’ve done a whole range of activities based on the chapter, none of which included comprehension questions, but I’m sure you could write some if you wanted to. Let me know which ones you use, and if you have any more 🙂

Harry Potter

The first question was ‘What do you think of when I say Harry Potter?’ My students are upper intermediate, from six different countries, aged 18-30. There was clearly a whole range of opinions, but nobody was out-and-out negative. As feedback, I asked a list of questions, with students standing up if the answer was yes. I joined in with the standing up. Stand up if:

  • you have never read or watched any Harry Potter.
  • you have watched part of a Harry Potter film only.
  • you have watched a complete film in your own language.
  • you have watched all of the films in your own language.
  • you have watched a complete film in English.
  • you have watched all of the films in English.
  • you have read one or more of the books in your own language.
  • you have read all of the books in your own language.
  • you have read any of the books in English (one student had finished Philosopher’s Stone the day before!).
  • you have read all of the books in English.

The titles

On scraps of paper, students guessed what they thought the titles of the books are in English – one title per piece of paper, with a number (1-7) indicating which book. The students who had no idea became the teachers. They collected the paper and compared the answers against a list I took with me.

I then put the titles on the board one at a time, and we talked about what they meant and how they differed, mostly in terms of word order, from the translations. We also talked about capitalization.

The titles in Britain are:

  1. Harry Potter and the Philosopher’s Stone
  2. Harry Potter and the Chamber of Secrets
  3. Harry Potter and the Prisoner of Azkaban
  4. Harry Potter and the Goblet of Fire
  5. Harry Potter and the Order of the Phoenix
  6. Harry Potter and the Half-Blood Prince
  7. Harry Potter and the Deathly Hallows

For students who didn’t know the books, we talked about the meaning of some of the words, especially goblet and phoenix.

The first page

To get into the book, I started off by asking students to read the first page (until ‘high chair’ if you have it in front of you). When they finished, they had to stand up. It wasn’t a race, but rather was designed to help them appreciate different reading speeds in class. Afterwards, I asked them two questions:

  • How did you read the page? For example, did you follow words with your pen? Did you underline words you didn’t understand?
  • How would you have read it in your own language?

The aim of these lessons was to reduce the students’ fear of reading in English. One of the things I did the first time I tried to read a book in German was copy every word I didn’t know onto a long list. After 2 pages I had about 100 words, and I stopped reading because I was so depressed! My class weren’t that bad, but I strongly believe (from personal experience) that:

If you don’t understand a word, keep reading.

If you see a word you don’t understand three times, keep reading.

If you see a word 10 times and you still don’t understand it, it might be important. You should probably look it up.

Especially in children’s fiction, ‘difficult’ words are generally explained. If a ‘difficult’ word only appears once, then the likelihood of it being essential to a story are slim. We came back to this point at various points during the week, and I think the students are a lot happier to continue reading now.

Adjectives and nouns

Before reading the first page, I handed out this sheet:

(You can download it by clicking ‘slideshare’ and logging in – it’s free to create an account, and you can link via facebook if you want to. For some reason, the word cloud doesn’t always appear properly. If that happens, once you’ve downloaded and opened the file, right click on the word cloud and select ‘arrange’>’bring to front’ or ‘in front of text’. You should be able to see it and move it to wherever you want on the page.)

I challenged students to think of as many adjectives as they could that would collocate with each noun. i had to tell them that ‘people’ and ‘sky’ were two separate words.

Once they’d read the first page and we’d had the discussion above, they returned to the sheet and found the corresponding adjectives from page. Here are the answers:

(no) finer boy

thin, blonde woman (Mrs. Dursley)

dull, grey Tuesday

greatest fear

big, beefy man

good-for-nothing husband

the last/unDursleyish people

cloudy sky

anything strange/mysterious

very large moustache

strange/mysterious things

good reason

small son

most boring tie

screaming baby (Dudley)

Throughout this exercise, and the ones following it, I tried to discourage students from using dictionaries. Instead, they had to use what they know about the world and about Harry Potter in particular to guess what words meant and try and explain them to me so I could confirm, or help them change, their guesses.

As revision, they said the nouns, and their partner had to say which adjective collocated with it.

For homework, they used the BYU-BNC corpus to check which of their collocations were correct – I showed them how to do this during class first.

Peculiar events

On pages 8 (from “None of them noticed…”) to 11 (to “a whisper about the Potters…”), Mr Dursley witnesses, and misses, a series of strange events. Students worked in pairs to highlight the strange events, again without using dictionaries. They then summarised the events using key words, and we talked about how often each description was repeated, and the fact that even if they didn’t understand the description the first time it appeared, they usually did by the last time. These were the key words and events I came up with:


owls flying in the day

page 8: “None of them noticed a large tawny owl flutter past the window”. 

page 9: “owls swooping past in broad daylight”

page 10: “there have been hundreds of sightings of these birds flying in every direction since sunrise”

page 11: “Owls flying by daylight?”


cat

page 8: “a cat reading a map” “It was now reading the sign that said ‘Privet Drive'”

page 10: “…the first thing he saw […] was the tabby cat he’d spotted that morning. It was now sitting on his garden wall.” “It just gave him a stern look.”


people

page 8: “…there seemed to be a lot of strangely dressed people about. People in cloaks”

page 9: “This lot were whispering excitedly.” “‘The Potters, that’s right, that’s what I heard -‘”

page 11: “Mysterious people in cloaks all over the place? And a whisper, a whisper about the Potters…”


man

page 9-10: “The man was wearing a violet cloak. He didn’t seem at all upset at being almost knocked to the ground. On the contrary, his face split into a wide smile and he said in a squeaky voice that made passers-by stare: ‘Don’t be sorry, my dear sir, for nothing could upset me today! Rejoice, for You-Know-Who has gone at last! Even Muggles like yourself should be celebrating, this happy, happy day!’ And the old man hugged Mr Dursley around the middle and walked off”


shooting stars

page 10: “instead of the rain I promised yesterday, they’ve had a downpour of shooting stars!”

page 11: “Shooting stars all over Britain?”

Peculiar words

Once they’d identified all of the events, the groups had to try to work out the meaning of any of the words they didn’t understand in the lines they’d highlighted. I emphasised that they should focus on these lines, as these are the important events here.

After they’d guessed as many as they could, each group was allowed to choose one word from each page, i.e. one from page 8, one from 9, one from 10, and one from the top of 11, to look up in the dictionary.

They then mingled to share their words.

Fan pictures

The website Harry Potter companion is a repository for everything you ever needed to know about the Harry Potter universe, and many things you probably didn’t. They have chapter-by-chapter guides to all of the books. Each guide has a set of fan pictures accompanied/inspired by quotes from the relevant chapter. Here are the pictures from chapter 1 in a slide show, so you can print them out and cut them up:

Students had read the rest of the chapter (page 11 to page 18) for homework. Only one of them failed to heed the warning that the next lesson would be very difficult if they didn’t. Before looking at the pictures, we started the lesson with students verbally summarising what they could remember from the chapter. I put the pictures around the room. Students had to circulate and try to identify a quote which could be matched to each picture.

You can check the answers by going to the Harry Potter Companion.

Verbs and adverbs

I wrote these verbs on the board:

say, sniff, nod, blink, repeat, appear, whisper, behave, act, climb, sit, lay sth down, look up (emphasising that this is the opposite of ‘look down’ not the phrasal verb)

Students had to decide which adverbs you could use with each verb. Once they had as many as they could think of, they went back to the book and looked for more. While they did this, I checked their lists and we talked about why some of their suggestions were not possible. Finally, we put the adverbs on the board to check, and talked about some of the stranger combinations, like ‘blink furiously’.

Verbs and adverbs

Summarising the chapter

We spent a whole two-hour lesson today on writing a summary. In pairs or groups of three, the students had to summarise the main events of the chapter in not more than 100 words. Inevitably, they tried to include every event they could think of, which meant a lot of editing.

The groups swapped first drafts. They then had to improve on these and rewrite them, with a little help from some prompt questions on the board and some advice about what to look up in the dictionary. Examples of my prompt questions were:

  • Are all of the main ideas included?
  • Is tense use logical?
  • Are capital letters in the right places?

The second-draft summaries were excellent, but unfortunately I forgot to copy one to put on here!

Never judge a book by it’s cover

For our final two-hour lesson, we’re going to look at some of the different covers for the first Harry Potter book:

Students will:

  • identify the objects they can see on the covers;
  • describe some of the similarities and differences between the covers;
  • think about why those images were chosen for each cover;
  • decide which cover would make them most/least likely to pick up the book – disregarding the language barrier of course!

The great Harry Potter language quiz

The final activity of the week will be a quiz bringing together the language we’ve studied this week, so the Harry Potter fanatics shouldn’t have any particular advantage over the newbies!

Adverbs

All of the adverbs are one small pieces of paper, one per piece.

In a variation on the classic adverb revision game, the adverbs will be divided between the groups. They have five minutes to decide how to mime or act out all of their adverbs, without saying it. 

Each group will then perform, winning five points for each adverb another group guesses, and losing one for each one they fail to guess from the other groups. (this scoring system may be edited on consultation with the students!)

Adjectives

One word: pictionary. 

The rest of them

I’ve kept a list of the random words which have come up during the week. The final part of the quiz will be a backs to the board/hot seat game. In this game, students work in pairs. One student can see the board, the other is facing them and cannot. The teacher writes a word or phrase on the board. The student who can see it describes it to the one who can’t, without using any of the words on the board, or variations of them, and without translating. As soon as the student with their back to the board thinks they know what is on the board, they stand up and tell the teacher. Two points for being first, one point for any other pair who gets the correct answer but are slower.

Postscript

Although I enjoy Harry Potter, I’ve only read them once, and watched them twice (once at the cinema, once on DVD) or sometimes a couple more times. I’m interested in the universe Rowling has created, but nowhere near as obsessed as some of my students. Her books are sometimes the whole reason they want to come to the UK! I was lucky, in that only one student didn’t really like Harry Potter at the start of the week, and two of them had never read or watched any of it, and they seem to have enjoyed the classes as much as the fans.

Sharing the richness of her language has made me re-appreciate how good her writing is, and how suitable it is for teaching, as well as the many layers of what she put together, no matter how much it might be sneered at by those who ‘hate’ Harry Potter. I’m sure there’s a lot more you can do with it too. The activities I’ve written about here, I came up with fairly quickly. You could use it to focus on so many different aspects of language. 

The best thing about this week, though, was that today, in our fourth of five lessons, two of the students walked in carrying brand-new copies of Harry Potter and the Philosopher’s Stone. Neither of them have read a book in English before. One of them had even decided that he would use each chapter to focus on a different kind of language, once he had read it. In chapter two, he had circled all of the verbs of speaking, and all without any encouragement from me.

And if that isn’t an argument for extensive reading, I don’t know what is.


Getting to know you with key words

I came up with an easy to prepare getting to know you activity today, which took about 30 minutes with 12 upper intermediate students.

Divide A4 pieces of paper into quarters – as many as you need for one quarter per student.

Students fold their piece of paper in half.

They draw a picture of themselves on one half, then write key words related to their lives on the other half – as many or as few as they choose.

The final step is a mingle where they show their pictures and key words to other students in the class, and use these as prompts for conversation.

I put the names of all of the students on the board to help them too.

This was my paper:

ImageWhen I first tried to end the activity the students all said ‘No, I’ve still got to speak to…’.

Enjoy!

Dear students

Welcome to our class! And if you’ve just arrived in Newcastle, welcome to this beautiful city! Why did you decide to come here? I went to university in Durham, and the north-east is my favourite part of England, although I’m not from here originally. I moved to Newcastle a year and a half ago, in July 2011. I’m staying here for at least another 18 months. What about you? When did you come? How long are you staying?

I love learning languages. I studied languages at uni, and I’ve lived in many different countries so I know how you feel. Is it your first trip to the UK? What do you think so far? If you have any problems, please let me know. I’m happy to help 🙂

What are your hobbies? I enjoy going to the cinema, and I’ll watch anything except horror – the people in horror films annoy me! I also read a lot, and I love travelling. I don’t have a lot of free time at the moment though, because I’m studying for my Delta, which is a teaching diploma. When I’ve finished it I will be allowed to train other teachers or run my own school, which is my dream. What do you do? What do you want to do in the future? Do you think English will help you with this?

I hope you enjoy your time in Newcastle and at IH. Remember, this is your class. you should always feel free to tell me if you want me to change anything or if there is something specific you want to study. I look forward to working with you!

Sandy

PS (extra special for the blog!) This idea was stolen from Philip Harmer, one of the best teachers and kindest people I have ever had the privilege to work with. Thanks Philip!

Reading a short story

This week, my colleague Lesley and I decided to work on a short story with our (two classes of) pre-intermediate students. We chose the Sherlock Holmes story A Scandal in Bohemia. We have four hours a day with them, divided into two two-hour lessons, so we dedicated the afternoon lessons to the story.

This post is intended as a list of ideas for using a short story, rather than a series of lessons you could necessarily follow yourself. If you want to follow it exactly, you need to find an abridged version of the story – I can’t find a suitable one to link to, unfortunately.

Monday

We showed the students pictures of Irene Adler (x3), Dr. Watson (x4) and Sherlock Holmes (x4), in that order, taken from various TV and film adaptations of the story. The students had to describe the people and decide what they had in common. Until they got to the final group of pictures, they didn’t know it was connected to Sherlock Holmes. After each group, we wrote a set of sentences on the board about the characters (the names were added later).

Character sentences

We then brainstormed everything the students already knew about Sherlock Holmes. Of my seven students, one had read a short story and two had seen the film. This is what we came up with:

Sherlock Holmes mind mapAfter this preparation, it was time to start reading the story. I read aloud while the students followed. I stopped on the second page of our abridged copy, so that the students had seen the description of Adler, Holmes and Watson, giving them enough information to add attach the names to the pictures.

To stop the students from trying to understand every last word of the story, I asked them to highlight every word they understood in their copies. This idea was inspired by Kevin Stein and really motivated the students. I put % on the board, and asked them to estimate how much they had understood so far, getting answers from 70-99%. They then worked together to fill in some of the gaps, highlighting any extra words they understood. Estimating the percentage again after this exercise, all of the students raised it. I pointed out that they didn’t need to understand every word to understand the story, but that it’s a good idea to focus on a couple of new words, and this is where we left lesson one.

Turn into and outsmart

Lesley had decided to start from the title, discussing what a scandal was. I never ended up doing this explicitly, but should have done at some point.

Tuesday

On day two we started by recapping what the students remembered from the first two pages of the story. I showed them the Watson/Holmes pictures again, and asked them to decide which Watson assisted which Holmes, based purely on the images. For example, Jude Law with Robert Downey Jr. and Martin Freeman with Benedict Cumberbatch. We talked about how they decided, using clues like the age of the photo and the kind of clothes they were wearing, as well as prior knowledge of the film. This introduced the idea of observation, and linked to a quote I had on the board: “You see, but you do not observe.”

In the next page of the story, Holmes lists four things about Watson which he has observed:

  • Watson is enjoying married life.
  • He has put on weight.
  • He was caught in the rain recently.
  • He has returned to his career as a doctor.

The students had to identify the paragraph where Watson confirmed each observation by writing a key word next to it, which the students decided would be married, fat, rain, job. They were very motivated when they realised this was easy to do, as they had initially said they couldn’t understand.

For the next sections of the story, Lesley and I had prepared pictures taken from screenshots of a YouTube video. I haven’t uploaded these, as I think they are probably covered by copyright. The students had to read the part of the story where the King describes his problem, and match what he said to the pictures. They then worked together to complete a gapped summary of his problem:

Sherlock Holmes gapfillSherlock Holmes completed gapfillFor the last ten minutes, they divided a piece of paper into four and wrote sentences describing everything they knew about the four main characters. For example:
  • Sherlock Holmes: He is observant. He lives at 221B Baker Street.
  • Doctor Watson: He is married. He works with Sherlock Holmes.
  • Irene Adler: She is very clever. She has a photo of the King and her.
  • The King: He wants to get married. He needs Sherlock’s help.

Wednesday

We started by recapping the summary from the end of Tuesday’s lesson. The students were amazed at how much they could remember! They also added to their sentences as we’d run out of time on Tuesday.

The next part was picture-based again, this time with the students predicting what they were about to read about. They  had pictures of Sherlock Holmes in disguise as a tramp, Godfrey Norton arriving at Irene Adler’s house, then leaving, and Adler leaving. There was another summarising gapfill for them to complete at this point.

Once they had checked their answers, they had to guess what would happen next. They were right in suspecting that Norton and Adler would get married, but were surprised when they read and discovered that Sherlock Holmes was the witness!

To finish the lesson, we read about Holmes’ plan to get the King’s photo back from Adler.

By this point, the students were flagging a little, but I told them we would finish the story the next day and they perked up a bit!

Thursday

The students read about how Holmes and Watson put the plan into action. They then watched three short clips from the TV episode, showing:

To finish the story, the students had to say what they thought would happen in the final four pages, then read to check whether they were right or not.

They then started to work on an 8-10 sentence summary of the main events of the whole story, which they had to finish for homework.

Friday

All of the students did their homework 🙂 They worked together to decide which sentences were necessary in the summaries, as some students had written a lot more than eight to ten.

I divided the class into two groups of three/four students each. Each group had to choose any scene from the story and reenact it. They had about 25 minutes to plan what they would say and do (luckily there was a spare classroom next door). They then performed their scene, to much raucous laughter – one student played the King visiting Sherlock Holmes. In the story he is wearing a mask, but she made do with her sunglasses and headscarf, which none of us expected! It was probably much funnier being in the room, but affective filters were definitely lowered! While watching the scenes, the other group had to decide who was playing who, and which part of the story it was. The task wasn’t very difficult, but they had used a lot of English to prepare for it, and they really enjoyed it, as they told me afterwards.

For the final half hour of the week, we played Hot Seat/Backs to the Board, using words taken from the story. We hadn’t really focussed on anything in particular, but words and phrases the students had picked up and started using during the week included: witness, framed photograph, panel (which Adler hid the photo behind), tube (which the smoke bomb was made of), false alarm, observe, Your Majesty…

When I asked them to think back to the first lesson and how they felt when they first looked at the story, the students all said it looked hard, but that now they could understand. There was a great sense of achievement on looking around the room.

Doing it again

I definitely would! And I wouldn’t change much at all – the students were engaged, motivated, and picked up a lot of new language along the way. Hopefully it will inspire them to read a little more in English, and remind them that it’s not necessary to understand every word of something to get the main points. One student did go home and look up all of the unknown words on Monday evening, but that was the only time she did it.

The final lesson was one of the most entertaining I’ve had for a long time. The students were very motivated by the role play, and put a lot more energy into it than I expected. (The role play was included as part of my Delta Professional Development Assignment.)

What other ideas do you have for using short stories in class?

Revising numbers and letters

I did this activity in an IELTS class this morning as a fun way to practise listening part 1, where you have to write information down including numbers and letters. These could be product codes, reference numbers and other combinations of numbers and letters.

You could also use it with lower level students to practise the alphabet or vocabulary you’ve studied recently.

Dictate a place name, interspersed with letters and numbers. This was my example (be careful with ‘o’ and zero):

w1o3lv4e79r12h6amp8t10on

Students should write it down as just a series of letters and numbers. Tell them it’s a place which they have to find by underlining the letters. The answer here is ‘Wolverhampton’, the town where I grew up.

They then think of a place name and add some numbers to it to dictate to a partner. They could also choose some vocabulary from a recent class, names of people, or reverse it by having a date with letters interspersed in it.

Utopia

This morning my students spent over an hour discussing and debating their opinions of what a Utopia should be like. All of this was prompted by a single page from the Total English Intermediate teacher’s book.

On page 124 of the teacher’s book there is a list of rules about a possible Utopia, designed to revise modals of obligation and permission (must, have to, should). Students work alone to decide if they agree or disagree with the rules, then get together to debate a final version of their Utopia.

This single sheet prompted discussion about whether taxes were necessary, whether governments really need weapons, the benefits of living in a foreign country, and whether one language should be allowed to dominate the world.

Thank you very much Will Moreton and Kevin McNicholas!

The consequences of me

This activity came to me when I was trying to think of something for a stand-alone lesson on a Monday morning before new students joined our B1 Intermediate class. For a sudden idea, it worked surprisingly well, so I thought I would share it with you.

It’s based on the game ‘Consequences’. Each person writes one or two sentences, folds the paper and passes it to the next person. Nobody can see what has been written before.

Each student needs a piece of paper and a pen, and the teacher needs a list of questions. This was my list:

  • What’s your name and where are you from?
  • What do you like doing in your free time?
  • Why are you learning English?
  • What is your family like? (you could also say ‘Describe your family’ if the ‘is…like’ structure is too difficult)
  • When was your last holiday? What did you do?
  • What are you going to do this evening?
  • What are your future plans? Is English important for your future?
  • What is one thing you love and one thing you hate?

Students answered the questions one at a time, folded the paper and passed it on, then answered the next question. In the end, we had over one page of writing for each student, something which they are often reluctant to produce otherwise.

Here are some examples (click to enlarge):

Consequences of me Consequences of me

Consequences of me

Students then worked in small groups to read the texts and correct them. Because each piece of paper had writing from all of them, it didn’t feel like they were being targeted. They could also see that everyone in the class makes mistakes, not just them. I monitored and helped them with any questions, but generally they managed to correct most things without my help.

Once they had all looked at every piece of paper, I highlighted the remaining few problems (there were never more than six on any piece of paper) and they looked at them together. You can see these in pink on the examples above.

The whole activity prompted a lot of discussion about the grammar, spellings and meanings, and students were really motivated.

The Vicar of Dibley meets Johnny Depp

The Vicar of Dibley is one of my all-time favourite comedies. I prepared this vocabulary worksheet for a short episode made for Red Nose Day featuring Johnny Depp. I’m just using it as a bit of Friday afternoon fun, since the students have been working hard all week. If anyone wants to write comprehension questions, I’m happy to add them to the post 🙂

Warning: do not watch/read if you are easily offended. There are some rude words included in the sheet as the double entendres they create are the key to many of the jokes.

[To download, click ‘view on slideshare’. You may have to log in (not sure), but it’s completely free. You should then be able to click on ‘download’ above the document.]

The answers are here (click to enlarge):

Enjoy!

Here’s a page of notes I made after the lesson. At the top are some extra idioms to teach the students. At the bottom are some possible discussion questions.

VIcar of Dibley extension

Present Simple / Present Continuous

Using these two tenses together still causes my students lots of problems. It took me ages to find a good activity to practise them that didn’t involve gap fills and was challenging enough for upper intermediate level students, but the search was worth it.

The one I found was taken from the Reward Upper Intermediate Resource Pack (Unit 3b). In the original task the students look at a set of twelve pictures of people. They choose one in secret and write a profile of the person, including information such as what they are wearing, what book they are reading at the moment and where they usually go on holiday. The other students then read the profiles and decide which picture they wrote about.

I adapted it slightly by giving the students two minutes to draw their own pictures instead of using the ones from the book. This personalised it and provided much laughter! This is what we came up with:

7 people

Day-to-day photos

Thanks to Fiona Mauchline’s At the deep end and Paul Braddock’s Mobile Storytime, I’ve just had a roomful of engaged and motivated learners for a whole two hours.

I teach this Elementary group for four hours every day (9-11 and 1-3). We’re doing a lot of pronunciation work in the first session, so I’m trying to do speaking in the second class to put the pronunciation into practice. Yesterday I set them the task of taking five pictures on the way home or on the way to school this morning (checking they all had cameras of some variety first!).

I did the same thing, printed the photos and stuck them around the room to start the lesson. Here they are:

First, I elicited ‘wh-‘ questions on the board. We looked at one photo and they asked me some questions about it. Then they walked around the room in small groups discussing what they could say. To finish this stage, I elicited their thoughts and told them why I chose to take each picture, as well as giving them any vocabulary they needed. We also added extra things to talk about on the board (e.g. feelings, opinions).

In small groups, students showed their photos to each other and asked and answered questions. Each student then chose their ‘best’ or ‘favourite’ photo from their set.

I placed a piece of scrap paper with ‘Questions for [X]’ on each desk and students put their photo on display. Students circulated and wrote questions based on the photos and their earlier discussions e.g. ‘When did you take this photo?’ As the students are elementary, there were obviously some problems with question formation, so the next step was for students to check the grammar and make sure the questions were ‘perfect’.

Next they wrote a short paragraph answering all the questions in continuous prose, before correcting each other’s work, with me underlining some things if students were insistent that they had finished 😉

This lesson has highlighted a couple of areas of grammar which require further work, so next week I plan to focus on question formation and there is/are, as well as doing some revision of irregular verb forms.

Thanks very much Fiona and Paul!

Diary of a Beginner: Sixth Lesson

Last weekend, H and I had our sixth lesson. He led this lesson, starting off with a little card he’d written with 5 sentences on it:

  • I am a teacher.
  • You are a student.
  • He is an actor.
  • She is an actress.
  • It is a dog.

Because he’d had so much trouble in the previous lesson with the idea of ‘I am’, ‘You are’, ‘I am not’, ‘You are not’ and the question forms, I decided we would write out these sentences in the different forms. These were the results:

Positive and negative forms (I, you, he, she, it + be)Question and short forms (I, you, he, she, it + be)As you can see, we did various things to highlight forms. The arrow shows that ‘not’ is how we make a very negative’ – in Czech ‘ne’ is used to say ‘no’ and is added to a verb to make it negative. I used an orange pen to show how the apostrophe in a contraction replaces missing letters. I also drew a line under the phrases to show how the contractions correspond to the longer versions.

This was a real lesson in how to teach beginners for me – there are so many things we take for granted with our students, and we ended up having a lot of discussions in Czech to help H understand various concepts – I dread to think how he would have felt if we couldn’t have done this. I know native speakers who don’t speak the learners L1 can teach beginners, but I can see how much easier it is using a mix of both languages. For example, even the concept of different word order for a statement and a question was very difficult for H to grasp, since in Czech this doesn’t change.

Other problems with L1 became apparent here too: there are no articles in Czech, so he couldn’t understand why he needed one in English even though his original sentences had them already. In the end I showed him the contents page of New English File Beginner and told him not to worry about them – they would be covered in unit 2A and we’re in 1B. The existence of contractions is another thing which Czech lacks – all words are equally stressed, so he found it hard to see why there might be more than one form of these phrases.

The last problem with L1 interference was with ‘dog’ – in Czech ‘pes’ is a masculine noun as it ends in a consonant. Therefore it is always replaced by the subject ‘he’. I extended the idea to ‘It is a bag’/’It is a table’ etc to show other ways to use ‘it’, but H decided to keep his original example sentence.

All of these discussions just from five ‘simple’ sentences!

Once we’d created these tables, we practised the I/you forms using the grammar bank activities in NEF Beginner. Here again we had a couple of problems. Although the two-line dialogues were accompanied by pictures, it wasn’t always clear who was speaking. In the end, we labelled the people in the pictures as A and B to make it a bit easier. H also can’t understand why we say ‘You ARE late’ instead of ‘You ARRIVE late’ like in Czech. I said to him that I can’t understand why they say ‘You ARRIVE late’ and pointed out that that’s why you have to learn other languages 😉 I recorded the conversations so that H could listen to them at home.

After all of that, we only had five minutes left, so I decided to introduce the five long vowel sounds from the English File pronunciation chart. I also gave him these to listen to at home. Ordinarily I wouldn’t rush him with all of these sounds, but we only have three more weeks in which to have lessons, so he asked me to try to do all of them before I leave.

In the end, it was a very educational lesson for both of us!

Diary of a beginner: Fifth Lesson

(If you’re interested, you can read about the first, second, third and fourth lessons.)

The first 45 minutes were spent revising what we’ve covered before, and I can definitely see that he is remembering things now. He’s making progress because we had time to do some writing today.

It took 5 minutes to go through my alphabet cards in a random order and say all of them, then pick them up when I said them – this is a real improvement!

I spelled the numbers and he wrote them, predicting the last couple of letters. The only one he still had trouble with was ‘twenty’, spelling it ‘twenteen’ by analogy with Czech where the ‘tens’ are counted in multiples of ten, so twenty is like ‘two tens’. I also taught him the idea of ‘double’ for the same letter twice, i.e. ‘double E’ = ‘ee’

For the days of the week I showed him the cards and he said them. I then asked him to write them all down in order. With a little prompting he remembered ‘How do you spell…?’ but had to be reminded to use it! He still struggled with Wednesday and Friday, but especially with Thursday which he has real trouble pronouncing and confuses with Tuesday (all of which I have to keep assuring him is completely normal!)

With the months, he put the cards in order, then closed his eyes while I took one or two of them away and he remembered them.

We revised the consonant sounds that we’d done previously and added the final six sounds. Unsurprisingly, he really struggled with the two pronunciations of /th/. He realised that he’d been pronouncing ‘this’ and ‘thank’ wrong, so was trying hard to correct himself.

We spent the last ten minutes of the lesson looking at ‘I am’, ‘You are’, ‘I am not’ and ‘You are not’ using New English File Beginner. First he looked at and spontaneously translated a dialogue, then listened to it. We then looked at the four phrases in the examples and thought about what they mean. There was a slight problem with the example sentence in the book because the dialogue used “You are late.” for ‘You are’. In Czech this would be translated as ‘You arrive late.’ without using ‘be’ at all. I showed him that this was the equivalent for ‘be’ and that this is the verb we use in this phrase in English.

He constantly surprises me with the amount of words he knows already, but they are still very isolated at the moment, with very little grammar to link them together. Highlighting to him that he knows this words is very important, especially when one of his final comments before leaving (in Czech, not English!) was “How will I communicate with people if I can’t speak?” I explained to him that he just needs time, that this was just the first time he had seen these things and that he needs 20+ times to really start to fix it in his head.

Diary of a beginner: Third and Fourth Lessons

The third lesson with my beginner student was two weeks ago.

We started by revising numbers and letters. I then tried to revise the days and the months, both of which I had sent him to practise after the second lesson. He hadn’t noticed them in his email, so didn’t know them at all. This really proved to me that the listening he does in his car is what makes him learn the words, as without it he was completely lost.

He had however recieved the third file I sent him, based on the 12 consonant phonetic sounds from the English File set introduced in lesson two. We spent a few minutes practising these and he remembered all of them without a problem.

After all of that we had about 25 minutes left (the lessons are one hour long). We used an information gap from the New English File Beginner Teacher’s Book, which I can’t reproduce here due to copyright laws. We each had the same 12 pictures. Under the pictures was either the word or a line. We asked each other “How do you spell…?” to complete our sheets. If he did not know a word, he asked “What is it?” first. I then recorded the words and the spellings for him to listen to at home. I also re-sent him the months and the days for homework, along with corresponding sets on quizlet (months, days).

We’ve just had our fourth lesson together. Even with a two-week break, he remembered everything really well. This is what we did:

  • Numbers: he put the flashcards in order, then closed his eyes while I removed 2-4 cards. Each time he had to say which numbers were missing. Then he said all of the numbers 1>20 and finally 20>1.
  • Alphabet: I placed the letters randomly on the table and he said them. Then I said a letter and he took it. No problems at all this week 🙂
  • Consonants: he remembered all of the words. I then got him to try to write them down as he only gets listening practice out of class. If he didn’t know how to spell the word he asked me. If he already knew it, he spelt it for me. This was good for practising spelling, and also to think about some common English sound-spelling relationships.
  • Days of the week: a year ago I was very happy to find a card game for children based on the popular book The Very Hungry Caterpillar. In the card game, the players should put down the days of the week in the correct order (Monday, Tuesday…). When they have played all of the ‘days’, their caterpillar turns into a butterfly. The cards are really well illustrated, and I jumped at the chance to use them. I used two sets of ‘week’ cards (there are four in the pack). First he put one set in order, helped by the fact that each card also says “Day 1”, “Day 2” etc on it – especially useful for Tuesday/Thursday. I explained the story to him in a mixture of Czech and English, helped by the pictures on the cards. We then played pelmanism with both sets, with him saying the words as he turned over the cards. Despite the fact that the cards are designed for children, I think he appreciated their quality and understand the value of pelmanism for his pronunciation.
    For those of you not familiar with the story, here is a youtube version:
  • Months: he said the months, then wrote them down. As with the consonants above, he could ask me for difficult spellings.
  • Six more consonant phonetics: I introduced /h/, /n/, /m/, /l/, /r/ and /w/, the latter being the most difficult as this sound doesn’t exist in Czech. He also wrote these words down. Listening to this recording is his homework.

What do you think I should do in the next class? Should I revise everything at the beginning as a confidence booster? I’m planning to start introducing some of the most common question / answer pairs, but probably won’t have time to do a lot in class. Which would you say are the most important for a businessman in his 30s (i.e. “What’s your name?” “Where are you from?” etc)?

Read about the first and second lessons.

How to give presentations in English

I created this set of resources for an Intermediate-level group. We used them over a series of five 1-hour lessons, with opportunities during the lessons for students to personalise the phrases. After each lesson I used Edmodo to share the part of the presentation we had done so that students could go over it again at home.

Notes:

  • Although it looks like it says “an Internet”, when you download the presentation you will find “an Internet connection”
  • The video links should all take you to youtube.
  • The ‘structure’ slide is also clickable and takes you to the relevant section of the presentation.
  • The slides with the phrases look messy here, but when you download it you should see that they work as a series of elicitation prompts. To see the phrases without downloading and clicking through the entire presentation, you can look at the ‘Did you remember?’ slides. These are also the best ones for the students to print as they should contain all of the most useful information. I know that having completely gapped sentences is difficult for students that first time they see the presentation, but in the lesson I skipped past them to the ones with the first letters and told students they would be more useful when they looked at the slides again.

We finished the unit yesterday, and next week they will do their own presentations for assessment. I will record them and give feedback based on language and technique.

Feel free to download the materials and adapt them as you see fit (crediting the source please). They are designed to be a cross between teaching materials and a presentation that could present to your group, demonstrating the techniques.

I would be grateful for any feedback you can give me so that I can improve them for future groups.

Enjoy!

Emotions word clouds

I created these word clouds based on The Little Book of Feelings and Emotions which I received at a recent conference as promotional material from Oxford University Press.

I have been using them with my 1-2-1 post-Proficiency student, and we have two questions for you.

Which five-ten of these words/phrases would you be most likely to use?

Are there any which you would never use? Why not?

Thank you!

And as a bonus, I created a downloadable slideshow using the #eltpicsEmotions‘ set on Flickr…

Enjoy!

Spanish Train by Chris de Burgh (linking words for fluent speech)

Alright, I admit it. I love Chris de Burgh. And while this is very unfashionable, I’m not ashamed in the slightest!

This week I was doubly grateful to him for providing me with an interesting story for my students to listen to (following on from ‘Story Prompts with #eltpics‘ last week) and a way to revise linking words when speaking quickly.

I showed the class the first slide of the presentation and asked them to decide what the story of the song is. They had to include something about all of the pictures in their story.

Once they had shared the stories, they listened to the song to find out who had the closest version. (The link in the presentation should take you to the video below)

I then showed them the pronunciation slides and elicited the rules.

Finally they practised saying lines from their own copies of the lyrics.

As their homework, they should find a poem or song of their own and record it, paying particular attention to the linking sounds.

Other ‘story songs’ by Chris de Burgh that you might find interesting include:

Enjoy!

Describing graphs

Here is a set of worksheets I made last year. I used them over a series of lessons with various groups at Intermediate and Upper Intermediate level. (They may take a while to load on this page)
Some of the activities are taken from other sources, in which case they should always be credited. If you believe I have used something which is uncredited, please let me know.
Feel free to use and adapt the worksheets however you see fit. They can be used in whatever order you see fit. I have tried to arrange them here with the more specific items at the beginning and the general summaries at the end. If you think any of the answers are missing or any of the information is incorrect, please let me know too.
Enjoy!


Story Prompts with #eltpics

In April 2010 I attended a talk by Laura Patsko at the IH Prague Conference about storytelling in an adult classroom. This week I finally got round to adapting it to make use of some #eltpics (pictures for teachers by teachers which can be used under a Creative Commons licence) and thought I would share the presentation and the lesson plan with you. Feel free to use it however you like. (My context was an Advanced group, but it could be used with other levels)

I showed them the first slide of the presentation and told them we were going to look at six pictures and talk about the ideas in the word cloud. I copied the cloud onto each picture so that they would have some ideas.

Once they had talked about each picture and I had given them any extra vocabulary they needed, they voted on the most interesting picture. I copied and pasted it onto the final slide, right-clicked on it and chose ‘send to back’. We were revising narrative tenses, used to and would, hence the orange box, but you could change it or delete it entirely.

I told the class to imagine that this picture was an image taken from the midpoint of a film. They were going to create the story of the film. Half of the class worked on the story leading up to the picture, the rest worked on the story after the picture. They were allowed to take a few notes, but could not write out the whole story.

After about fifteen minutes I then reorganised the groups. Each new group had one ‘beginning’ student and one ‘ending’ student. They then had to put their halves together to create one logical complete story.

The final step in the process was for each pair to tell their story to the group. I recorded it using Audacity and emailed it to the students after class. Next week we will focus on their use of narrative tenses, used to and would based on the recordings.

One-to-one variation

I also (unintentionally) taught the same lesson 1-2-1 when only one student turned up from a class of five! We followed the same process, but got through it much faster, finishing all of these steps in about 30 minutes. Once we’d recorded the story, the student then typed out what she had said. We then went through a series of drafts, each time focussing on one or two changes, for example tenses, punctuation and choice of vocabulary. This is the document we produced based on the picture of the two girls at the castle door:

What worked

  • The students found the pictures interesting and were motivated to discuss them.

  • They enjoyed being able to create their own stories.
  • They used their English in a natural way, so it recording their stories really showed the areas which they need to focus on.
  • In the 1-2-1 lesson, the student was given an intensive personalised focus on her errors. She also learned about punctuation in a relevant way, particularly the punctuation of speech (which I personally find can be difficult to teach/learn)
What I should change
  • At the beginning of the lesson I should have introduced the idea of storytelling in more detail. We could have talked about why we like stories and what a good story requires.
  • With more time we could have created more detailed stories, adding in information about the characters, using more adverbs etc.

If you choose to use this lesson (and even if you don’t!) please let me know what you think and if you have any suggestions to improve it.
Enjoy!

Diary of a beginner: Second Lesson

Alphabet Soup
Alphabet Soup (created using http://www.wordle.net)

I’ve just finished my second lesson with the beginner I’m teaching and blogging about (read the first post to find out more). For homework he had to practise the alphabet using the audio file I had sent him previously.

We started the lesson by using my laminated letters to randomly practise, and he got all but H and Y without a problem. Last week he’d struggled with more than half of the lessons, so it was great to see such a quick improvement – one of the reasons I enjoy lessons with beginners!

Next, I said the numbers 1-20 in a random order for him to write down. When he had trouble I spelled the word and highlighted anything he needed to rememeber. For speaking practice, I then said a number and he had to spell it out loud.

Once we’d consolidated numbers and letters, we moved on to eliciting any and all English words he already knows, designed to be a confidence builder and an evaluation task at the same time. He wrote the alphabet down the side of the page, then wrote any words he could think of. When he had spelling problems, I helped him out.

Through this we got on to talking about the phonetic alphabet, with me attempting to explain in A2/B1-level Czech what it is, how it works and why it’s useful! We got there in the end, and once he’d understood that we talked about whether he wanted to learn it or not. He decided he did, so this week’s homework will be me going through the key consonants which are similar sounds in Czech to start him off. That should give him at least 12 of the sounds straight away. I’ll use the English File symbols and pictures, as I think they’re the most useful version of the phonetic alphabet, using pictures to help you remember the sounds.

Do you teach the phonetic alphabet to students in general? And to beginners in particular?

Diary of a Beginner: First Lesson

I’ve just started teaching a new private student. He’s a complete beginner in his 30s, having studied Russian at school and learnt a little German when working as a waiter a few years ago. He’s recently decided that he really needs to study English as he’ll soon need it for his job (he’s a salesman in the Czech Republic). He constantly travels and spends many hours a week in his car. The lessons will be sporadic, depending on when he is away. I thought it would be interesting to catalogue my approach and his progress here, which he has agreed to.

Our initial meeting was conducted almost exclusively in Czech, as he really couldn’t understand anything I said to him. He couldn’t count to ten, so we decided to start with numbers. During our meeting, I recorded myself counting to 20 using Audacity, leaving gaps between the numbers for him to say them. I also sent him a copy of a powerpoint presentation I had made previously for young learners, without adapting it as I wanted to get him started as soon as possible.

(Feel free to download and use this with your own students if you think it will be useful)

The plan is for him to do as much self-study as possible, with internet support where applicable. He will listen to the audio files in his car and use the presentations as he likes (printing them, on-screen or on his phone). We will then consolidate what he has done by himself by practising it further in class. If there is time, I will introduce the next topic in the sessions too.

I have decided not to use a textbook and to record the audio myself, as I feel this will personalise the lessons as much as possible.

What do you think of this approach? Have you ever taught in a similar situation? Do you have any advice?

Podcasts for extra listening practice

One way to get your SS listening to English outside class is to encourage them to use podcasts. They don’t need an iPod or mp3 player – all they need is a computer with an internet connection. Some places to download podcasts from:

There are podcasts about everything you could possibly imagine. Here is a selection of the ones that I listen to:

  • BBC History Magazine
  • BBC Focus Magazine (Science, includes some natural discussion and some reports)
  • Digital Planet
  • Science in Action
  • Stuff you Missed in History Class
  • In Our Time (assorted topics, discussion)
  • Thinking Allowed (sociology)
  • Reduced Shakespeare Company (this is the podcast which is most like natural speech – lots of conversations)
  • Mark Kermode and Simon Mayo’s film reviews
  • Great Lives
  • Best of Natural History Radio
  • The Film Programme
  • Excess Baggage (travel)
  • Material World (Science)
  • Friday Night Comedy
  • Front Row Highlights (some interviews, some monologues)
  • World Book Club

There are also many podcasts specifically designed for English learners, including:

  • 6 Minute English (BBC) – a discussion programme including explanations of new vocabulary
  • Talk About English (BBC) – lots of grammar focus, as well as in-depth looks at individual items of vocabulary.

It’s important that the SS know they don’t need to understand every word, but that the more they listen to English as ‘background noise’, the easier it will become for their brains to tune into it.

Enjoy!

Update: I have created a complete beginner’s guide to podcasts, designed for teachers or pre-int and above students.

Cuisenaire Rods

A few weeks ago, I was reading a post on Ceri’s blog and stumbled across a picture of some Cuisenaire rods. I made a quick comment on the post, and Ceri asked me if I would like to write a joint post on how we use them. Ceri is a respected ELT writer and inspirational teacher and it’s an honour to be able to blog with her for a newbie like me. It’s the first attempt at cross-posting and blogging together for either of us: hope you like the results!

Ceri’s story

I bought my box of cuisenaire rods in 1989 when I was doing my induction to the Dip TEFLA (as it was known then) at IH Hastings. I was inspired by a silent way influenced lesson I observed at the school and bought my rods on the way out.  I was fascinated by the atmosphere of engagement and focused attention, of the calm, controlling presence of the teacher and the concentration on the part of the students.  I’ve carried the rods around with me ever since. They’re looking pretty good, despite their age, I think it’s something of the aura of care and respect from that first class I saw that’s rubbed off on them.

Recently I dusted them off and used them in class. But before I did, my kids got their hands on them.  My daughter’s been using them at school for maths.  She squealed with delight and pounced on them.  “They’re made of wood!” (the ones in her school are made of plastic) and proceeded to build a “picture” showing all the number combinations that add up to ten.  There’s a real pleasure in touching them and handling them and the colours are really attractive.  The way they’re laid out so carefully in the box breeds a sense of respect and discipline. When she’d finished with her maths drawings, she very carefully put them all back in their rightful place (not something that happens very often with her toys!).

Inspired by her enthusiastic response , I  took them into my adult class the next day.  We’d been using a lot of internet, Web 2.0 and IWB materials in our classes and I’d taken the rods in as a change of focus.  I wanted to use them first of all as a kind of show and tell activity. I also wanted to know if they too had used them at school and to see what kind of response I’d get.  No-one had used them and they were interested to learn about them.  We’d been discussing the power and associations of colours in the class before so we talked about how colours can aid memory and learning.  And we conducted an experiment, associating specific rods to idiomatic expressions  and explaining why.  We put the rods away until the end of the lesson and brought them out to see if we still remembered the associations.  No surprises, we did. We brought them out again the next lesson. We still remembered.

In the second lesson I introduced them to the rods for language practice using an activity I’d seen modelled back in that lesson in Hastings.  It’s incredibly simple. Incredibly basic. And there’s much, much more that you can do with rods, but it caught their imaginations. This is how our class secretary described the activity in the lesson summary:

Ceri suggested a new game with the blocks.

First ,  she made a figure with some of them and with the explanations she gave us,we were able to make it without seeing it. It was very funny.

After this, everyone of us made a figure and we explained how to make it and the other classmates tried to find out .”

The students were focused, engaged, concentrated, paying attention to the careful choice of each word, especially the “small words” (prepositions, articles, pronouns).  This is a comment one of the students made in her summary after the class:

We noticed our common mistake is when we say “take one block and put it in front of you”. We don´t usually say “it”.We eat “it”.

This seems to be a general pay-off with using rods; the level of attention and the focus on details and precision often help students value small insights, small “noticing” moments that then carry over as a shorthand for correction in less controlled production.

As an extension task I asked the students to write instructions to build a new shape with the rods and to post it on our class blog.  Here’s what one of the students wrote (if you have a set of rods you may want to follow the instructions and see what you come up with):

Hi Ceri!

If you follow the instructions, you’ll reproduce a piece of art made with scaled-up Cuisenaire rods I found on the internet.

Take the rods: 1 orange. 1 blue, 1 brown, 1 black, 1 dark green, 1 yellow, 1 lime green, 1 red and 2 white.

Let’s go!

Take the blue rod and put it on the table in front of you, standing up.

Take the purple rod and put it standing up on the right, next to the blue one.

Take the orange rod and put it behind the blue one, standing up.

Take the brown rod and put it standing up behind the purple one and next to the orange one.

Take the black rod and put it carefully on top of the purple one, standing up.

Take one white rod and put it on top of the orange one.

Now take the red rod and put it standing up on top of the last one you have just placed.

Take the yellow rod and put it on top of the blue one in front of the two smaller rods.

Take the dark green rod put it standing up on the top of the brown one, next to the stack of orange, white and red ones.

Take the lime green and put it on top of the black one, standing up.

In the end, take the other white rod and put it on the top of the red one.

If I’ve given you the right instructions and you’ve followed them correctly, you should have got this sculpture: http://www.tetuhi.org.nz/exhibitions/exhibitiondetails.php?id=8

Bye

M

Follow the link, it’s worth it to see the photo!

Sandy’s story

When I was about four, my parents gave me a set of Cuisenaire rods. A couple of years later, I got a book showing how to do sums using the rods. I loved playing with them, and it’s possibly here that my primary school love of maths originated. Until I was about eleven, I used the rods all the time. Then, I grew up and they disappeared into the cupboard. If it weren’t for a CELTA session, I would probably not have thought about them again until I had my own kids. I came out with loads of ideas and the joy that one of my favourite childhood toys could have a role in my classroom. The next time I went home, out they came and into my bag of teaching tricks. Every time I’ve used them, the students have been engaged and enthusiastic, once they’ve got over the initial “What does the crazy teacher want us to do with THEM?” reaction, that is!

Re-enacting stories

After reading a story in a young learner textbook, the kids used the rods to represent the different characters and retell the story. There was a jack-in-the-box at the end of the story, and they really enjoyed throwing it across the room!

Grammar – phrasal verbs

Cuisenaire rods are great for showing sentence structure. This is a downloadable set of worksheets I created for word order in phrasal verbs (based on New English File Pre-Intermediate Unit 8).

Building models

My favourite activity uses the rods for model-building. It’s especially good for the vocabulary of houses and furniture, but I’m sure it could be used for many other things. I’ve used it at Elementary, Pre-Intermediate and Upper Intermediate levels, with groups ranging from 2-12 students, and it’s always gone down well. This is how to do it:

  • Before the class starts use the rods to build a room in your house / your whole flat (however much you have time to do!). Add as much detail as you can.
    My flat in Cuisenaire rods
  • At the beginning of class, encourage students to guess what it is. They will probably get that it is a house / flat very quickly, but working out the exact details of what is there is generally more challenging. Depending on the level:
    -Draw the outline of the house / room on the board. Students fill it in with the names of the objects. I also left a space for students to write words in Czech they wanted to know. Once we’d looked at the vocab list in their textbook they wrote the English on the board.
    My flat on the board
    – SS use modals of speculation to decide what is where and perhaps why you bought it / put it there.
    – SS describe the room to their partners, focussing on prepositions.
  • Teacher confirms or corrects the names of the furniture / rooms.
  • You could expand the vocabulary, focus on the grammar or generally build on the student-generated language at this point.
  • Students each build one room, without telling anybody which room it is or what objects they have put in it.
    Building a roomRoom
  • Their partner then guesses what is in the room, and which room it is. One really creative student once created a garage, complete with chairs stacked on top of a table. Needless to say, neither his fellow student or I could work out what it was!
    Garage

NOTE: If you don’t have enough Cuisenaire rods for the whole class, encourage students to use other small objects like coins, rubbers, pencil sharpeners… I also have a box of laminated shapes that comes in very useful for many things. Every time I have a bit of space in a laminating pouch, I put in a scrap of coloured paper and cut the result into random shapes.

A box of shapes

Here are links to two great posts that follow on from this theme.

Emma Herrod wrote about using lego blocks on Barbara Sakamoto’s blog Teaching Village in a blog that appeared in two parts.
More Than Five Things to do with LEGO® in the EFL Classroom Part 1 (by Emma Herrod)
Teaching Village Rotating Header Image More Than Five Things to do with LEGO® in the EFL Classroom Part 2 (by Emma Herrod)

Michelle Worgan wrote about the power of colours and associating colours to words and language on her blog So This is English.
Colour Experience

Hiding ‘have’

A couple of weeks ago I was due to revise the grammar of ‘have’ with Advanced students, covered a couple of months previously. Wanting to make it more student-centred but being short of inspiration, I put a call out on Twitter for help. @fionamau came to the rescue with this suggestion:

Give the students five minutes to write as many sentences as they can using the word ‘have’ in any tense.

With this as my starting point, I then created a whole lesson:

  • SS did a very quick controlled practice exercise to remind them of different uses of ‘have’.
  • They had five minutes to write their sentences.
  • With a partner, they checked their sentences. I also quickly went round and offered advice.
  • With the same partner, SS wrote a text in any format they wanted to (story, review, letter…) which had to include one sentence from their list.
  • They switched texts with another group and had to find the hidden sentence.
  • They then got their original text back and with the help of a monolingual dictionary, a collocations dictionary, a thesaurus and the Internet (in the form of my laptop) they then had to make the text more advanced. By this, I meant moving away from short S + V + O sentences (if appropriate to the text type) and trying to incorporate some of the grammar and vocabulary we have looked at throughout the year. I also challenged them to include more description / emotion etc depending on the text type they had chosen. The final thing for them to look at was punctuation – in Czech, the longer a sentence is, the better.

With their permission, here is an example of the ‘before’ and ‘after’ transformation of one of the texts:

Before (sorry about the format – it’s easier to read if you click on the image)


After

New Irish restaurant is big disappointment

A new Irish restaurant was  opened in the city centre two weeks ago so I decided to visit it and look  the menu over. I had a delicious lunch in the afternoon, so  I was expecting a tasty  meal in the evening as well. I was excited to have a kind of traditional Irishfeast , but it turned out this  wasn´t such a good idea.  It took the  waiter 15 minutes to come with the carte du jour and finally, when I chose my meal, I was told that they didn´t have it that day . I started to be really annoyed. However, I picked something else.

I really didn´t know what my meal was going to be because the name was written in Irish, so it was quite surprising when I got undercooked potatoes with a bloody steak. It made me feel sick so I had to go home. I must say it was disgusting.

I taught the same basic lesson with two different groups and both of them really enjoyed it. They also found it useful to analyse the grammar using their own sentences, as it highlighted the problems THEY had, and not the ones which I ‘guessed’ at.

It would be great to hear your suggestions for variations / improvements on this.

Enjoy!

Comic Relief and Red Nose Day

To me, Comic Relief is one of the greatest charities around – it raises the profile of so many organisations, and sends all of the money it makes off to where it is needed instead of spending it on admin (the ‘Golden Pound‘ principle). Every two years, with the help of the comedians who set it up, it takes over BBC1 for a night in March. Red Nose Day 2011 is on the 18th March. I’ve created a couple of lessons to share it with my students. Even if you’re not planning to use them to teach, I hope it’ll be interesting for you to learn a little something about an aspect of UK culture which isn’t necessarily well-known abroad.

Feel free to download them and edit them as you see fit, with appropriate credit. The last two slides contain teacher’s notes and the links to the pictures.

For more advanced students:

For lower-level students, including a focus on modals of speculation:

If you use it, please let me know. I’d also be grateful for any feedback on how to improve it.

Enjoy!

Planning Evolution

I read Cecilia Coelho’s most recent post with interest, wondering what prompted her to begin her adventure as a blog challenger, having been a sucker for any challenge that came her way. Being just as much of a sucker myself , here is my response to What’s your plan?

Having only started full-time teaching three years ago, I actually have copies of lesson plans on my computer from virtually every lesson I’ve taught at IH Brno. I had done some summer school teaching and a year of pre-CELTA, where my planning largely consisted of opening the book for 10-15 minutes and trying to work out if I knew the grammar (my poor students!) already, but when it got serious, I decided my plans should too.

The first format that I came up with was based on the CELTA plans I’d done, as I think many fresh teachers’ plans are. This is the plan for the first ever lesson I taught in Brno:

1st plan

If you look closely you’ll see I still had an aims column on there. By the end of October, I stopped writing the aims, and a couple of weeks lately I deleted the column from the lesson plan. One thing you can see on the plan is where I’ve edited it after the lesson – this shows any changes I made, things we didn’t get through, ideas on how to improve the lesson if I teach something similar again and more.

It just so happens that this 1-2-1 student is the only one who I have taught for the entire time I’ve been in Brno, so here is a plan for the first lesson I taught with him in my second year in Brno:

2nd plan

Again, you can see where I’ve edited the plan after the lesson – this is a great way of reflecting on the lesson for me. I used highlighting in my plans when there is something I really didn’t want to forget, although this is gradually disappearing now as I settle in to my teaching and planning. Another feature is a list of notes at the bottom of the plan; these are things which have come up in discussion and could be potential themes for future lessons. I copy and paste them from plan to plan, adding and taking away from them as things are covered.

The plan from my first lesson from my third year in Brno, is essentially the same:

3rd plan

What you’ll probably notice though, is that the plans are getting shorter and shorter. This is because there are fewer and fewer reminders which I need during a lesson. The main one here is for before the lesson: something I need to remember to copy is in red.

This year I’ve made one more change to my plans: originally I would print them to take into class, but since the end of October 2010 or so, I’ve started taking my computer everywhere with me, so it seemed a bit of a waste to print plans as well. This means that I can edit lesson plans as they are happening – it’s easy enough to move lines up or down as I decide to change something. It also means that anything unfinished can be copied to the following week. (Of course, I only do this when the students are busy and don’t need my help – the rapport is good enough that they know they can call on me whenever they need me).

This is my latest plan, from  last Monday’s lesson:

4th plan

The biggest thing here is the amount of empty space – I’ve become more and more comfortable with the lesson taking the course required by the student, rather than imposing my own will on it. This is especially true in this class, where I’ve got to know the learner very well.

The one thing that has remained constant throughout all of my planning is the materials column. This is the most important part of any plan for me – I can check it just before the lesson and make sure I have everything I need quickly and easily. I also copy and paste file names of specific worksheets I’ve made in there, so that I can just search for something on my computer and all of the lesson plans featuring that sheet / activity appear so I can see how I’ve used it in the past. This works in reverse too: for example, if I think “I had a great activity for second conditional, but I don’t know what I called it”, I can search for “second conditional” on my computer, and see which lesson plans come up. I was very careful right from the start to give every file as clear a name as possible, and thus far it seems to be working!

Many of my colleagues would ask me if I was being observed when they first saw me planning like this, but they have gradually become used to it. I type much faster than I write (although I still write often), so plans don’t take long to produce. I have a database of all of the lessons I’ve ever taught, ready at hand on my computer whenever I need / want to consult it, and as soon as I see a plan, I can almost always remember exactly what happened in the lesson when I taught it. Best of all, I don’t have reams of paper all over the place.

So, these are my plans. Thank you to Cecilia for prompting me to write this post!

Enjoy!

Vocabulary box-ing (with added monsters)

I’ve just read Cecilia Coelho’s post about using a vocabulary bank with her classes, which was a response to Emma Herrod’s vocabulary blogging challenge. This is the first challenge which I’ve taken part in, so here goes…

As a relatively new teacher, I’m still constantly finding new activities to revise and practise vocabulary. The one which I use most is very popular at my school (IH Brno), and was introduced to me by Lily-Anne Young. With all of my groups, especially the adults, I have created a vocabulary ‘box’. All new words which are introduced to the students are written on folded slips of paper. The word / phrase is on the outside of the paper, with a definition and example sentence on the inside. I then use them in most sessions with a variety of activities, often variations on a theme. Here are some of them:

  • I / a SS read(s) a definition. The SS call out the word. The first person / team keeps the word.
  • Spread the cards on the table / floor. SS are divided into teams. Each team has a fly-swatter. Somebody says a definition and the teams swat the correct word. The team that gets the word gives the next definition. (from Anette Igel)
  • A selection of cards are placed around the room. Each SS / team has a ball of scrap paper. Somebody reads a definition and the SS must through the paper at the correct card. They then get to keep it. (from Lily-Anne Young)
  • Divide the cards between all of the SS in the class. They mingle and give definitions. When the other SS guesses the word correctly they take the card. If you want to make it competitive, you can give them a time limit and the winner is the person with the most cards at the end.
  • Give SS 5-10 cards each. They have 20 minutes to write a story including as many of the words as possible.
  • Put the SS in teams. One SS comes to you to see a definition. They run back to their team and tell them the word. The team must create a grammatically correct sentence using the word / phrase. (based on a game for pronunciation revision from ‘Homework’ by Lesley Painter)
  • Use 9 of the words to create a noughts and crosses board. SS must use the words/ phrases in a short conversation to win the square.

In order to avoid ending up with too many words in the box – you could easily have a couple of hundred by the end of the year – I ask SS to put a small mark in the top corner of each card after the activities if it has been correctly used. When there are three marks in the corner of the card I ask SS if they think they know the word. If they agree we remove it from the box. I normally keep the cards and a couple of months later pull them out and do a quick revision activity with only the old cards.

With most of the groups I encourage SS to write the words on the cards during the session, then take them home to write the definitions / example sentences. Occasionally the words don’t make it back to class, but there are always more than enough cards to keep us going!

With teens I use a pared down version of the vocab box. We just have large slips of paper with only the words (generally I can remember the context of most of them). They fight over who gets to write on the cards after each vocabulary activity!

For YLs, I use a variation of the vocabulary box, called a vocabulary monster. I got this idea from a book in 2004, but I have absolutely no idea which book it was – if anyone can provide me with the source I would be eternally grateful, as it’s stood me in good stead through the years! This is how to make one:

  • Stick two A3 pieces of paper together along the short side, making a long thin piece of paper.
  • Fold a piece of A4 paper in half and attach it to the bottom of the paper to make a pocket – make sure the sides are sealed, but not the top. This is the monster’s plate – you can draw a picture on there or ask your kids to do it.
  • Use two pieces of A5 paper to make a mouth and stomach and draw your monster around this. I’m not an artist, but I can manage a monster 🙂
  • The final result should look something like this (the second pair of legs was added by the confused software which I used to stitch the photos!):

You can use word or picture cards with the monster. At the end of the class put the words into the monster’s ‘plate’ pocket. At the beginning of the following class, take out the cards and show them to the SS. They should call out the words / draw a picture / do the action / use the word in a sentence. If they do this correctly, the card goes in the monster’s mouth. If not, it stays on the plate. In week 3, any correct words from the mouth go into the stomach. In week 4 any correct words are taken out of the monster. If SS use the word incorrectly it always goes back to the plate. Obviously if you have a large class, it’s your call whether to move the word on or not – it depends what percentage of the class you think is comfortable with the word. I’ve used this with 5 or 6 small classes and they’ve always really enjoyed it.

These activities are just a taster – the great thing about the vocabulary box is that the cards can be used for literally hundreds of activities, and require almost no work at all to prepare. It’s great for warmers, coolers, revision lessons and waking up sleepy students half way through a lesson. And the best thing is, you can use scrap paper for all of it, so you’re not even wasting resources 😉

Enjoy!