It was a huge privilege to be asked to deliver a plenary at the IATEFL Hungary conference in Siófok on the shores of Lake Balaton. I was very happy that my voice came back enough to be able to deliver the plenary as it was touch and go for 10 days or so before it happened!
László Nemeth, the current IATEFL Hungary president, had asked me to present something about materials writing. I’ve been talking about it a lot recently, as well as researching it for my dissertation (watch this space: 17 days until I hand it in!) The title of this year’s conference is ‘FLOW’, so that gave me the idea for focussing on flow in materials. I originally tested out the presentation at the BRAZ-TESOL Pre-Conference Event earlier this year – you can see a fully written out version of the presentation here. Here are my slightly updated slides from the IATEFL Hungary version of the presentation:
Richer Speaking: How to get more out of speaking activities
Later that same day I gave a workshop. Long-time followers of blog will know that I’ve delivered this talk a few times before, but I never get tired of it – it’s so much fun watching teachers become more engaged the second time they try each task, and I enjoy sharing these simple ideas for upgrading existing speaking activities. Most of the ideas in the book were collected from colleagues at in-school workshops and at events similar to the IATEFL Hungary conference, so it’s great to be able to pass them on to a new group of teachers.
You can find out how to buy Richer Speaking, ELT Playbook 1, and my other book, ELT Playbook Teacher Training on the My books page of my blog. There is a 10% discount on the ebook version of ELT Playbook 1 if you buy it from Smashwords and use the code NH87X by 31st October 2023.
If you’re interested, I shared a few other posts from the talks I went to at the IATEFL Hungary conference.
In the past many people taught in classrooms with no technology, but during the pandemic this flipped to teaching with technology but no classroom. Both situations create constraints on how you can teach.
How do constraints create creativity?
We need constraints for creativity – absolute freedom can make creativity very challenging.
Madagascar – classrooms without technology
This was a situation Jill and Charlie Hadfield taught in. They worked in Madagascar, but there were no books. There might be a cracked blackboard, or slates for children. The solution came from the market. Smallholders there had stocks of large paper to wrap goods in. They got schools to buy lots of these pieces of paper. They put up a washing line in a classroom, with one picture at the front of the room and one at the back. Children sat in pairs back to back and described the picture they could see to their partner. Here are examples of the pictures:
The pandemic: technology without classrooms
Here are examples of the kinds of constraints when working online:
So how did teachers work around these constraints? Here are examples of using classic ELT activities.
Using video and audio
Interview an object
Jill would be off screen and have an object on screen. Students ask questions to the object, and the teacher answers as if they’re the object. Then the students do this.
> Not everybody needs to be on the screen at the same time.
Running dictation
Use email / a link to send to one student before the lesson to print out or put on the phone. Put the phone or text at the end of the room. When the teacher says go, the student has to get up and go to the text.
Participation tools
For example, chat box, emoji reactions.
Longest sentence
> This worked well even if students couldn’t get video or audio to work.
Who am I?
> You can ‘Spotlight’ / ‘Pin’ somebody so that even if they’re not talking, they’re the main screen. It’s like you’re putting them on stage.
> By giving the students the constraint that they can only use the thumbs up / thumbs down button with the video off, it forced students to ask yes / no questions.
Sharing your screen
Art thoughts
> You don’t just have to share PowerPoint slides or websites, you can share many other things too.
Same words, different place
> You can spotlight more than one person to have a dialogue.
For example, in a supermarket, in a city, in a library. Then another slide in the same place but without displaying the dialogue.
Breakout Rooms
Lindsay found that he did fewer pair/groupwork activities but for longer, compared to his classroom. They tended to be longer activities with feedback. There tended to be more open pairwork, rather than closed pairwork.
Dreamtowns
> Getting students to write things on paper and hold it up to the screen meant that others would lean forward to look at it. It seemed to engage others who were in the session as they wanted to see.
This worked well for mini projects.
Clock match
This is a kind of information gap.
> Students can produce their own materials. It might take around 10 minutes to create the materials, but it makes it possible to do interactive pairwork games in breakout rooms.
Zooming Out
> Micro breaks away from the computer.
> Teaching on Zoom drastically reduces the teacher’s mobility, which can be very tiring.
> It also feels like you’re teaching into a mirror a lot.
> Tiring for students too to always be in front of a screen!
Stand up, stretch your arms, walk to the nearest door, count the steps, type in the chat box. Then who was the closest? Who was the furthest?
Go to the fridge, find something which is yellow, come back and tell your partner.
Get up, walk around the room, mentally name 5 things in English, then come back and say what you’ve done.
On 2nd April 2022, I had the pleasure of presenting at the PARK conference in Brno. I shared 4 activities from Richer Speaking, my ebook of 16 ways to get more out of the speaking activities you do in class with minimal extra preparation. This was a slightly updated version of the last but one presentation I did live – my previous face-to-face presentation was at the PARK conference in November 2021, and the one before that was Richer Speaking at the IH Barcelona conference in February 2020, in what feels like another lifetime way back before the pandemic!
Here are my slides:
I did the original version of this presentation in July 2019 which I’ve fully written out here.
To find the full details of the richer activities, plus another 12 ways to extend speaking activities, get your copy of Richer Speaking from Smashwords or Amazon [affiliate links]. It costs around $1/€1, so shouldn’t break the bank! As always, I don’t claim that these ideas are original, but it’s handy to have them in one place and see how they can be applied to specific activities.
If you’d like more reflection activities, you can find all the links to buy ELT Playbook 1 at eltplaybook.wordpress.com. There’s a 10% discount until 30th April 2022 if you buy it via Smashwords [affiliate link] using the code KN74F. That makes it only $6.29 or €5.63!
By the way, my blog has been a bit neglected as the previous three months have been super busy with lots of interesting projects and finishing off an MA module in Materials Development (with a distinction!). Hoping to resume normal service relatively soon…
Today was my first face-to-face conference since before the pandemic started. According the Czech event law, this was required:
Covid-19 Measures Circumstances force us to check everyone at the entrance. Please have the following ready in paper form or in an app on your mobile phone:
A Covid-19 Certificate
Proof of having had Covid-19 recently
A negative Antigen test (not older than 24 hours) or a negative PCR test (not older than 72 hours).
We kindly request that everyone:
wear a respirator (not a normal mask) for the duration of the conference
disinfect their hands
wash their hands regularly
maintain distances.
This made me feel much better about going to the conference, though it did involve trying to find respirator masks in the UK. This proved impossible (even normal masks were challenging to find!) and I ended up ordering them online from a Czech company and collecting them from a parcel box once I’d arrived in Brno…the miracles of the internet!
Mark Andrews, Nikki Fortova, me, and Phil Warwick during the panel discussion to round off the conference
I presented a talk called One activity, multiple tasks, and took part in a panel discussion at the end of the day. These are my notes from the sessions I attended – the opening plenary and two other talks.
The next PARK Conference will be 2nd April 2022.
Going with the flow: Making our learners fluent, well, actually confluent! – Mark Andrews
Mark started by playing a little of Smetana’s Vltava. Write the name of a river you like, 3 words to describe it, and think about what it might be like to talk to the river. Mine: Kennet, changeable, mixed, shallow.
Confluences have been a big part of Mark’s life. He grew up in Appledore, and lived in Belgrade.
Listenership is a concept he’s interested in.
A conversation is not a monologue, it is two- sided, we not only express our thoughts but we listen to the expression of other people’s thoughts.
Harold Palmer, 1921, The Oral Method of Teaching Languages
Mark believes we need to create more activities which build confidence in our learners, but also prompt more spontaneous reactions. How do we put the con(fluence) back into conversation? There are still lots of students who do English at school for 10 years but aren’t able to speak English.
Try this structure:
The thing is…
The other thing is…
The (worrying/strange/etc.) thing is..
Have you ever taught this?
You see…
I see… (to mean I understand, is often taught quite late)
Well,…
OK,…
Right…
We separate productive and receptive skills, but what about interaction. [I believe the CEFR does highlight interaction now…]
We can use a corpus to find common phrases from interaction.
The exercise above is a kind of drill. It doesn’t separate accuracy and fluency…maybe we should be combining them more.
Teacher talking time has been a taboo for a long time, but maybe we can say short things and get students to react.
Did you?
Really?
What happened?
How could we react? What could we say?
The COBUILD project and John Sinclair had a revolutionary effect on language study. Developing the largest English language corpus led to many changes in research.
IRF:
Initiate
Response
Feedback
…is a common classroom pattern. Feedback is often ‘good’ – we don’t take the opportunity to push the conversation further. Wong and Waring (2009) showed that teacher falling intonation signals the end of conversation and closes the door for student interaction.
Discourse analysis started in 1975, finding out how real communication really happens.
Push learners beyond IRF: Tell your partner about your last week. Make sure you both speak at least 4 times.
How collocations with ‘vaccine’ have changed over the last few months
A lot of repetition is good for learning languages. Mark gave lots of examples of what linguistics calls ‘vague language’, but they’re the lubricants that make fluent communication possible. We can do this in the classroom, like this:
These writers make listeners feel like we’re fluent.
Etymology is interesting to learn too. [The slide above shows one of my favourite Czech words, and I never knew where it came from!]
Hello? Goodbye? Or…
Hi
Hiya
Alright?
See ya
See you later
You can introduce this kind of diversity of phatic communication even at very low levels. Get the students interested in language right from the start.
Teach them how to build relationships, not just engage in transaction.
Do you want a drink?
No. (I’m OK for now. Thanks, but not now…)
‘Must’ in spoken English is used almost exclusively for speculation, but we associate it with obligation.
Good listenership involves responding.
We can drill this kind of thing fairly easily – getting students to respond in simple phrases.
Going back to the start of the talk: I talk like a river is the Best Children’s Book of the Year 2020 according to Publishers Weekly. It was written by somebody who stutters, about overcoming it. It could be a way to think about how to encourage children/ students to talk. Some people have a bad experience in the first year of English classes, and are quite ever after.
Here’s Ed Sheeran reading the story:
Definitely worth watching!
The Sounds and Shapes of Words: Teaching reading effectively – Steve Lever
Steve was presenting a hybrid session from Greece, something I think will be increasingly common in future conferences. There was a facilitator in the room and Steve was on the screen.
He discussed teaching early literacy for young learners, including how frequency can influence your choice of what to teach.
We watched a scene from I Love Lucy where Lucy’s Cuban husband is reading in English, demonstrating the vagaries of English spelling and pronunciation.
How many characters are there in the English alphabet? Not 26 as you might think, but 52, as capitals and lower case look different.
How many sounds are there? 44, depending on the variety.
How many spellings represent the English sounds? 250
How many consonant clusters are there in English? 30 initial and 100 final
Why have capital letters increased in importance? Because keyboards use them.
A letter may have more than one phoneme. A phoneme may be represented by more than one letter or combination of letters.
These are all issues those learning to read in English have to contend with.
We associate meaning with sound. Reading is not an innate, natural skill. Learners go from the letter to the sound to the concept. Readers become prudish when we see the image of the word and automatically get to the concept of the word.
Early literacy teaching has moved towards a frequency focus: what are readers most likely to encounter?
A possible sequence:
Introduce most common sound pictures in CVC words. Single letter consonant pictures: b p t d l m. Single letter vowel pictures: a e i o u.
Introduce consonant blends (2 letters, 2 sounds): st, br, bl, gr etc.
Introduce digraphs: sh, ch, etc. (2 letters, one sound)
Introduce split vowel digraphs – explore magic ‘e’: Tim/ time
Introduce proper vowel digraphs: ai in rain, ou in house etc.
Make learners aware of initial, mid, final position sound pictures.
Present alternatives: snow/now, dog/egg.
Frequency: /k/ in duck (3), kitten (2), queen (5), school (4), cat (1). Which is most common? I think ‘cat’ – I was right! The numbers in brackets show you the order from most to last frequent.
/i:/ is tree (3), key (4), me (1), pony (5), beach (2)
3 key skills:
Blending (running sounds together)
Segmenting
Phoneme manipulation (how a word sound changes if you change one of the letters within it)
We’re not looking at saying the names of the letters, we’re looking at the sounds of the letters.
Sight words (e.g. the, and, to, he, she, that, in, it, is, are, be, but, one, said, was, at, I, you, he, she, his, her…):
Build learners’ confidence
Help children focus on more challenging words
Provide clues to understanding the meaning of a sentence/ text.
Many sight words defy decoding strategies.
Builds learning behaviours that will help learners read new and more complex words.
Practical tips:
Balance ‘sound’ approaches with letter pattern and ‘sight word’ activities. Encourage recognition of patterns, getting learners to actively focus on words in a text. Work with words systematically and in context.
Get learners into the habit of ‘looking with intent’ – paying attention to the eyes.
Point out that print is all around them (this really helped me with Cyrillic). You could have labels or word cards around your classroom.
Take an interest in words as you read. Ask them to predict the spelling of one or two words before you read for example.
Encourage students to take mental pictures of words in their mind.
Get students to write down words and to see if it feels right.
Be multi-sensory.
Word shapes – what words are above, below, on the line? You can draw lines around the word for the shape, or have hand up for above, down for below, flat for on.
Show words on the screen. Close your eyes. Which word is missing?
Bingo works for writing and reading.
Overwriting/Tracing works for letter formation. Green dot where we start to write it, and a red one where we stop, without fully writing it.
Visualise words within words. An animal in education: cat. A part of the body in learn: ear.
Angels or Demons? ADHD and other white elephants – Claudia Molnár
What does SEN look like? All of these people have/had one or more of dyslexia, ADD or ADHD.
Fragile X syndrome was new to me – it’s a mutation in the X gene which brings many other things with it: dyslexia, dyscalculia, limited short term memory, limited executive control, emotional behavioural diaorder, autistic spectrum disorder etc. It’s rarely tested for.
Many people with SEN go undiagnosed for a while.
Teachers of English do not usually get adequate preparation for teaching children with SEN, or we might not be told about a diagnosis, or we might suspect but not be able to communicate that with parents.
Meeting the needs of children with SEN requires a lot of commitment, energy, professional knowledge and skills. Not only do English language teachers need specific knowledge and skills to accomplish this important task, but the crucial pre-requisitve for success in the EL classroom is their cooperation with class teachers, specialists in school or local community, and parents.
Claudia Molnar
How do children learn a foreign language? Exposure, repetition, etc. These are hard enough anyway, but can be much harder with the additional barriers to learning caused by SEN. Building confidence is important.
Inattention, hyperactivity, impulsivity: 3 features common to ADD/ADHD, though they might be differently balanced for different people.
Symptoms of inattention:
Failure to give close attention to detail or making mistakes
Often forgetful in daily activiites
Easily distracted by extraneous stimuli
Often losts things necessary for tasks of activities
Often does not seem to listen when spoken to directly
Difficult sustaining attention during activities
Difficulty in following instructions for activities
Avoidance of activities that require sustained mental effort
Often has difficulty organising tasks and activities
Hyperactivity can easily exhaust people. Symptoms of hyperactivity:
Often fidgets with hands or squirms in seat
Often runs about or climbs excessively in situations in which it is not appropriate
Often leaves seat in situations in which remaining seated is expected
Often talks excessively
Often has difficulty playing or engaging in leisure activities quietly
Is often ‘on the go’ or acts as if ‘driven by a motor’
Symptoms of impulsivity:
Often blurts out answers before questions have been completed
Often interrupts or intrudes on others
Makes important decisions without considering long-term consequences
Reckless behaviour and accident-prone
Often has difficulty awaiting turn
Potential knock-on effects, which can also influence each other:
Segregation
Anxiety
Motor skills problems
Depression
Fear
Phobias
Insomnia/sleep disorders
Emotional disorders
PTSD
What does that mean for language learners? Bilingual learners with ADHD have more difficulty with code-switching, not necessarily being able to keep up with which lanugage they are supposed to be in. The lesson they had immediately before might influence their ability too, for example if they had a German lesson before their English lesson. Translation activities could be quite challenging. Claudia is running studies on this now.
Dyslexia manifests itself in different ways with different people. Again, it can have huge knock-on effects on other areas of people’s lives, not just the stereotype of problems with reading. [Note: Dyslexia Bytes has excellent resources to help you.]
People with dyslexia might use their peripheral vision more than those without it.
Ways we can adapt our lessons in a range of ways for successful inclusive practice:
Applying appropriate teaching methodology
Using appropriate teaching material
Having extra time for individual work with the child
Acquiring specific knowledge, skills and experience in dealing with diversity in class.
Adapting the curriculum
Considerations when planning:
Pre-teach vocabulary
Give learners a title/ context when writing
Allow learners to draw rather than write everything, they speak it loud
Give them the opportunity to discuss the difficulties they have and share possible solutions through peer discussions.
Go back to basics. Think about how to make things easy access.
Reading:
Don’t insist that all learners read aloud
Use prediction techniques for each upcoming section
Read short sections
Stop and ask Wh- questions for comprehension and clarification, and to check predictions
Use visuals – images, comic strips (see the CIELL project), etc.
Repeat these steps for each section.
Writing:
Build in planning time (as a group)
Brainstorm text organisation
Create sub tasks for the writing process
Give enough time, release the pressure of in-class writing (though might be a problem for exam prep)
Set a linguistic focus (e.g. use of mixed past tenses) (Komos, 2020)
All SEN students can learn! But we may need to find ways to change our teaching to help them to learn.
It’s nearly three months since I completed the live parts of the module (!) and I’ve finally got time to get back to the course input I didn’t have time for during the three weeks in July. When I did weeks one, two and three, I found it useful to summarise what I read/watched on my blog, so I’m going to do the same for this additional input too.
These are notes I’ve made while reading. The notes are there for me, but you may find something useful in there, or something you’d like to investigate further. Please note: this is not intended as a subsistute for doing this reading yourself – it’s very subjective and based on my interests!
Getting learners involved
These notes are based on chapter 8 of McGrath (2002) Materials Evaluation and Design for Language Teaching [Amazon affiliate link for 2016 edition] on involving learners in the materials adaptation/production process.
Utilising learner language
You can use learner language as ‘learning-teaching material’ in a range of ways (additional information about the benefits of each activity can be found in the chapter):
‘Retrospective error focus’ (p164) Make them written (unless you’re focussing on pron) Include context Include correct examples Group similar errors together Keep the list a manageable length > “It is a good idea to keep the lists and to label them with a note of the date, the class and the activity from which they were taken.” (p164) The materials can be as revision with this group, or to predict problems other learners might have (see next idea)
‘Prospective error focus’ (p165) Predict errors learners might make and give a task based on these.
‘Learner transcriptions of their own stories’ (p165) Record a story (with permission!) as a learner tells it The learner then transcribes it, correcting it and highlighting any areas where they feel unsure The teacher checks the transcription with the recording and responds to learner questions The materials allow for personalised, focussed correction
‘Learner generated texts for use with other learners’ (p166) Students tell a pre-prepared story to a small group based on prompts The group choose one story to develop, tell the class, and write up, along with comprehension questions The story is recorded The materials can be used with other learners
Drama (p167) Students improvise and collaborate on a script / recordings of scenes The materials can be used with other learners
‘Transcript comparison’ (p168) Based on images or short video extracts, students record a description of what’s happening They transcribe the description They compare their transcript to another group They can also compare their transcript to a recording/transcript of a more advanced speaker doing the same task
‘Picture description for exam preparation’ (p169) e.g. Students record a 1-minute description of photos for a Cambridge exam – they can’t make notes, but can re-record as many times as they like They transcribe the recording They can correct the transcription The teacher can provide feedback / prepare additional practice based on problem areas
Learner-produced exercises and worksheets
Rather than the teacher doing all of the work, students could:
Create flashcards.
Prepare a paragraph describing X e.g. a recent news event. Put all of the verbs into the infinitive. Other students then supply the correct verb forms.
Design a questionnaire.
McGrath suggests the following caveats:
1. exercises should be kept relatively short (e.g. five gap-filling sentences);
2. the exercise designer marks the answers of the other students and discusses with them any wrong answers;
3. the teacher circulates during the exercise-writing, answering and feedback stages and helps to settle any disputes;
4. students rewrite their exercises in the light of feedback from other students.
McGrath (2002) p170
Learners as teachers
Learners as teachers of other learners
Implicit in the argument for learner-made materials is an acceptance of the learner as a potential teacher of other learners.
McGrath (2002) p171
This section seems to build on the previous two.
Teachers also test, but what they test reflects their ideas of what is important. […] learners might be asked to construct tests for each other (with the teacher providing guidance in the form of ‘model’ test types) (Clarke 1989b). This will not only stimulate them to review what they have been learning, it may also reveal important differences between learner and teacher perceptions of what is significant.
McGrath (2002) p171 (my emphasis)
There’s a fascinating description of what happened when Assinder (1991) handed over materials creation to her class on Current Affairs – two groups preparing work for each other, getting into intense discussions about the language they heard in the video clips they were using and the activities to be created. (p172-173) She listed these effects of involving the learners like this (p173):
increased motivation
increased participation
increased ‘real’ communication
increased in-depth understanding
increased responsibility for own learning and commitment to the course
increased confidence and respect for each other
increased number of skills and strategies practised and developed
increased accuracy.
Learners as teachers of teachers
The book suggests learners preparing questions for ‘a native English-speaking teacher […] teaching a monocultural class’ about the local culture. As the book was written in 2002, I feel like this is of its time and (hopefully!) wouldn’t make it’s way into a book now. It’s also very limited in vision – there are so many things that learners can teach teachers, regardless of both of their backgrounds! I also don’t understand why it’s only preparing questions – that seems to be testing the teacher, rather than teaching them. What about creating a guide to something they know about (their job, the place they live, a particular style of cooking, their hobby…), or introducing people (famous or otherwise), or really anything that involves learners sharing what they know with the teacher.
Learner-based teaching
What is novel about learner-based teaching is the idea that all activities can be based on [students’] wealth of experience, be they grammar exercises, exam preparation, games or translation…
Campbell and Kryszewska 1992: 5; original emphasis, in McGrath (2002) p174
This immediately rang alarm bells for me (see my notes on ‘Towards less humanistic teaching’ in the MAT week three post). Thankfully on p175 (and in the caveats below), McGrath details some of the disadvantages of this approach, but also notes that:
For teachers working within an externally-defined course framework, the answer may be to use learner-based activities as a complement to other, textbook-based work; for teachers who are more autonomous, it is probably still desirable to introduce such ideas gradually […]
McGrath (2002) p175
Deller (1990) suggests periodically handing potentially interesting materials which she has previously stored away over to learners to classify or select from.
This material [created by the learners] has the advantage of being understood by them, feeling close to them, and perhaps most importantly of all, being theirs rather than something imposed on them. As a result they feel more comfortable and involved, and have no problems in identifying with it.
Deller 1990: 2, in McGrath (2002) p175
Tudor (1996: 15-16) suggests a typology of learner-generated activities (McGrath, 2002: 176):
activities in which learner knowledge is utilised as a source of input bringing their own content to lessons
activities in which the learners’ L1 is used bringing L1 into the classroom
direct learner involvement in activity development and organisation handing over responsibility from the teacher to learners for materials selection, explanation, and ‘diagnosis and evaluation’
affectively-based activities giving ‘learners scope to use their imaginative skills, creativity and sense of fun’ (p16)
Caveats
McGrath lists three caveats to getting learners involved (p177).
“It needs to be recognised that if the materials used are restricued to those produced by learners this will have an effect on their ability to cope with other types of text (Gadd 1998). A combination of teacher-selected and learner-generated texts is therefore likely to be preferable.
Handing over control may be seen as an ‘abdication of responsibility’. It may take time and patience to prepare learners to participate in learner-centred teaching.
The relationship between learner-centred teaching and learner autonomy might not be as direct as it may seem.
Summary
Worth reproducing in full I think:
The focus in this chapter has been on learners producing materials for use in class by their classmates or other students. This has a number of positive effects as far as the learner is concerned, both in relation to motivation and learning. When learners are actively and creatively involved, motivation is increased; such activities as peer teaching (including correction) consistute a valuable and valued learning experience and can contribute to group solidarity. There are also benefits for the teacher. Monitoring learners as they discuss and prepare materials raises the teacher’s awareness of individual or general difficulties. Some of the material is potentially re-usable with learners in other classes. Teacher-preparation time is reduced. And because there will always be an element of unpredictability, the classroom is a more interesting place for the teacher as well as learners.
While the use of most of the activity-types described here is likely to lead to increased motivation, one type of material – that is, spoken (and recorded) and written texts produced by learners – is likely to be the most relevant from a linguistic perspective. Careful in-class analysis of this type of material, which is as finely tuned to learner level as it could be, is sure to be helpful not only for those involved in producing that text, but for others in the same class.
McGrath (2002) p177-178
I’ve used transcription with students before, but mostly only in one-to-one lessons, and only very rarely. I feel like this is a missed opportunity, and is definitely something I’d like to experiment with more if/when I get back into a classroom again.
Fluency revisited – Mike McCarthy
This was a recording of a guest lecture for NILE which is not publicly available – you’ll need to do the MAT course to get access to it. 🙂 Interesting points/reminders for me:
Fluency isn’t just a quality of the speaker, it’s a quality of the listener too (and the CEFR recognises this – see B2 criteria)
Fluency is an unusual term in our profession, because it’s one that’s understood by the general population too – we all have an idea of what fluency means.
If you translate fluency into other languages, it’s always related to the idea of ‘fluid’.
The two qualities of fluency are ease and readiness – we have to be able to start speaking pretty immediately, or listeners will wonder what the problem is. That’s why we use fillers when we’re thinking.
Fluency is an aspect of social capital for immigrants.
Our fluency can affect other people’s perception of us.
Conventional criteria for spoken fluency:
Speed of delivery Depending on the context – e.g. presentations v. conversations with friends (120wpm!) are different speeds
Pauses When, how often, how long, again depending on context – in conversation the average length is 0.6 seconds according to research
Dysfluencies Coherent messages
Automaticity
McCarthy’s suggested extra criteria
Can the learner use chunks accurately and automatically? (e.g. you know what I mean, or something like that) Most chunks are 2-5 words. We can process 7 chunks of information at once, after which we restart – this speeds up processing. These expressions are often culturally loaded, but are required for natural communication – without them we can sound like a robot or far too specific and detailed. There shouldn’t be pauses within the chunks – they are generally spoken very quickly. We cannot be fluent if we don’t have a range of chunks in our vocabulary, and if we can’t use them immediately and readily.
Can the learner use a repertoire of small interactive words? (e.g. just, so, actually, then, etc.) The lack of these words can affect our perception of fluency. These words carry a lot of extra information: compare Can I just ask you a question? to I don’t want to interrupt you but I need to ask you a question.
Can the learner link his/her turn smoothly to the previous speaker’s, using linking words and phrases, to create ‘flow’? (The technical term is ‘confluence’) 20 or so words regularly start our turns in a conversation (see below). Without these words, the conversation sounds much less fluent / more robotic. Fluency is about being a speaker, but also showing you’re a listener at the same time. If students can react appropriately to something, we don’t need to test listening in a more traditional way – we shouldn’t test listening skills separately from speaking skills. “Good listening materials allow you to be the speaker and the listener at the same time.”
I had a look at Mike McCarthy’s website afterwards, and found a long list of videos you can watch, including (I think) a similar talk on fluency to the one I watched. The list also includes three videos for learners on how to use the chunks ‘you know’, ‘or something’ and ‘the thing is’.
Learner preferences and affective learning – Martin Parrott
This was another recording of a guest lecture for NILE in 2015 which is not publicly available – you’ll need to do the MAT course to get access to it. 🙂 Interesting points/reminders for me:
We tend to teach in the style we like to learn in. It’s important to remember that our learners are very varied, and have lots of different preferences.
Affective = to do with feelings, think about ‘affection’ Effective = efficient, works well
Affective teaching = our learners can grow as people
SEAL = Society for Effective and Affective Learning, originally begun by the teachers who created Suggestopedia, and is an organisation for teachers interested in humanistic approaches. (I can’t seem to find a website for it through – not sure if it still exists?)
Benjamin Bloom – educational psychologist, known for Bloom’s taxonomy of the cognitive domain (Parrott says that we need to remember that we need comprehension before application), but he also created a taxonomy of the affective domain (Parrott particularly highlighted the fact that ‘value’ is repeated three times)
Carl Rogers – American psychoanalyst who became a psychotherapist – wrote about the relationship between the psychologist and their client, and has had a huge influence on teaching indirectly through the counselling model (and therefore Community Language Learning). Important features are:
Unconditional positive regard Not judging the client
Empathic understanding Moving away from your instinctive reaction to what is happening and finding out what students are really thinking – our perceptions of what learners are thinking are not always correct
Genuine-ness
Congruence Matching your body language and your words
Learner-centredness = consultation/involvement about content and style, the teacher keeps low profile, activities are collaborative and self-directed
This is a questionnaire Martin Parrott used to do some research with a class of 10-year-olds he was teaching and two other similar classes. He wanted to find out whether his learners valued affective or cognitive factors of lessons more.
The affective factors can be sub-divided into ones which the teacher can control directly (4, 5, 14 (8)) or only indirectly (1, 10, 11, 15).
His 10-year-old students said 7, 10, 11, 14 and 15 were not important, four of which are affective factors (!) 1, 2, 3, 4, 6, 8, 9, and 12 were all important. 4 and 13 were considered very important: one is affective, one is cognitive, and both are about the teacher. This goes against what we might think about learner-centredness.
He emphasises the importance of finding out about our learners as a group, and as individuals, and what they want, not what we think they want. We should also remember that their priorities might change throughout their time in the group based on their experiences in the class.
Martin also asked them what makes effective learning. They said they wanted a teacher who is funny, strict and fair – Martin hadn’t asked specifically about the teacher at all.
Martin has some warnings:
Don’t turn ‘affective learning’ into a method.
One model doesn’t ‘fit all’.
Don’t impose your own cultural values onto learners.
But remember that for many learners affective = effective – if learners feel they are learning, then they are happy. We need to find out first-hand from the learners want they want, and aim to provide this if we can.
I saw Fari Greenaway presenting activities to use with proficiency students at the IH Online conference in May 2019. Since it’s hard to find good ideas to use with such high-level students, I asked her if she’d mind sharing them with the readers of this blog. Many of them can be adapted for other levels too. Thank you for agreeing, Fari! (Yep, this post has been a while in arriving! It was also written before any of this COVID malarky happened, hence the fact that online teaching isn’t mentioned, though most of the activities should be pretty easy to adapt online.)
My experience with teaching C2 Proficiency classes is that the materials tend to be very dense and lack communicative or interactive ideas. As a result, teaching C2 often means creating your own activities. I’d like to share some of the activities I use in class.
As with all students C2 level learners can gain from the benefits of interactive work: helping memory, promoting practice and providing motivation by making lessons more fun.
Presentation
Extreme adjective mingle
1) List adjectives and their extreme versions on the board ask students to match the two, e.g.:
hot exhausted
cold boiling
tired furious
interesting starving
angry freezing
hungry fascinating
2) Elicit the differences between the two lists (the extreme adjectives on the right are non-gradable and take different adverbs – you may want to go through some examples)
3) Give each student a regular adjective on a card and ask them to write a statement on the card with the adjective e.g.: “It’s hot in here”
4) Students should mingle and read their sentences to each other, the listener should answer with the extreme adjective in the correct intonation e.g.. “Hot? It’s boiling!”
If your book comes with grammar explanations that you like to use or think are useful: give students a set (short) amount of time to read the information. Ask them to close their books and reconstruct as much they can of the text / rules whilst speaking with their partner.
Reported speech and reporting verbs
Students brainstorm reporting verbs.
Display a list of reporting verbs on the board and ask students to work together to organise them into groups according to the structure that follows them, this can be done with the verbs written on cards or on a board (ideally an IWB). There is a good table at: https://de.scribd.com/document/136102001/Reporting-Verbs-Table-pdf (retrieved 15/05/19).
Check as a class.
Give each student a reporting verb and ask them to come up with a sentence that illustrates that verb but doesn’t use it (in direct speech) e.g.: you give them a card saying “apologise” and they write “I’m sorry for being late”.
Students mingle and say their sentences to each other.
Put students into small groups, they should now report on what the other students in the group said using the structures revised previously, e.g.: She apologised for being late.
Passive/Causative structures
The TV show How it’s made is great for passive and causative structures.
Ask some introductory questions about the topic, e.g.: in this case: Have you ever tried Japanese noodles? How are they different from Chinese noodles etc…
Watch the video and ask students to make notes on what they see.
Elicit the structures used in the video, e.g.: “This factory was formed in…” “433 tonnes will be used every year.”
Display key words and ask students to reconstruct the procedure, speaking in pairs.
Feedback as a class.
Students work in pairs to write about the manufacturing process of the product of their choice.
This is also a great video for ellipsis and provides lots of vocabulary and examples of collocations.
Practise
Jigsaw activities
Choose a fairly long grammar practice activity (I use activities from Destination C1 and C2) [Amazon affiliate link]
Make two copies of it and complete half of the answers on each page i.e. the odd numbers on one page and the evens on another. Label the pages “Student A” and “Student B”. Sit students in A/B pairs and ask them to tell each other what they think is the correct answer
They should help each other to find the answer by giving leading responses rather than giving them the correct answer immediately if they get it wrong.
Tape the pages to the board or door so that students can tear off one transformation at a time.
Put students into pairs or small groups.
One student from each group at a time should come and tear off a strip from their page (you may want to mark the pages with team names or letters) and take it back to their team.
When they have agreed on an answer they write it on the paper and show it to you. If it is correct they tear off the next strip and repeat. If not, they go back to their group and try again.
The winning group is the one which finishes their sentences correctly first
Revise
Peer teaching
Put students into pairs or small groups.
Write structures you have covered and would like to revise on cards for students to randomly select.
Supply students with reference material to research their structure.
Give students 15 minutes to prepare a short presentation for the rest of the group: it must be presented without prompts, they must provide examples and other students should make notes.
Structure bingo
Create a short grid of structures you would like to revise and a list of 6 topics on the board. Students roll a dice to select the topic and try to be the first to correctly get bingo whilst discussing their topic.
Phrasal verbs / verbs with dependent prepositions
With a reading text from the book, do the reading in class or for homework.
Give students a list of verbs to find and to underline which preposition they go with.
List the prepositions on the board for students to complete with the correct preposition (books closed!)
Display gapped sentences on the board or around the room.
Recommended resources
Total English Advanced: Teacher’s Resource Book, Pearson Longman, 2007. Will Moreton [Amazon affiliate link]
Destination C1 and C2 Grammar and Vocabulary, Macmillan, 2008. Malcolm Mann and Steve Taylore-Knowles [Amazon affiliate link]
Other than that she is a linguistics graduate, DELTA qualified and DELTA tutor. She has written numerous EFL articles for different journals and has written teaching material for Edelvives. Fari has spoken has spoken at a variety of provincial, national and international conferences and is a great believer in promoting learner autonomy.
On 5th September 2020 I presented at the EFL Talks Poland online event. 10 Directors of Studies based in Poland presented 10-minute talks of 10 slides each. Here are my slides:
The video is available here – my talk starts at 1:50:07.
To find the full details of the richer activities, plus another 12 ways to extend speaking activities, get your copy of Richer Speaking from Smashwords or Amazon [affiliate links]. It costs around $1/€1, so shouldn’t break the bank! As always, I don’t claim that these ideas are original, but it’s handy to have them in one place and see how they can be applied to specific activities.
If you’d like more reflection activities, you can find all the links to buy ELT Playbook 1 at eltplaybook.wordpress.com. There is a Smashwords discount code for 10% off ELT Playbook 1 until 5th October 2020: TB33T. You can also buy a paperback or ebook version of ELT Playbook 1 from Amazon [affiliate links] or a paperback from BEBC (support this great bookshop!)
I’d love to hear from you if you’ve tried out any of these activities.
Have you ever watched in despair as students have a ‘conversation’ which is actually just two monologues? Or tried in vain to interact with a student who only gives one-word answers, however encouraging you are?
I know when I’m B1 or below, it’s difficult for me to pull my weight in a conversation and I need a lot of support from whoever I’m talking to. In the classroom we can provide this support in a variety of ways. We can supply sentence stems that students can complete, we can show them the first two or three turns of a conversation, or we can provide them with a whole range of questions or other functional language which might be useful in the conversation they are having.
These are all interventions we can make before or during students speak in class. But what about after the conversation? How can you help students to reflect on the success of that conversation? Here’s one idea I haven’t tried yet but it would like to: show students the conversation shapes below and ask them these questions:
Which shape is like a conversation you might have in your own language?
How would you feel in each of these conversations if you were a person A or person B? How actively would you participate in the conversation in each example?
Which shape is like the conversation you just had? Do you think you were person A or person B?
How successful do you think it was as a conversation?
What could you change in the conversation you just had to make it more like shape 3? What help do you need from the teacher to do this?
You can download a PowerPoint of all of the images at Conversation shapes if you want to adapt them for your own lessons, though please retain the credit.
I think this activity is an example of metacognition, which is the act of monitoring and making changes to learning strategies you use. The reflection helps learners to become aware of the processes they use when they are having a conversation, and what they can do to have more successful conversations in the future. Here’s a beginner’s guide to metacognition from Cambridge.
What other strategies do you use to help learners have more successful conversations?
On 3rd June 2020, I presented a webinar for IH Bucharest demonstrating how to exploit activities in lots of different ways, with minimal planning required by the teacher. Of course, I wouldn’t expect you to use every activity in the same lesson, but the ideas I shared were designed to demonstrate how you can make a single exercise lead to a much wider range of practice activities, depending on what your learners need help with. The slides are here (though they’re much more useful when presenting than referring to them later! See below the slides for a more useful link!):
All of the ideas in the webinar were originally designed for a face-to-face classroom, but most of them can be used as is or with only minimal adaptations in an online classroom. They were originally shared on my blog in the post One activity, multiple tasks, based on a task from ELT Playbook 1. ELTPB 1 is a book of short tasks for teachers to help them reflect on their teaching.
My ebook, Richer Speaking, costs less than $1, and contains 16 ways to adapt speaking activities to help students get more out of them. You can find four of the ideas for free in this post.
If you’d like ideas specific to teaching online, particularly using Zoom, then try ideas for adapting group lessons to working on Zoom. Some of these may take a little longer to prepare, but I’m a firm believer in teachers doing less work and students doing more!
Let me know which ideas you’ve tried out and how they go with your classes.
On 8th February 2020, I had the pleasure of presenting at the IH Barcelona 2020 conference. I shared 4 activities from Richer Speaking, my ebook of 16 ways to get more out of the speaking activities you do in class with minimal extra preparation.
To find the full details of the richer activities, plus another 12 ways to extend speaking activities, get your copy of Richer Speaking from Smashwords or Amazon [affiliate links]. It costs around $1/€1, so shouldn’t break the bank! As always, I don’t claim that these ideas are original, but it’s handy to have them in one place and see how they can be applied to specific activities.
If you’d like more reflection activities, you can find all the links to buy ELT Playbook 1 at eltplaybook.wordpress.com. There’s a 10% discount until 29th February 2020 if you buy it via Smashwords [affiliate link] using the code WG94S.
Here are my slides:
I did a version of this presentation in July 2019 which I’ve fully written out here.
Thank you to those who attended my talk, and I’d be really interested to hear from you if you try out any of these activities in your classroom. And don’t forget to get your copy of Richer Speaking from Smashwords or Amazon [affiliate links]!
In a collaborative planning meeting today, we came up with a plan for a speaking lesson based around a single activity from Speakout Intermediate called ‘My life in film’. The image below is taken from the 1st edition, and we were working with the 2nd edition.
The groups we were planning for have a mix of ages from 16 to 60+, so we thought of a tweak to level the playing field and make sure everybody was starting from the same point. Here’s how the lesson goes:
Guided visualisation
Students close their eyes, and the teacher says something along these lines, pausing at appropriate points for students to think:
You’re 80 years old and you’re in an old people’s home. Look around you. What can you see? How do you feel right now? Go out of the room and down the corridor. Where are you going? Who is walking past you? Where are you going?
It’s time for lunch. What are you eating? What can you smell? What can you hear?
You get some visitors. Who are they? How do you know them? How long have you known them for? What do you talk about? How do you feel about their visit?
After a suitable pause, students tell a partner what they experienced in the old people’s home. As feedback, elicit a couple of general impressions from the visualisation – don’t ask students to repeat whole chunks of what they experienced, as the pace will probably drop and others won’t be particularly interested.
Setting up the situation
Tell students that a film director has come to the old people’s home. They want to choose somebody’s story to turn into a film.
Display the film strip from Speakout and elicit ideas for how to complete it for you (the teacher) – demonstrate just taking notes.
Planning time
Give students about 5 minutes to make notes in their own film strips, including asking you for extra vocabulary. They can be as true or as creative as they like.
Getting into role
As a class, brainstorm one or two ideas of questions/comments directors could use to find out more from the old people in the home and to respond to the stories they hear. For example: ‘That can’t be true!’ ‘What happened after that?’ Students think of more ideas in pairs. As feedback, get them to (simultaneously) write the ideas on the board or use something like mentimeter to submit them electronically.
Pitching ideas
Arrange students into a ladder, with two lines of chairs facing each other. One line will be the directors, the other the old people.
The old people have 3-5 minutes to talk about their lives, while the directors listen and ask questions to find out more.
After each turn, directors move along one seat. The old people stay seated as it’s harder for them to be mobile!
The teacher sits either beyond one row or at the end of the ladder and takes notes on what they are – we are using this activity as a speaking assessment, and this gives the teacher lots of chances/time to listen to the students.
Making a choice
The directors listen to three old people, then choose the person whose story they’d most like to film and write their name on a piece of paper in secret.
Directors and old people switch roles and the pitches and choice stages are repeated.
Off to Hollywood!
Students discuss in new pairs which stories they particularly enjoyed listening to and why. Meanwhile, the teacher looks at all of the names, then declares whose stories will be filmed as a way of feeding back on the content of what the students have said.
For language feedback, the teacher can share some of the great language they heard, and/or highlight some problem areas for students to work on.
If you try this activity out, I’d love to know whether your students get into it. It’s always fun to plan things like this, but I don’t get to use them myself very often!
On 3rd and 4th July 2019 I attended the English Teachers’ Association of Israel (ETAI) international conference. They were celebrating their 40th anniversary, so there were a few special events. This included a musical celebration hosted by Leo Selivan and Jane Cohen, which I really enjoyed. Attendees were mostly from Israel, but Poland, Serbia, Greece, Austria, and other countries were also represented. I learnt a lot about how the Israeli school system works, and particularly the shift to try to get more speaking in the classroom, hence my own session on Richer Speaking.
Ideas from the conference
Penny Ur has written A guide to talking which is a useful beginner’s guide for getting more speaking in your classroom, including a selection of ready-to-use activities.
There are resources available for 7th grade students to help teachers get their students comfortable with speaking (aged around 12). Let’s Talk includes games to teach the language of basic role plays. We were shown these by Rachelle Borenstein and Renee Binyamini.
Early on in her courses, Timna Hurwich asks her students to discuss the Einstein quote below and answer the questions ‘When is a mistake good?’ ‘When is a mistake bad?’
I happened to see the same quote in this street art two days before this conference presentation!
Mitzi Geffen said “There is no glue on the bottom of your shoes!” which I think is a great way to remind teachers to move around the classroom, or ‘circulate and facilitate’ as she put it.
She shared how she helps reluctant students get over their fear of speaking in an achievable way, in this case when she wanted them to talk about a project they had done at home.
Step 1: each person stands at the front and says “My name is [Sandy] and my project is about [Einstein].” Everybody claps. They sit down again. When they’ve all done that, Mitzi points out that they all spoke and nothing bad happened!
Step 2: in the next lesson, other students have to ask questions about the project. They can use the questions they based their project research on. As everybody has the same questions, it’s easy to be successful, and takes the pressure off the presenter to work out what to say next.
Mitzi also suggested a really simple structure for brainstorming ideas for a debate, using the phrases “Yes, and…” or “Yes, but…” Anybody can add an idea. For example:
Chocolate is really delicious.
Yes, but it’s unhealthy if you eat too much.
Yes, and you can get fat.
Yes, but you can exercise more.
Yes, but exercise makes you tired.
etc.
Marta Bujakowska woke us up with a series of lively activities, including a conditional chain of actions, and countable/uncountable conversations. I’ve asked her to write a guest post so won’t say any more here!
James Kennard suggested we rethink some of the terminology connected to leadership and management. He emphasises that we often talk about them both like they should be part of the same job, but that the role is almost always given the title ‘manager’, unless you’re in a political party! Would it make a difference if we changed the terminology? He tried it at his school and it didn’t change much, but still something to think about. He also believes that ‘focus’ is a better word than ‘vision’ when it comes to describing your priorities as an organisation. Leaders need to identify the focus of the organisation and articulate it to others, so that members of the organisation can make the right decisions every time, in line with this focus.
Books as bridges: why representation matters
The two talks given by Anne Sibley O’Brien were probably the most influential for me. She was born in the United States, but when she was 7 her family moved to Korea, and she grew up there. You can read more about her story in the interview Naomi Epstein did with her. Her background has led Anne to work in diversity education, and she is the author and illustrator of various children’s books. She talked about the development of our identities, including racial identities, bias, and contact theory. Her perspective is unusual as she grew up with a minority identity, but a privileged one. We all have a mixture of identities, and generally some of them fall into majority and some into minority categories.
We learn who we are by the mirrors that are held up to us and what is made salient to us.
For Anne, she was constantly told that she was American and white, but her Korean friends were never told they were Korean, thus emphasising her difference. Majority identities are taken for granted because they are ‘normal’ and they end up disappearing. Minority identities are highlighted and everything you do becomes tied to that identity.
For example, consider being the only girl in a football team, versus being a boy in the same team. The fact of being a boy is unlikely to be commented on in this case, whereas being a girl will probably always be commented on. Members of a majority identity stop seeing what is actually there or can never see it, whereas members of a minority identities can often say quite incisive things about the majority identity because they have to be aware of the other side too, not just their own. For example, white Americans often don’t see how race affects the everyday lives of non-whites.
Children already notice racial and cultural differences from a very young age – I think Anne said that it’s around 6 months old. They get their attitudes about race from community norms, more than from parental norms (consider the analogy of accents and where children pick them up from) and from their environment, including who visits their house and what is and isn’t talked about. Three year olds already know that we don’t talk about skin colour. Consider when you’re describing pictures in a book to a child: you would probably say that it’s a blue ball, or a yellow car, but you’re unlikely to say it’s a brown or a pink baby. This is an example of our silence when it comes to race.
We all see the world through lenses, but we’re often not aware of what we see.
Our brain uses cognitive processes to make it easier for us to deal with the world. It sorts things in an unbiased way all the time, for example familiar/unfamiliar, same/different, like me/not like me, etc. This sorting initially does not contain judgement, but then we layer associations onto the categories, which can add bias. For example, same = good, different = bad.
The brain creates bias based on what it’s fed. If it only sees ‘white’, it will create white bias, but by making conscious decisions about what we feed our brains, we can change the bias. We all carry bias, but if we don’t understand this, how can we help others? If you’d like to find out more about your own biases, Anne recommends projectimplicit.net.
We can also help children by referencing people they know and books they have read to start a discussion about race, instead of staying silent.
Aren’t we amazingly different? Look how we’re the same!
As we get to know each other, it can reduce prejudice and inter-group anxiety. This is known as contact theory. Anne has worked on something called The Storybook Project (?), where children and their teachers looked at 1 book a week for 6 weeks showing positive interactions between people of different races, followed by a short discussion of how much fun the children are having in the book. They found this made a difference to how children felt about interacting with people from the groups represented.
She also works on the diversebookfinder.org website to help people think about who is represented in the books they use, and how. Are there interactions between two named characters of different races? Are they positive?
Her two latest books I’m New Here and Someone New [Amazon affiliate links] tell the same story of three children arriving at a new school (one Guatamalan, one Korean, one Somali) from the perspective of the children themselves in the first book, and from the perspective of the other children in the class who don’t know how to react in the second book. I will definitely be getting copies of these!
Thank you to everyone at ETAI for organising the conference, and especially to Naomi Epstein and Leo Selivan who encouraged me to attend. As you can see, I had a really good time!
On 4th July 2019, I had the privilege of presenting at the English Teachers Association of Israel (ETAI) 40th anniversary international conference. Here is a summary of my talk:
Richer Speaking: how to get more out of speaking activities
This session will demonstrate a range of low-preparation ways to adapt speaking activities that appear in coursebooks and other materials, based on my self-published book ‘Richer Speaking‘. These adaptations are aimed at helping students to speak comfortably for longer and produce higher quality language while minimising the effort for you!
To find the full details of the richer activities, plus another 12 ways to extend speaking activities, get your copy of Richer Speaking from Smashwords or Amazon [affiliate links]. It costs around $1/€1, so shouldn’t break the bank! As always, I don’t claim that these ideas are original, but it’s handy to have them in one place and see how they can be applied to specific activities.
What do I want to know?
Original activity
Tell your partner about you.
Richer activity
Before speaking, come up with three questions you want to know the answers to. Pool the questions with a partner and add two more to your list. Tell your partner about you. If your partner gets stuck, ask one of your questions.
Feedback stage
Did you find out what you wanted to know?
Rationale
This gives students a real reason to listen, and helps them come up with ideas for their own speaking turn too. It also helps to create more of a conversation instead of two monologues.
Language challenge
Original activity
Any list of conversation questions.
Richer activity
Answer the conversation questions. Afterwards, list the language you used (either in English or your own language). For example:
Consider what other language you could use. Look at your notebook or coursebook to help you. Change partners and repeat the activity.
Feedback stage
Did you use all of the language on your longer list?
Rationale
This challenges students to use a wider range of language and adds a reason for them to repeat the same speaking activity. It can be particularly good for exam students who need to show off the range of language they know.
Who am I?
Original activity
A role play. In the session I used one from Now You’re Talking! 2 by Rivka Lichtner (A.E.L. Publications, 2018) where an Israeli teenager sees an American celebrity on the street. The teenager thinks the celebrity looks familiar and tries to speak to them, while the celebrity is on holiday and wants to hide their identity. [I love this idea!]
Richer activity
Create a mini biography for a teenager or celebrity in this situation. Here are some ideas:
Celebrity: Who are you? Where are you from? Why are you visiting Israel? Why are you hiding?
Teen: Who are you? Who do you think the celebrity is? Why do you want to talk to them?
Both: How do you feel right now? Why? What did you do before the conversation? What are your plans later?
Optionally, exchange biographies with another student. Read your biography, then put it away. Meet as many celebrities/teens as you can in the time limit.
Feedback stage
Teens: Did you find out who the celebrities were?
Celebrities: Did you hide successfully?
Rationale
By giving students time to prepare before they speak, they can get into the role more fully and the role play should be much more interesting for them. Adding dimensions such as feelings and how this conversation fits into the character’s whole day can make it feel more realistic and part of a larger story.
Not me, you!
Original activity
Talking about why two cartoons are funny. Again, the cartoons in my session were taken from from Now You’re Talking! 2.
Richer activity
For 1 minute, think of as many reasons as you can for why these cartoons are funny. Choose an object with your partner (for example, a pen or a coin). List ways that you can pass a conversation over to a partner. For example:
What do you think?
Do you agree?
How about…?
I really don’t think…, but maybe you do?
Have a conversation with your partner. Every time you pass the conversation to them, give them the object. When the teacher says stop, you shouldn’t be holding your object! Don’t be the last person speaking!
Feedback stage
Who is holding the object?
Rationale
Because students don’t want to lose the game, they push themselves to find something else to say to be able to hand over the conversation to their partners. This extends the conversation and gives them turn-taking practice.
Reflection
To finish off the session, we used these reflection questions based loosely on ‘Supporting students in speaking tasks’, an activity from ELT Playbook 1.
Choose 2-3 speaking activities you’ve done in the last school year. Could you adapt them using these ideas?
Do you often include stages like these? Why (not)?
What other support do/could you give your students to help them:
prepare to speak?
speak for longer?
repeat activities in a varied way?
have a clear reason to listen?
If you’d like more reflection activities like this, you can find all the links to buy ELT Playbook 1 at eltplaybook.wordpress.com. There’s a 10% discount until 31st July 2019 if you buy it via Smashwords [affiliate link] using the code YM64U.
Thank you to those who attended my talk, and I’d be really interested to hear from you if you try out any of these activities in your classroom. And don’t forget to get your copy of Richer Speaking from Smashwords or Amazon [affiliate links]!
Following on from Monday’s lesson, I deliberately made sure that my intermediate class today would have lots of opportunities to speak, starting immediately with the first activity. I hoped this would make a difference to the atmosphere in the room, and briefly, it did. After a while though, regardless of what I tried to do to get a response, it seemed that nobody wanted to say anything. I’d done everything ‘right’: put them in pairs, given them thinking time, played music (at their request) so they weren’t speaking into silence, suggested possible answers (yes, no, maybe for some questions), given them chance to make decisions (do you want to listen to anything again, or shall we move on?) and was generally greeted with silence, increasingly so as the lesson progressed. There were only 6 students, we’ve been working together since the end of September, and they seem to be quieter and quieter rather than more confident as the year goes on. They get on well with each other, and have been happy to speak to everyone else in class when we do mingling activities. I’d spoken to each of them individually during tutorials before our winter holiday in February, and talked about reasons to speak more and what might be stopping them. I know that none of them are particularly introverted in Polish and have regularly heard them conversing without any problems, even with people they don’t know. So what was stopping them?
I decided to ‘pause’ the lesson as we didn’t seem to be getting anywhere. On the board I wrote a long list of possible reasons that could be stopping them from speaking, then stood in front of it and told them about my experience of learning Polish. I didn’t speak at all really during my first year, once I’d realised that I was mixing Czech, Russian and Polish and people couldn’t understand me. The turning point came when I went for a flamenco weekend. When people asked me conversational questions, I had two choices: ignore them and stay silent, or try to reply. Because I felt comfortable, I tried to reply, and this made me realise people could understand me, which was the kick-start I needed to start speaking. I haven’t really looked back since. I asked the students to look at the list of reasons on the board and write as many of them as necessary on paper I gave them, or any other reasons they may have for being reluctant to speak. Here are some of them (I probably had about 15 in all, but don’t remember them all now):
I don’t know enough words.
I’m worried about my grammar.
I’m worried about my pronunciation.
I’m not interested in the topics.
I don’t have enough time to think.
It’s too quiet in here.
Sandy scares me – she puts too much pressure on us.
I don’t have any ideas.
A couple of students mentioned being tired, and one said ‘Just a bad day’. Afterwards I asked them if they’d be comfortable sharing their feelings with their classmates. They agreed, so I put them in a circle and left the room, telling them they could choose whether to speak Polish or English, and suggesting they respond to each other, not just listing their ideas, telling each other whether they feel the same. They opted to have the discussion in Polish, and exchanged a little, though it was mostly monologuing. I could hear some of it from outside, but the background music and my intermediate Polish meant I couldn’t catch all of it.
When I returned to the room, I then spoke to them in my best Polish, saying something along the lines of ‘Language is communication. You’re here because you want to speak more, but if you come and sit in silence, then it’s just grammar, and you can do that at home. I’m making a lot of mistakes right now, but you can understand me, right? Grammar is not the important thing, communication is.’ I then switched into English and said that I’m tired too, and while I can try to give all 7 of us energy, it’s hard work and I need them to help me. I also explained a bit about the process of learning, going from knowing nothing to things being automatic, saying that some bits of their English are already automatic, things like using ‘I’ in the first person, or being able to spell ‘good’ or ‘bad’ without thinking about it. To help them make more things automatic, I need to be able to hear them so I can correct them if necessary, and they need to practise more.
We spent the last few minutes coming up with either/or debate topics, like cats or dogs, winter or summer, PC or PS…which they wrote all over the board. They will be the topics for a speaking assessment we’ll do next lesson, when I’ll see whether they can use the phrases for giving examples and expressing your opinion which were the actual topic of today’s lesson, as well as monitoring their interactive communication. They’ve got five days to think about what we discussed, practice the phrases and mentally prepare themselves for the assessment – I told them what it would involve and what they’d be marked on. I’ll be interested to see if any of this makes a difference…
At the end of the lesson, one of the students checked a bit of extra homework she’d done, and stayed for longer than the rest. I asked her if she thought this kind of discussion was useful, and she said she hoped it would help. She mentioned that at school, sitting in silence and listening to the teacher is considered respectful, and at uni you sit in silence because you’re taking notes, and you work out how to understand them later, so this is quite different for her now she’s an adult. As well as contained this idea to make me think, it was also the longest stretch of English I’ve heard from her all year. As I keep telling all of them, they’re much better than they think they are!
Discussing it with my colleagues afterwards, one suggested that it could also be because we’re at (I hope!) the tail end of winter, a lot of students have been ill recently, it’s still dark and pretty cold, and maybe that’s tipping over into a relative lack of enthusiasm in the classroom – it’s definitely reduced as the year has progressed. Another said it could be a good idea to ask them to have discussions in Polish first, then in English, which I’m certainly going to try. I’ve only ever used that strategy once or twice, and it’s always worked before. She also suggested getting them to set goals, even if it’s just ‘I’ll answer three questions in class before Easter.’ That fits in quite nicely with the topic of our next lesson.
Do you have any other thoughts or suggestions on this? I’m not sure I’ve ever had a class quite this silent before!
In lessons I have observed, it is often a little step that is missing that could make a real difference to the students’ engagement in a particular activity. By asking yourself ‘Why should they care?’ at every stage of the planning process, it’s easy to make little tweaks that could help students to get more involved.*
Do you recognise any of these situations?
Speaking
You ask students to discuss a question like this in pairs:
Tell your partner what you did at the weekend.
They each monologue for about 30 seconds, and the whole activity peters out after less than two minutes. Neither student really listened to their partner, and apart from saying a few words in English, they haven’t really got anything out of the activity.
Why should they care?
Here are a few little tweaks that might avoid this situation.
Give them a listening task too. These can also be used as questions for feedback after the activity.
‘Find something your partner did that you didn’t.’ > Feedback = ask one or two students to say what their partner did and why they didn’t do it.
‘Decide whose weekend was more boring.’ > Feedback = put your hand up if you had the most boring weekend.
Add challenge.
Students have 15 seconds to tell their partner what they did – time it strictly. Afterwards they change partners and tell someone else what their partner did. Give them thinking time first to decide/rehearse what to say in that time.
Students can only say two sentences before their partner speaks. Give an example, and make sure you include questions!
Change the interaction pattern.
Students mingle, speaking to as many others as possible. They have to find one person who did the same three things as them/did none of the things they did/did something they wish they’d done.
Play Chinese whispers with two teams racing to correctly write down one thing each person in their team did.
Give them some functional language you want them to use.
‘No, really? Why did you do that?’
‘That’s something I’ve always wanted to do.’
If you want more ideas for how to adapt speaking activities, I’ve got a whole e-book of them!
Writing
You ask your students to write a blog post about a place they want to visit. Some of them write a paragraph, others write a whole page.
Why should they care?
Get them interested in the topic first.
Talk about the most popular places a tourist can visit in the students’ countries.
Get them to decide three things which make a place worth visiting, then compare the list with a partner and narrow it down to three things from their combined lists.
Show them what you expect from them.
Give them a framework, e.g. Paragraph one = a description of the place, including at least three pieces of information about it. Paragraph two = why they want to visit it. Paragraph three = why they haven’t visited it yet/when they plan to visit it. > This can also be used for marking if necessary, giving you an objective way of deciding if they get full marks for content.
Show a couple of examples from real blogs.
Change the interaction pattern.
Allow students to choose if they want to work alone or in pairs.
Get students to write a paragraph, then pass it on to the next student/pair who write the next paragraph, then pass it on again for the final paragraph.
Give students other choices.
They could write about a place they don’t want to visit/the last interesting place they visited/the most boring place they’ve ever visited.
Let them decide on the format: a blog post, a poster, a newspaper article, a comic strip…
Listening
There is a three-minute audio recording about straw bales in the course book your school requires you to use. 30 seconds in, the students are clearly incredibly bored, and starting to fidget.
Image from Pixabay
Why should they care?
Use an image.
Show them the picture above. Give them a minute to imagine this is real – they think about what they can see/hear/smell/touch/taste. Then tell a partner.
Give them the image in the middle of a piece of paper. They should draw the bigger picture, then compare it to a partner. Do they have similar pictures?
Set them a challenge.
Get them to think of a minimum of five different things they could use a straw bale for, then compare to a partner.
Somebody has dumped a straw bale in front of the school. It’s too heavy to lift easily. How will they move it?
Make sure they have a clear task to do while they’re listening.
The first time they listen, they could check predictions they’ve made before listening.
Get students to come up with three questions they want the answers to. They can be as simple as ‘Why am I listening to a text about straw bales?’ 🙂
Use the audio in other ways.
Break it into 30-second chunks. After each chunk, students should tell a partner what they remember. They could also come up with one question they think will be answer in the next section.
Pause the audio at a particular point and ask the students what they think the next three words are. You can decide on these points before the lesson if you want to focus on particular pieces of language. This can build students’ confidence when listening to English if you choose chunks of language students are already familiar with.
Reading
There’s an article about gender pay gaps in the news, which you think is an important issue and should be discussed with your students. Some students have previously said they would like to read ‘real’ things in class, but in the lesson the students just aren’t interested in the article, and you end up moving on to something else after a few minutes.
Why should they care?
Deal with part of the topic first.
Have pieces of paper around the room, each with the beginning of a statement. Students walk around and write as many sentences using these beginnings as possible in two minutes. Examples might be ‘Women are…’ ‘Men are…’ ‘Women can’t…’ ‘Men can’t…’ ‘It’s important for women to…’ ‘It’s important for men to…’
Ask students to list five jobs where people get paid a lot of money, and five where they don’t get paid much. They compare lists with other students, then decide whether they think more men or women do those jobs.
Use a word cloud. Wordart.com allows you put a whole text into their creator.
Students have five minutes to write as many sentences as they can using the words in the word cloud. These become predictions – they read the text to check what was included.
They choose one big word, one medium word, and one small word, then predict how these are connected to the story. You could also give them the headline to help.
Reflect real life.
Show students the headline. Ask them if this is something they would read about in their own language. Encourage them to discuss why or why not. If they say they would, ask them to read it. If they wouldn’t, ask them to choose another article from the BBC homepage (give them a time limit). In both cases, get them to tell a partner what they think they’ll still remember about the article tomorrow.
We often read online articles by skimming them quickly as we scroll down the page. If you have a projector in your classroom, replicate that process. Scroll down relatively slowly, but fast enough that students can’t read everything. When you get to the bottom, minimise the window and ask students to tell their partner what they saw, what they understood, and what (if anything) they’d like to go back and read in more detail.
Work with the language.
Ask students to find phrases which describe companies or replace the name of the company, e.g. ‘major companies’, ‘organisations with 250 or more workers’, ‘the carrier’, ‘the firm’. They discuss why these phrases were selected in each case.
Get them to list five different sentences with a percentage in them, e.g. ‘Many financial firms feature in the list, including the Co-op Bank – where mean hourly pay is 30.3% lower for women.’ or ‘It said 7% of apprentices last year were men, compared with zero in 2016, while 41% of roles involving helping at children’s tea time were filled by men – compared with 25% in 2016.’ They can analyse the structures these percentages appear in, e.g. ‘X is % lower for Y.’ or ‘% of X were blah blah blah – compared with % in year’
Grammar points
You’ve recently taught students how to use the passive in news articles. In a follow-up piece of writing, there is no evidence of passives at all.
Why should they care?
Contextualise.
Make sure that example sentences you use are all taken from clear contexts, not plucked at random from thin air. Context can really help students to understand new grammar.
After doing a practice exercise, ask students to choose three sentences. For each sentence they should add a minimum of two sentences before and two after, making a longer paragraph or dialogue. They could leave a space where their chosen sentence appeared for other students to remember what it was.
Get them to notice how it’s used outside the classroom.
Ask students to open an article from English-language news at random. They should underline all of the passive structures they can find. Afterwards, they can compare usage of the passive in different kinds of article – for example, is it used more in articles describing a crime? A sports event? An election?
Send students on a treasure hunt. Ask them to find one example in the news of each kind of passive you have studied, e.g. present simple passive, past simple passive, present perfect passive. They should find as many as they can and write out the full sentence, all within a specified time, for example 15 minutes.
Compare and contrast.
Give students pairs of sentences in the active and the passive, with each sentence in the pair conveying the same information. Ask them to choose their ‘favourite’ sentence in the pair and say why. For example: ‘The dog ate the cake.’ ‘The cake was eaten by the dog.’ ‘Somebody stole my bag.’ ‘My bag was stolen.’
Show students a 2-3 sentence paragraph including a passive structure. Ask them to translate it into another language they know. They then use the translation to analyse differences between how the idea of a passive is expressed in their own language(s). For example, emphasis on the object might be conveyed through a change in word order but no change in the verb form.
Add it in.
Give students a short news article in pairs. Ask them to add three passive sentences into the article, wherever they like. They can then compare the results to another group.
Tell students you expect to see a minimum of two passive structures in the news article you want them to write. Include this in criteria for peer checking before the article is handed in.
Vocabulary
You introduced a range of words connected to clothes in your last lesson, like ‘button’, ‘zip’, ‘sleeve’. During a revision activity at the beginning of this lesson, the students need a lot of prompting and they can’t really remember any of them accurately.
Why should they care?
Find out what they know.
If you’re working on vocabulary from a particular lexical set, do a board race first. In this case, divide students into two teams. They race to write as many clothes words on the board as possible in five minutes. Teams switch and work out the points for their opponents: one point for completely correct, half a point if there is a spelling mistake.
Show them pictures of clothes – three or four items is enough. Ask them to list as many things they can see in the pictures as possible. Point to various things and ask ‘What’s this?’ to prompt students to notice features like the buttons or sleeves, not just the items of clothing themselves.
Help them to notice the gaps in their knowledge.
Display all of the words you’re planning to teach on the board. Ask students to draw pictures for as many of them as possible, but not to worry if they don’t know any of them – they will by the end of the lesson! To reinforce this, repeat the same activity at the end of the lesson and point out how much they’ve improved.
Give them the first and last letters of the words, like this ‘b_____’, ‘z__p’, ‘s_____e’. Ask them to complete the words to describe parts of clothes. Again, they shouldn’t worry if they don’t know them.
Add extra processing.
Don’t just ask students to read words from a flashcard, show them the picture and get them to remember the word. For extra challenge, they could then spell it. It’s better to do this chorally or in pairs/groups, rather than putting individual students on the spot, as this may affect their confidence if they can’t do it or increase their fear if they think they might be next.
Display all of the pictures on the board/floor. Students should write as many of the words as possible in their notebooks, then compare the spellings with the vocabulary list. To add challenge, you could get them to switch notebooks with somebody else for the checking stage.
Make it real.
Ask them to choose a word which is new for them. They should think of one time they would expect to say/write the word, and one time they would expect to read/hear it. For example, they might say ‘button’ if they’ve lost a button, or read it in a craft magazine which tells them how to make a teddy bear.
They choose three new words they want to remember, and write them into short sentences connected to their lives, e.g. ‘I’ve lost three buttons from my coat.’. As an extension, they could then google the sentences and see if they exist on the internet anywhere.
All of the vocabulary tips can be connected to the idea of ‘hooks’. This is a metaphor I use to describe how you remember new information. The more hooks you hang something on, the more likely it is to stay where you put it. When you think about learning new vocabulary (or grammar for that matter), you need to give the students as many hooks as possible to ‘hang’ the new vocabulary from and keep it in their heads.
Pronunciation
When you ask students to repeat sentences after you as part of a drill, they sound really bored and/or refuse to do it.
Why should they care?
Do you care?
Record yourself doing some pronunciation work. Listen back to it. What do you think your tone of voice and body language conveys to the students? What does your intonation sound like?
Before you drill anything, imagine somebody is going to ask ‘What was the point of that?’ Do you have a good answer for them?
Play.
Experiment with different tones of voice, speeds, characters (the Queen, Arnold Schwarzenegger…), positions (standing, sitting, superhero poses)…
A really popular activity at my school is a stickman drill, where students are in teams. Each team gets a stickman, with one or two extra features of their choice, like a hat or an umbrella. Each team repeats the sentence. Whoever the teacher decides did it best can remove part of their opponents’ stickmen. The aim is to have the most complete stickman by the end of the game. [I still haven’t actually tried this, but I’ve seen it used many times!]
Add challenge.
Don’t just ask students to repeat the same sentence again and again. Get them to change parts of it. For example, in the first sentence of this paragraph, you could change the verb (ask), the person (students), the infinitive phrase (to repeat the same sentence) or the time adverbial (again and again). This is known as a substitution drill. Students or the teacher can decide what changes.
Use key words or images as prompts, so students have to remember the language without having it all in front of them.
Add extra support.
Give students a minute to read and remember the language you’re going to drill, then close their books during the drilling process.
Break down longer sentences into smaller chunks, then put them back into the full sentence. This is known as backchaining if you do it from the end of the sentence.
*I recognise that a lot of the tweaks I’ve suggested above may more appropriately answer the question ‘What can I do about it?’, but I find the phrasing ‘Why should they care?’ adds a bit more impact when I’m asking my teachers!
Have you tried any of these tweaks? What other little tweaks do you use to encourage students to care more about activities in class?
P.S. This blogpost has been in the back of my mind for a while now, and reading this post about lead ins by CELTA train is what made me actually write it today 🙂
When I was looking through my diaries yesterday to write my post about starting different teaching jobs, I opened a diary at random and came across a folded handout:
What was so confusing was that it was from 16th June 2005, so two years before I started CELTA, and I had no memory of it at all. At that point I was coming to the end of my first year at Durham University, and it was just after our exam period had finished.
When I opened it up, it said:
Thank you for helping us out today! We hope that your participation will be fun and helpful to the students. This worksheet will give you some background information and ideas for activities to help the students with their speaking on Saturday.
The exam
The students are sitting the Cambridge KET exam. The oral paper lasts about twelve minutes. [The exam was then described.]
Today’s Exercise
To prepare for the test, it is important that they gain confidence in speaking to and understanding people they have never met before, perhaps with accents to which they are not accustomed. It is also important for them to have practice with the exam tasks in a ‘real’ situation outside the classroom. […]
We will start by dividing the students into groups with an even number of volunteers in each group. You can then take your group into another classroom or area where you can do a number of icebreaker games, followed by some more formal conversation practice, for about 90 minutes. Then we would like you to take your groups into Durham to give them practice in making questions and finding and relaying information as they will in section 2 of the exam.
Overleaf are a number of activity ideas for you to try. You don’t have to do them all, and you can use your own judgement about which activities will work, and if you have your own ideas please feel free to try them.
I really like this way of helping the students to meet people outside their campus, and to make exam practice more realistic for them. It’s also a great example of how you can show non-teachers what to do to help them to interact with and assist learners, without it being too much of a strain for either of them.
Sadly I didn’t write anything about how I felt about participating, but I’m assuming it wasn’t that traumatic or dramatic as it had completely disappeared from my memory. I wonder if there are any other teaching connections hidden in my diaries? 🙂
For the past six weeks or so I have been sharing a flat with a couple who only speak a few words of English and German. When I moved in my Polish was probably hovering around A2, having received a boost over the summer from my reading, writing and use of a grammar book. I was still quite hesitant about speaking, and had only really started to build my confidence during a weekend away organised by my flamenco teacher, again with a few people who didn’t speak any English but who still wanted to communicate with me. Both the people on the flamenco weekend and the couple I was living with were great interlocutors for me, patient, happy to rephrase and repeat themselves as much as necessary, and supporting me in trying to communicate my ideas. The woman I lived with was also very good at correcting me consistently which had a massive impact on my grammar.
One of two kittens entertaining us when we weren’t dancing flamenco 🙂
Six weeks on, it’s like I’m a different person. I feel like my Polish is probably now into B1. I can speak about most everyday things, my accuracy has improved in quite a few areas, and my confidence is at similar levels to my much stronger languages. I’m not normally shy about pushing myself to speak, which is why the last year has been so strange for me as I was very reluctant to speak Polish if I didn’t have to. I felt like I didn’t really know what language I was speaking in, and it was a real mix of Polish, Czech and Russian. I’m very glad to be past that point, and feel like I’m now in a very good place to continue improving.
On reflection, I’m also wondering whether having such a long (almost) silent period has also helped me to speak more fluently and more confidently at this point than at the same point with other languages. A year of building my vocabulary and listening to and reading whatever I could has certainly helped me improve my understanding, and I feel it’s also made me more accurate when I finally did speak, although I’m sure Czech and Russian probably also had something to do with it.
This is the most conscious I’ve ever been of my speaking progress, as I’ve either already been at least B2 when I’ve been immersed in a language, or I haven’t been in a complete immersion situation for more than a couple of hours at a time. Six weeks of having to speak Polish most mornings and evenings for at least a few minutes meant I had no choice but to communicate. Talking about things which were relevant to me and trying to explain things which had happened during a very eventful few weeks, sometimes with Mr. Google’s help, extended my language and provided a huge amount of motivation.
I know that it’s theoretically possible to create similar situations through the use of Skype conversation partners for example, but I’ve never had the motivation to do it before, confident that I’d eventually learn as much as I needed to through constantly plugging away at the language. After this experience of immersion, I think I might try harder to recreate it with the next language I want to study (not sure what yet!)
I’ve only had two or three Polish lessons, and I’m wondering just how much and how accurately I can learn without having any, even though I know I definitely want some at some point as I need correction. Watch this space…
I’m on my way to Warsaw for a weekend on a part-time CELTA. All of the announcements on this modern train are in Polish and English.
The young woman next to me is reading a biography of Morrissey in English, but her phone is in Polish. It’s quite a challenging read from the snippets I’ve looked at, so she’s clearly a confident English user. She’s near the end of the book.
A cheeky Amazon affiliate link to a game I really enjoy 😉
A few rows in front of me, four students from different countries are playing Monopoly Deal, using cards written in English. There is at least one French person and one Polish. I’m not sure about the other nationalities, but all of them are using English fluently as a second language. Three of them are familiar with the game already, and one is learning. In the course of the game, she is asking a series of questions and clarifying the rules with the other three players. There is a lot of laughter and joking, and they’re clearly enjoying themselves. Accents make no difference, nor do grammar mistakes. They are using English to communicate and it is working for them. It’s a pleasure to listen to them negotiating meaning so fluently and without worrying about what they are saying. [They carried this on for the entire three hour journey – great work!]
Are you tired of your students running out of things to say? This book will show you 12 different ways to adapt a wide range of speaking activities to get more out of them in the classroom, divided into four categories:
– Preparing to speak
– Adding repetition
– Extending speech
– Having a reason to listen
There is a full index showing you what kind of activities the techniques work particularly well with, as well as worked examples of each technique in action. All of them are ready to take into the classroom with the minimum of preparation.
Richer Speaking is available to purchase at Smashwords and Amazon [affiliate links] and costs less than 1USD. It’s part of the roundminis series, all of which you can spot on their titles page by looking for similar covers to mine, and all available at the same bargain price.
I could never have done this without the help and encouragement of Lindsay Clandfield and Luke Meddings at the round and editor Karen White, as well as the people who helped me come up with some of the ideas included in the book. Thank you so much!
I hope you find Richer Speaking useful, and I would of course appreciate any and all feedback which you have.
Enjoy!
Reviews
I’ll try to collect any reviews that I see here. Thanks to everyone who has said such nice things about the book!
Some really great ideas for developing speaking tasks in Richer Speaking by @sandymillin. Feeling very inspired!
Many of the activities should be self-explanatory, but if not, you can watch the recording to find out how to run the activity. If you’re a BELTA member, you can watch recordings of webinars from the past six months. Anyone can watch older webinars from the series. My recording is here:
I’d be interested to hear how you use the activities in your own classrooms, and what adaptations you needed to make to fit your context.
I came up with this activity for our getting to know you session during induction week at IH Bydgoszcz this year, so I’ve only used it with teachers, not students. I’d be interested to know how it works with real classes! I was inspired to create it by seeing the list of hobbies on our new teachers’ CVs, and I realised that it can take a while to discover which free time activities we have in common. I hope this can prove something of a shortcut. Thanks to Lizzie Pinard for helping me to figure out how to run the activity.
Students draw three circles on a piece of paper.
In each circle, they write one of their hobbies.
The teacher introduces and drills functional language appropriate to the level.
For example, at lower levels you might introduce:
“I love _____. Do you?”
“Me too.” / “Not really. I prefer ______”
Or at higher levels:
“Would you be interested in _________?”
“I’d love to.” / “I’m not really into that. I’d rather _______”
Demonstrate the activity with teacher-student, then student-student in open class.
The teacher says “I love hiking. Do you?”
If the student says, “Me too”, the teacher writes their name in the circle and asks another question to find out more, noting that information too. For example “Where do you go hiking?”
If the student says, “Not really. I prefer going to the cinema.”, the teacher writes their name and the hobby outside the circles, and again asks one more question to find out more.
Students mingle and speak to as many people as possible to find out about their hobbies.
Students sit with a partner and share what they learnt. They could also say if there are any hobbies they’d like to try or find out more about. Again, functional language could be introduced here to help students discuss their answers more easily, especially at lower levels: “I love hiking, and so do Maria and Ahmed.” “Stefan likes reading science fiction and he said Terry Pratchett is really good, so maybe I’ll read one of his books.”
Possible open class feedback options would be: “Put your hand up if you found somebody with the same hobby as you.” and/or “Who has the most interesting hobby?”
Update
Tekhnologic took this idea and ran with it, creating video diagrams showing how to set it up and introducing a Venn version which I think is an improvement on the original!
A very simple activity, which works very well as a filler, as revision, or as the prompt for a whole lesson. All you need is a window with something going on outside.
The view from our classroom at IH Sevastopol
Ask the students to look out of the window and tell each other/you what they can see. With my elementary students I encouraged them to use a few structures they’d recently studied:
There is/are…
Present continuous
NOT: I can see… I can see… I can see… (which is what they started with!)
Feed in any vocabulary and structures that they might need, and make a note of them on the board. The students should focus on speaking as much as possible for now, rather than note-taking. Give them time and space to think of ideas – it took my students time to warm up, but then they came up with lots of ideas.
When they’ve run out of steam (after about ten minutes for my group of four elementary students), let the students make notes based on what you put on the board, as well as ask more questions about language.
I repeated the activity a week later, and the students managed to remember about half of the new vocabulary they’d used the first time, as well as adding adjectives and more description without any prompting from me at all. They had resorted to ‘I can see…’ again, but after a reminder from me started to use ‘There is/are…’ and present continuous again.
I’ve read many times about this kind of activity, but this is the first time I’d used it, and it definitely won’t be the last!
[I wrote this post nearly a year ago, but never pressed publish. Better late than never!]
Anyone following my blog will know that CELTA took over my life in August last year (2014), and will continue to dominate until the same time this year (2015). I’ve been building this list in my head for a while, and it’s finally time to get it onto the blog.
It’s arranged into categories, with subtitles and topics in bold to help you navigate. There’s a lot here, so just use the bits you need as you need them rather than trying to look at all of them – if not, you’ll end up being overwhelmed!
A quick way to find what you need it to press CTRL + F (CMD + F on a Mac) and type a key word connected to what you’re struggling with, like ‘TTT’, ‘instructions’ or ‘writing’ – this will take you straight to the relevant section.
The links on this page have been updated in March 2024 by Phil Longwell (thanks Phil!). Please let me know if any of the links are broken so I can update them, and feel free to add suggestions to the comments. I add links to the page regularly as I write/find more posts, so do keep coming back!
Before the course
CELTA is a very intensive experience, and it’s important to know what you’re getting yourself into. Take a look at these to give you an idea of what to expect.
Cambridge English has a 30-minute webinar called The Ultimate Guide to CELTA which details different types of CELTA and tells you what to expect from the course. (Thanks to Viacheslav Kushnir for telling me about this)
Seth Newsome wrote about his experience on the course, reflecting on the positives and negatives, with links to other posts he wrote about the process of doing the CELTA if you’d like a bit more depth. Tesal described the challenges of the course and what he got out of it. Rachel Daw wrote a week by week diary of her course, showing you what it’s like in depth: one MTWTF, two, three, four. Vincent Sdrigotti, an experienced teacher of French origin, wrote about the ups and downs of the whole 4-week course as well as the preparation he did before it started. Here’s one quick quote from that post:
Is the CELTA worth it? As a course and as an experience I would have to give a resounding YES!!!
Although the old interviews on Adi Rajan’s blog were called ‘Life after CELTA’, they give you a great idea of what different professionals at various stages of their careers got out of the CELTA course and why it was worth doing, even if they already had a PhD in one example! My favourite quote is from Vaidehi Kenia:
What running 5 miles daily for a month will do to your physique, the CELTA will do for your mind.
Since March 2020, fully online CELTAs have been possible. Two trainees from the first online CELTA I tutored on shared their experience and tips of their full-time four-week course: Yawen Jin and Nadia Ghauri. Trainees from a part-time fully online course run from Cork, Ireland share their experience and tips, and there are specific testimonials from Yuhi Fujioka, and from Philip Ryan, whose course was forced to move online half-way through when lockdown arrived. Joanna (who got a Pass A on an online course) asks whether you can be a good teacher after a CELTA 100% online course.
If you’re still not sure whether to do the course or not, Chia Suan Chong, a certified CELTA trainer, describes (2016) 10 things she likes about the CELTA, all of which I agree with. If you’re a more experienced teacher, you might be interested in Jason Anderson’s research on how trainees who came to the course with experience feel like they benefitted from CELTA.
Adam Simpson recommends 10 books to read before you start your CELTA [updated link]. While you’re unlikely to get through all of them (due to the expense if nothing else!) I’d definitely recommend getting copies of either 1 or 2, plus 3, and possibly also 6. Another book that you might find useful is the Ultimate Guide to CELTA by Amanda Momeni and Emma Jones which is available as an ebook (thanks for recommending this Helen Strong).
Martin Sketchley tells you how to prepare for the CELTA in 9 easy steps, with advice about choosing a centre, things to do before the course and advice about working with your peers.
It’s particularly important to build your language awareness as much as possible before the course. JoGakonga at ELT-Training has a pre-CELTA grammar webinar (30 minutes), as well as a comprehensive grammar for language teachers course on her site.
If you’d like to do a course before your course, you could invest a little money in the ELT Campus Complete CELTA Preparation Bundle, online training in key ideas, teaching methods and concepts, as well as a grammar refresher. Or you might find these two free courses useful from ELT-Training: Applying for CELTA and the CELTA Toolkit (including 50+ videos and resources on CELTA terminology, classroom management, lesson planning, teaching methods, concept checking, teaching grammar, vocabulary, phonology, receptive and productive skills, and guidance with all four CELTA assignments).
Another area that people often find overwhelming is the amount of terminology thrown at them. ELT Concourse helps you out by introducing some of it. I’ve put together a Quizlet class with most of the terminology you might come across (though remember the same thing might have different names in different places!) If you’ve never used Quizlet, here’s an introduction to it.
If you’d like to do a course before your course, you could invest a little money in the ELT Campus Complete CELTA Preparation Bundle, online training in key ideas, teaching methods and concepts, as well as a grammar refresher.
Brushing up on your technology skills could also help you out. You’re going to spend a lot of time in front of a computer, and every timesaver you can learn will make a difference. Regardless of how confident a Word user you are, it’s worth checking out my friend Liz Broomfield’s very clear posts about making the most of Word. She uses Word for Windows. If you have a Mac and can’t work it out, Google it first, then ask me and I’ll try to help – I have Microsoft Office 2008 for Mac.
How to use ‘Track changes’ to add comments to your work (useful if you want to make notes to yourself along the lines of ‘Don’t forget to finish this!’)
Keyboard shortcuts save a lot of time in the long run. These are 100 for Windows and some for Mac too. If you’ve got a long time before your CELTA, working on your touch typing will help you now and later. On a side note, set up a filing system on your computer and start naming files with lots of detail in the file name so you can find things easily in the future. “Document 1.docx” won’t help you, but “Personality adjectives and definitions NEF Pre-Int SB p6 and SB p145 U1B.docx” will. I always try to include the book, chapter and page numbers so I can use the search function to find things again quickly in the future.
Since the COVID-19 pandemic started in March 2020, teachers increasingly need to know how to teach online, particularly using Zoom. I have a post with Ideas for teaching group lessons on Zoom which provides a starting point of activities (most are not Zoom-specific and would work on other platforms). If you’ve never used Zoom before, you may want to buy a (very affordable!) copy of Teaching with Zoom: A Guide for Complete Beginners by Keith Folse (Amazon/Smashwords affiliate links). ELT Campus have a set of webinars showing how to teach English online. Sara Katsonis describes her experience of being a CELTA trainee when the course had to move from face-to-face to fully online – she got a Pass A despite (or maybe because of?) the challenges.
If you set up your goal as “I’m gonna gits me an A!” then, well, it’s a worthy goal and all, but you’ll probably give yourself an ulcer, and stress so much about whether you’re doing enough or doing well enough that your freaky-outy stress will cause you to lose focus and actually do worse. Don’t look for a magic bullet or secret formula – there is none, and trying to guess at the magical combination of factors that leads to an A will just cause you to get even more freaky-outy. Always remember that it’s not a competition, so if you see someone who seems to be doing better than you, hey, you’re in it for four weeks with that person and you are quite possibly friendly with them – you are not in a race. There is not just one gold medal. Their good work does not mean you’ll get edged out for the one top spot, because there is no “one” top spot.
By the way, when I did my CELTA, one of my fellow trainees got a Pass A with no prior teaching experience, so it is possible! However, in the courses I’ve tutored on so far, I’ve yet to see an A candidate. Update (May 2017): I’ve seen a couple of A candidates now, and they’ve been very hard-working, and followed all of these tips from Ricardo Barros, among many other things!
Nicky Salmon, a CELTA trainer, tells you how to write CELTA lesson plans to make the documents as useful as possible for you and your trainer, so that you’re ready to give your students the best possible lesson.
The ELT Concourse guide to lesson planning covers aims, procedure, staging and a useful checklist of things to consider when planning. They also show examples of present-practice-produce and test-teach-test lessons, along with a guide to helping you decide between these two possible ways of staging a lesson (there are many more!). Pete at ELT Planning lists lots of different ways of staging your lessons (though only the names) and explains why it’s been important to him in his post-CELTA career. Later he put together a post with a breakdown of how to stage different lessons, covering most (all?) of the main types of lessons you may teach on CELTA, both language and skills. He’s also got 12 tips for writing lesson plans, not all of which apply to CELTA-level courses, but which are still useful. John Hughes suggests a before/while/after you watch approach to video lessons, most of which works for reading or listening.
Jo Gakonka at ELT-Training has an introductory webinar and free sample (7 minutes) of her course lesson planning made easy covering aims, procedure, language analysis, lesson frameworks, planning from a course book and more.
When writing aims, it can be useful to consider how SMART they are, as this will help you to know when and if you’ve achieved them – Andriy Ruzhynskiy shows you how to do this in a 10-minute webinar.
I have a step-by-step guide to setting up an information gap, a speaking activity in which each student only has part of what they need to complete the task and they need to speak to others to complete the information.
Jo Gakonga has a webinar on analysing language and anticipating problems (21 minutes). She also has a webinar introducing you to PPP, TTT and TBL – three different ways of presenting language, whether grammar, vocabulary or functions (35 minutes). It will tell you what the abbreviations mean!
Jo Gakonga has a series of videos on teaching vocabulary in the free CELTA toolkit at ELT-Training (Anatomy of a word, Ideas for teaching vocabulary, Exploiting text for lexis, Digital tools for teaching vocabulary, Concept checking for vocabulary).
Adrian Underhill explains how the phonemic chart (which he put together) works in this one-hour introduction on YouTube, full of great techniques for introducing the sounds to your students. He also has a very useful blog breaking down the sounds and showing you how to find them in your mouth, and how to teach them to your students. For a shorter introduction to the same chart, try Jo Gakonga‘s webinar: introducing the phonemic chart (37 minutes). Rachel Daw recommends books to help you familiarise yourself with the phonetic alphabet (best used before the course). ELT Concourse has a series of activities to help you feel more comfortable with transcribing pronunciation.
Pronunciation Bites has a collection of links to online transcription tools, along with reviews for each. It also tells you how to download IPA (International Phonetic Alphabet) scripts onto your computer, and how to use them. Don’t forget to put the phonetics into Lucida Sans Unicode font to make sure they’ll print on any computer (I hope!)
ELTchat was a weekly hour-long Twitter conversation which happens every Wednesday. In February 2012 there was a discussion, several years ago, about the IPA, including reflection on its usefulness and suggestions for how to exploit it.
Drilling is not a very fashionable technique in language teaching these days, but it’s still really useful. Jo Gakonga has a 2022 webinar on drilling when teaching beginners (15 minutes) and this older one on the same topic. She several videos on connected speech in the Phonology chapter of her CELTA toolkit. (Weak forms, Word stress, Sentence stress, Intonation).
Keeping learners interested (16 minutes) – this shows you how to tweak activities easily so they are more interesting and motivating for the students, and will help you with pacing.
Jo also has a number of videos on the use of different resources in the CELTA toolkit (Using stories for language learning, Using songs, Using dictation, Warmers and Fillers ).
Rachel Daw summarised all of the things she learnt while observing her peers and receiving feedback on TP in the first two weeks of her CELTA course in CELTA Teaching Practice: some tips (an incredibly useful post!).
Nicky Salmon offers tips on how to reflect on your teaching during CELTA courses, including examples of language you can use. As she says, reflection is a skill which takes time to learn, but is one of the most important things you can do to develop professionally.
I have dedicated blogposts with links for business English teaching and doing the FCE (Cambridge First)exam (this one is for students, but should still be useful) – just one example of the many EFL exams out there. Teaching academic English is another possible avenue. Jo Gakonga has a webinar on teaching beginners, which includes tips on drilling (22 minutes).
There are four assignments on the CELTA course. I’ve divided the links by assignment. Jo Gakonga has a general library of freely-available reputable resources for all four assignments.
Focus on the learner
Jo has a webinar introducing this assignment in the CELTA toolkit at ELT-Training. (18 minutes) Remember that the rubric might be slightly different at your centre. Her tips are still useful though.
Skills Related Task
Jo has a webinar introducing this assignment in the CELTA toolkit at ELT-Training. (16 minutes) Remember that the rubric might be slightly different at your centre. Her tips are still useful though. She also has one on using authentic materials. (38 minutes)
Lessons from the Classroom
Jo has a webinar introducing this assignment in the CELTA toolkit at ELT-Training. (12 minutes) Remember that the rubric might be slightly different at your centre. Her tips are still useful though.
Jo has a webinar introducing this assignment. (12 minutes) Remember that the rubric might be slightly different at your centre. Her tips are still useful though.
The links from the After the course section of this page will also help you here.
The main problem most people have with the CELTA is the workload. It’s not unusual for some trainees to stay up for most of the night and forget to sleep, and there are always some people who don’t hand in lesson planning documents because they ran out of time. In a 10-minute webinar, Lisa Phillips offers some tips for time management for teachers in general, but many of them apply to the CELTA course too. Remember to ask for help if you need it – you’re not bothering people, and you might find they’re in a similar situation. As for your trainers, that support is what you’re paying for!
I know I included it in the lesson planning section, but these suggestions for approaching planning are designed to make your life easier, so I think they’re worth repeating.
Don’t forget to take some time for yourself during the course. You’ll benefit from it more than you will by just pushing on through, and no matter how important the CELTA is, your health and well-being should take priority. Get enough sleep, look after yourself and take regular breaks. If you need inspiration this might help:
Here are a few of videos I send out to encourage my trainees to take a brief break – I won’t tell you what they are so it’s a lucky dip! One, Two, Three – each one is 3-4 minutes, clean, and should make you laugh!
And just in case you think you’re entering a serious profession involving a lot of work, take a look at the cynical world of EnglishDroid – he’ll burst your bubble quickly – or rather he did, because the site was deleted with no warning. This TEFLtastic post reflects upon it.
Once you’ve finished your CELTA, you’ve got all this to look forward to. But first, you need a job. Here are a few places you can look (but there are many, many more!):
To continue the reflective cycle you started on CELTA, you could keep a reflective journal, as recommended by Dale Coulter. Another option is to write your own blog, which I’ve found really useful. However you choose to do it, Jason Renshaw explains why reflection should be a vital part of any teacher’s development (and offers another suggestion for how to keep a reflective journal). Oh, and if you want to send a few pennies my way, you could investigate ELT Playbook 1, an ebook of 30 reflective tasks designed for new teachers, written by me and only costing around 5GBP/5.50€ 🙂 If you complete all five tasks from a single section, you can earn yourself a badge to put on your CV or social media, showing potential employers and/or students that you are continuing your development after the course.
The best resource on Twitter is ELTchat, a weekly one-hour chat on topics chosen by participants. Summaries of chats going back to 2010 can be found in the Summaries index on the website and cover pretty much every topic you could possibly imagine related to ELT teaching – if it’s not there, you can suggest it for a future chat.
You can join a teaching association to get support. Ask around and you might find one in the city or country you’re working in, like ELTABB in Berlin. You could also join IATEFL (UK-based) or TESOL (US-based), international organisations which also have lists on their sites of country-based affiliates, like BELTA in Belgium or TESOL France (both of these websites also have lots of other resources). Here are some of the benefits of joining a teaching association.
Cambridge English Teacher and the International Teacher Development Institute are online communities with forums, webinars and courses you can follow. CET is paid, but you can get benefits like cheaper subscriptions to journals with your membership. iTDi contains lots of free content, and a couple of more extended paid courses.
Conferences are a great source of ideas. Both IATEFL and TESOL hold multi-day conferences each year, and although the IATEFL conference is the highlight of my year (!), they can be quite expensive. IATEFL streams some sessions from the conference, and these are available to watch after the event (for example Harrogate 2014). One- or two-day local conferences can provide lots of inspiration. There are also online conferences and webinars provided for free. David Harbinson has a long list of sources for webinars to start you off.
There are various journals and magazines dedicated to ELT, full of articles from around the world with lots of great ideas and issues to think about. The IH Journal is available free online. Most teaching associations have their own newsletter or journal. Other magazines include English Teaching Professional and Modern English Teacher, both of which are subscription only – you can choose whether to get them online or as a hard copy.
Matt Noble regularly posts reflections on being a trainer on his Newbie CELTA Trainer blog, as does Ricardo Barros on his. Anthony Gaughan talks about a completely different way of doing CELTA on his Teacher Training Unplugged blog. He has also written an incredibly useful step-by-step guide explaining the process of becoming a CELTA trainer: part 1, part 2, part 3, part 4.
If you’d like to work on your own skills as a trainer, you might want to get yourself a copy of ELT Playbook Teacher Training, my book of 30 reflective tasks in 6 categories, as you can see below (Amazon/Smashwords affiliate links).
In March 2020, the COVID-19 pandemic meant lots of things changed, including the sudden need for provision of fully online CELTAs. Brendan O Sé from University College Cork, Ireland, blogged about running their first fully online CELTA. James Egerton talks about how IH Rome Manzoni took their CELTA course online and offers tips for other centres doing the same. Angelos Bollas has a demo lesson with upper intermediate students on Zoom which you might want to use to show trainees how it works from a teacher’s perspective:
Ruth Lavina shares 10 things she learnt on her CELTA, covering a whole range of categories above. I particularly like number 7, because trainees often forget it!
As I said at the start, please let me know if any of the links are broken so I can update them, and feel free to add suggestions to the comments. I hope these links are useful!
What do you mean, you don’t understand? 😉 The face you’re pulling right now is the one which the students will show you if you attempt to set up a ‘complicated’ speaking activity and the instructions go wrong. Information gaps are activities which can work brilliantly if you set them up efficiently, and fall completely flat if you don’t.
Before we go any further, what exactly is an information gap?
An information gap task is a technique in language teaching where students are missing information necessary to complete a task or solve a problem, and must communicate with their classmates to fill in the gaps. It is often used in communicative language teaching and task-based language learning.
They’re very common in coursebooks, and are often used to practise specific language points at the ‘freer practice’ stage of a lesson, but they can easily be used for fluency practice without a particular grammatical focus too. Boggle’s World ESL has some examples if you’re still a bit confused.
Here’s a simple guide to setting one up, including some potential problems so you can think about whether/how you’ll check instructions.
Step 1: Allocating roles
Tell your students what role they will take in the info gap.Don’t move the students yet! To make the rest of this explanation easier, I’ll say you’re doing one with two sets of information, so roles ‘A’ and ‘B’. A ‘C’ in brackets shows what you would do with an info gap with three sets of information.
Potential problems and possible solutions
The wrong number of students, e.g. an odd number when you need pairs. Don’t work with the leftover student – you need to be free to monitor and help! Instead, have two As or Bs in one pair, and tell them how to share the work, e.g. take it in turns to ask/answer a question. Think carefully about who your two As/Bs should be to make sure you don’t end up with a strong student doing all the work or a less dominant student with no opportunity to speak because their partner won’t let them get a word in.
Students can’t remember which role you allocated. Before you go any further, ask them to put up their hands to check they know who they are: “Who’s A? Who’s B?”
Step 2: Preparation time
Before your students speak, they need time to understand the task and work out what they’re going to say. Group As together and Bs together: AAA BBB (CCC) to prepare. For example, for a question and answer task they could work out the questions. For a ‘describe your picture’ type task, they could describe the picture they have to each other. This will give them a chance to rehearse and to ask you for any language they need.
Potential problems and possible solutions
Students start trying to do the actual information gap. Make it clear that this is preparation time and that e.g. they should only write the questions, not answer them – their partner will do that later.
Step 3: Information gap
Your students should now be ready to do the task. Regroup them AB(C) AB(C) AB(C). When they’re sitting in the right places, tell them exactly what they need to do. Something like this:
A, you ask your questions. B, you answer them. Then B, you ask, and A, you answer.
or
A, tell B one thing in your picture. B, tell A if it’s the same or different to your picture. If it’s different, circle it. Then B, tell A one thing in your picture. Find 8 differences between your pictures. Don’t look at the other picture.
Potential problems and possible solutions
Students speak their own language. This is natural if the task is too difficult for them. They may not have had enough preparation time, so you could give them more. Encourage them to speak English, and tell them you realise that English might be slower, but they need practice to help them get faster!
They look at each other’s paper/sheet/picture etc. When giving your instructions, check carefully that students know they’re not allowed to look. You can also seat them back to back:
or in two rows facing each other with a large gap between. Bear in mind that this may create noise issues, although that can encourage quieter students to speak more loudly to make themselves heard, and helps students to get practice with phrases like “Can you say that again please?”
Students forget to write the answers/circle the differences etc. Check that they know what to do, and monitor during the activity so that you can remind them if you need to.
Step 4: Checking the answers
If students should now have all of the same information on their paper, they can compare their sheets side by side to spot differences/mistakes/missing information etc.
Otherwise, it’s good to return students to their original AAA BBB (CCC) groups to share the things they found out.
Step 5: Feedback
Don’t forget this stage! You need two parts:
Feedback on content: This can be as simple as ‘Did you find all of the differences?’ or ‘Did you both get all of the information right?’, followed by further checking of the problem areas.
Feedback on language: While you were monitoring, you were (hopefully!) taking notes of some of the language students were using successfully and any problems they may have had. Choose a few of these to focus on, and make sure you praise the good language too.
If I’ve done my job right, the image at the top should now make perfect sense 🙂 I made it off the cuff during a CELTA input session when the trainees asked me how to do this, and I thought it might be useful for others too. I hope it works!
Today I had the pleasure of presenting a Live Online Workshop for International House teachers around the world.
The topic was the use of images in the classroom, including an introduction to ELTpics. This was the abstract:
Picture this: ELTpics and images in the classroom
Images are the language of the 21st century. How can we exploit them to maximise our students’ language production? This webinar will introduce you to ELTpics, a collection of nearly 25,000 images shared by teachers and other members of the ELT profession and available for you to use in the classroom. Learn how to make the most of the collection with activities to use the ELTpics images, those in your coursebooks and those your learners bring with them every day.
You can watch a recording of the session, which will take you 56 minutes:
Almost all of the activities were taken from the blogs of various wonderful people, as well as the ELTpics blog. Here are the links:
Information about how to credit ELTpics images can be found on the attribution page of the ELTpics website.
I also shared two mosaic makers. On BigHugeLabs, you can use the Flickr links or images which you have on your computer. For Fotor you need to have the images on your computer first. I think the Fotor mosaics look nicer, and you have more options for layouts on them, but you can include more images in a BigHugeLabs mosaic.
Finally, you can download the slides, which will give you a summary of all of the activities (not all of them have links above):
[I believe you need a free SlideShare account to be able to download the slides]
I cancel about one lesson in four, normally the one on a Saturday. I’ve recently moved it to a Thursday in the hope that I’ll be more likely to have time then. I have two 90-minute lessons a week, the other being on Monday. We’ve never managed to make up a missed lesson, and since I pay on a lesson-by-lesson basis, this must create quite a lot of financial uncertainty, which I feel bad about.
At times, I hijack the lesson and tell my teacher exactly what activities I want to do. The last example of this was after she used a bilingual Quizlet set to introduce clothes words to me at the end of our Monday lesson. In a very rare spurt of motivation, I had twenty minutes on Wednesday night, and ten minutes on Thursday morning during which I managed to play with the words and kind of learn about 70% of them. I started the lesson by drawing pictures of clothes all over the board and writing the words next to them.
This took about 20 minutes. I then asked my teacher to define words for me, which meant she had to teach me verbs like ‘wear’, ‘get dressed’ and ‘put on’, and prepositional phrases like ‘on your head’, ‘on your feet’. She then turned the tables and made me define words for her. This whole process took 90 minutes, and meant we had no time to do anything she had prepared. I wrote notes throughout, and listened to and spoke more Russian than I had in any other lesson throughout the year. She told me: “You’re ready for it now.”
I constantly make demands about what I want from my lessons. My main demand is to have my lessons entirely in Russian (or as entirely as possible for a beginner/elementary student), but this is difficult because of the above statement/belief, that you have to have a certain amount of language to be ‘ready’ to speak/listen to more. This is not a choice I have in the real world, where I have to deal with whatever is thrown at me, and the person who’s speaking to me often doesn’t know how to change their language to help me understand.
We’ve also got into the habit of speaking English in class. In an average 90-minute lesson my teacher probably speaks about 10 sentences of spontaneous Russian which are not read from a piece of paper and/or accompanied by an English translation. I speak less than this, and occasionally read new vocabulary/sentences from the page, although this is not consistent – I probably only say about 50% of the new language that is introduced to me during any one class. Both of us have spoken a bit more Russian in the last couple of lessons because I’ve made more of an effort, but it hasn’t lasted long. The rest of the lesson is in English, including chats and all grammar explanations. I rarely have to produce any Russian that isn’t part of a drill based on an exercise from a worksheet. I’m trying to speak a bit more Russian in class now, but I don’t have a lot of the classroom language I need unless I ask for it to be translated, because I’ve never heard it or been made to use it.
Most of the published materials my teacher uses are taken from a text-only coursebook, with lists of vocabulary and dialogues, or a slightly more ‘designed’ coursebook with some pictures and tables. Both of them are through the medium of English. I have no idea how you find published materials to learn Russian if you don’t already speak English (this is true of a lot of none-EFL materials). We have occasionally used a website with some very entertaining short videos telling the story of John, a Canadian visiting Russia, which is available in various languages. The videos are very short – less than a minute each – and accompanied by subtitles in Russian or other languages if you want to read them.
We have never listened to any ‘real’ Russian in class, like music or videos, or any audio designed for the classroom. All of my listening practice comes from life outside the classroom, very rarely with support from an English-speaker to help me, but English speakers normally do the work if they’re there, rather than me! That means that most of the time I’m trying to piece things together myself, using what skills I’ve picked up from learning other languages, and the pre-intermediate Czech that I know. This has, of course, got easier as the year has progressed.
I demand context, trying to move away from isolated vocabulary. I constantly ask for the prepositions and cases that go with the verbs/nouns, even though I know I won’t remember them at the moment. I try to get as much new language in sentences as possible. Having said that, I find the Quizlet sets useful for building up sets of vocabulary in topics like the body or clothes. I’m trying to get exposure to as much language as possible while I have access to somebody who can mediate it for me. During a lesson which isn’t based on materials, we fill a notebook with random notes. There’s a lot of Russian here, but it’s almost all written – there’s very little speaking, very little controlled practice, and almost no free(r) practice at all, unless I instigate it. The bit of text you can see in the top-left corner of the page is the second half of twenty minutes worth of writing I did at home to force myself to produce an extended stretch of Russian.
In some classes, I give my teacher English sentence after sentence I’ve tried to say in Russian during that week, but didn’t know, ask her to translate them, then fail to learn them. This week we have a week off school and I’ve finally had time to dedicate to Russian. I’ve copied out the sentences onto cards (made from A4 pieces of paper cut into 16 rectangles, yellow because it’s a happy colour!), with pictures on the other side as prompts. There’s a huge backlog, and I have no idea how long it’ll take to actually learn them.
My teacher has a degree in teaching Russian. She is a native speaker of the language, who also speaks very good English and knows bits of other languages, so can occasionally tell me when grammar is similar to other languages I speak. She is a lovely person to put up with me. She puts a lot of time and effort into preparing lessons and materials. Here’s an example of a summary of tenses she made:
She’s also started making Quizlet sets for me after I showed her the site and she realised that it motivated me! I copy the sets she’s made and get rid of the English if I can, trying to make things Russian only. When I got ill and was given a special diet, she translated the sheet I was given by the doctor and made me a list of all of the food in Russian and English, with pictures for things I might not know. When I found out just before a lesson that my grandad had been taken into hospital, she took me for a walk in the park and we chatted, then wouldn’t let me pay for the lesson.
The last lesson we had was at my flat, and she decided to try something different. We labelled everything in my kitchen that I didn’t know the names of already. I’d been meaning to do this for ages but hadn’t got round to it. We did this entirely in English, with me asking ‘How do you say…?’ in English. I was never forced to use Russian, and I forgot to try. I could have practised using the words in sentences and spelling them – although I can read Russian confidently now, I still have no idea how to say a lot of the letters. We could also have played a describing game again, but I didn’t think about that until I was writing this.
When I have time, normally in three- to four-hour blocks about every six weeks, I transfer the language in my class notebook to a vocabulary notebook, organised by topic. This is the first time I’ve tried this approach, and I mostly use it as a dictionary. Copying the words/phrases helps me to recognise them, but I haven’t really used the notebook to learn.
With pictures and colours where possible…
…with English where it’s not. (or when I run out of motivation)
With colour-coding to show grammar patterns
I also use index cards to write out grammar and some vocabulary sets, particularly those connected to time. I try to have as little English as possible on the cards, and use regular layout and colour-coding to help me reduce the need for English. If there is English, I often write it in tiny letters that are difficult to see – I want Russian to be the first thing I see when I look at the cards.
Verb conjugation, time and reflexives
Time index cards, showing colour-coding
I then blu-tack them all over my flat. (Blu-tack is the one thing that I always take with me when I move to a new place!)
Cards start on the cupboard I look at when I’m getting ready in the morning/doing my physio exercises
They graduate to the inside of my front door when I think I know them. (Loosely arranged by grammar point, e.g. verbs at the top, and with the really easy stuff at the bottom)
Surrounding them with postcards makes me more likely to look at them (maybe…)
This is what my desk looks like in the process:
Some conclusions
Both the teacher and the student(s) need to have a lot of willpower to conduct the lesson entirely in the target language.
The student also needs to be given the classroom language they need to be able to operate in the target language.
The teacher needs to be flexible, to respond to the language that the student needs, the time they have available, and the mood they are in.
The student needs to make an effort to study what has been learnt in class.
Language should be introduced in context, rather than as isolated items. It should be learnt as chunks to start with, then pulled apart for grammar later.
Seeing language once is not enough. Students need to manipulate it, play with it, say it, use it, in class to help them remember it.
The student needs exposure to real language in the classroom environment to prepare them for what they will encounter outside the classroom.
Some methodological terms which I can hear you shouting at me
March and April have beenprettybusy, both personally and professionally. They came not long after I’d finished Delta, and this week off has been a great opportunity to catch up and get a handle on a lot of things. Most of the things you can see in the photos in this post were written out in a one-day marathon study session. Three days later I had another whole day of study, which meant I finally finished copying everything out and caught up. This is something I want to avoid in the future!
I have therefore decided that in May I am going to try something (new) for thirty days and study Russian for 10 minutes every day. This could include any of the following activities:
Using my sentence cards, where I try to remember them/write them out
We checked the answers in class, and they were fine, but I wanted them to really notice the language. One student drew a picture for each idea in the text, numbering them from 1 to 10 to help her. (She was early and this was a way to help her before the other students arrived!) These are the final five pictures:
She’s a much better artist than me! By the time she had finished, the rest of the class had arrived. They used the pictures to reconstruct the text on the board. It’s a small group, so using the board enables them to easily change their mind about the text. Students could also use mini whiteboards, tablets/phones, or good old-fashioned pen and paper!
Once they were happy with their version of the text, they compared it to the original and asked me questions about differences they didn’t understand, particularly why ‘three-month-old’ had no ‘s’. They spoke a mix of English and Russian, and were engaged and motivated, arguing about whose memory of the text was better.
This was a lesson plan in the form of a presentation I put together for the weekly 90-minute English Speaking Club at IH Sevastopol. The notes for the plan are visible when you download the presentation (in the notes pane, normally found under the slides):
Here is the SMART goals jigsaw reading (jigsaw reading is where you divide a text into sections. Student A reads part A, B reads part B, C reads C and so on. They don’t see the other parts. They then work together, with or without the text, to build the meaning of the whole by sharing information from their own parts.):
There are also tapescripts to accompany the two videos, which could be mined for language if you choose (that wasn’t the purpose of this club):
It was the first topic for the speaking club for 2014, and hopefully we’ll revisit the goals the students set for themselves later in the year. Unfortunately I was ill, but my colleague taught it and said it went well. Let me know what you think!
My FCE students sounded really stilted when they tried to do this speaking part 3 in class today (taken from the FCE Gold Plus student’s book, page 87). If you don’t know FCE, this part involves looking at 5-8 pictures and answering a question about them, then coming to some kind of decision.
There were three of them, and despite having phrases for turn-taking and ideas on the topic, they struggled to talk for three minutes, and sounded incredibly unnatural, with long pauses while they tried to work out what to say.
I described interactive communication and how people work together to come to a decision, and suggested they watch out for it in the next film/TV show they watch in English. Then we talked about how they do it in Russian. I then had a brainwave: why not get them to do the task in Russian first?
So that’s what they did, and wow! What a difference! They were talking over each other, finishing each other’s sentences, asking for opinions, and most importantly moving from one picture to the next quickly and efficiently. (Although I don’t speak Russian, a lot of the words for the electrical appliances they were discussing were similar enough to English for me to notice that!) In English, they’d taken a minute to discuss a single picture, and they should have done about three in that time!
We talked about how they had spoken in Russian, and I mentioned how they had helped each other to build the conversation. We then repeated the task one final time in English, and it was a huge improvement on their first attempt, with them carrying over a lot of the interaction from their Russian conversation. Of course, it helped that it was the third time they’d done the task too!
Definitely something I’ll try again.
Here is the collection of Christmas activities which I presented at the International House Sevastopol seminar on Saturday December 21st 2013.
Some of the activities are available on the web, some I have created, and some are versions of time-honoured none-Christmas EFL activities adapted to the festive season. If there’s no link, click on the picture within the presentation and it should take you to the activity. Hopefully the slides are self-explanatory, but if not, feel free to leave me a comment.
What were you doing?
What were you doing?
What were you doing
At 10 last night?
I was sitting on the sofa.
I was sitting on the sofa.
I was sitting on the sofa
At 10 last night.
What were you doing?
What were you doing?
What were you doing
At 10 last night?
I was watching the TV.
I was watching the TV.
I was watching the TV
At 10 last night.
What were you doing?
What were you doing?
What were you doing
At 10 last night?
I was listening to music.
I was listening to music.
I was listening to music
At 10 last night.
What were you doing?
What were you doing?
What were you doing
At 10 last night?
I was looking at the sea.
I was looking at the sea.
I was looking at the sea
At 10 last night.
What were you doing?
What were you doing?
What were you doing
At 10 last night?
I was on vkontakte.*
I was on vkontakte.
I was on vkontakte
At 10 last night.
What were you doing?
What were you doing?
What were you doing
At 10 last night?
I wasn’t doing anything.
I wasn’t doing anything.
I wasn’t doing anything
At 10 last night!
I made up this chant, inspired by Jane Harding da Rosa, to help my pre-intermediate students with the concept of past continuous to talk about ongoing events at a fixed point in the past. I had a few ideas for verses and they added more.
We also tried a variant where they asked:
What was she doing?**
What was she doing?
What was she doing
At 10 last night.
The verse was about a particular student, and the others had to choose a possible answer. For example:
She was listening to music.
She was listening to music.
She was listening to music
At 10 last night.
…to which the student who was being discussed had to respond with either:
Yes, I was. Yes, I was.
Yes, I was. You’re right.
OR
No, I wasn’t. No, I wasn’t.
No, I wasn’t. You’re wrong.
(followed by a verse of them saying what they really were doing)
Through the chant, the students had practice with the positive, negative, question, and short forms of the past continuous. It is also designed to help them with the rhythms of English, as they struggle with listening, especially with weak forms (something I identified using this post-listening reflection questionnaire from Mat Smith’s blog). They responded really well, and a week later were chanting it when they came into class. I tried it with my teens too, and they didn’t get it at all!
So, what were YOU doing at 10 last night?
*Vkontakte is a Russian equivalent of facebook, which is very popular among my students.
About two months ago, my intermediate class put together a video to help students coming to International House Newcastle, by answering some of the questions they thought new students might have. This was the result:
To get to the final product, this is what happened:
The students talked to each other about what questions they had before they came to the school and in the first couple of weeks, as well as how they tried to find out the answers.
They wrote their questions on small pieces of paper – one question per piece of paper – and stuck them to two whiteboards.
I divided the class in half. Each group had one whiteboard. They had to divide the questions into categories of their own choosing.
They then compared the categories they had with the other group, merged any which were the same, and moved round any which were different.
This resulted, quite conveniently, in 5 categories, which was exactly how many pairs there were.
With their partner, students selected the most important/interesting questions from their category, so that they had 3-4 questions per pair.
They came up with possible answers themselves, supplemented with information from the internet and from me. They decided how they would turn their questions/answers into video form.
The pairs took turns going into an empty classroom with my digital camera and mini tripod to make their section of the video. After each, we transferred it to my computer so I could start editing while the next pair filmed.
By the end of a two-hour lesson every pair had finished filming. As each pair finished, they came and told me what they wanted me to do in terms of the editing. They also found any pictures that they wanted to add to the video.
At home, I spent quite a few hours editing the video, then sent it to my students for approval and to see if there was anything else that needed changing. I made the necessary changes and then reuploaded it to vimeo, which I think is a lot better than YouTube for things like this because it feels more intuitive, and the advertising is more subtle.
Students often ask me about the difference between ‘either’ and ‘neither’ and it normally results in me drawing a table on the board. I finally put this into a document and thought I would share it in case anyone else finds it useful.
(You can download it by clicking ‘slideshare’ and logging in – it’s free to create an account, and you can link via facebook if you want to.)
Let me know if there’s anything you think I should add/change to improve it.
My Advanced level students are very good about talking about ‘topics’ like the environment or health but sometimes struggle to strike up conversation with native speakers in a natural way. I decided to teach them about small talk, but couldn’t find a handy lesson anywhere so made my own. 🙂
Before the students came into class I pushed all the tables back and put some party music on. As they walked through the door I asked them to put their bags on the tables and write their names on the board (we had some new students joining the class). I then gave them a card from a tin my friend gave me for my birthday (Thanks Kim!):
and said “Talk”. [This combatted my common problem of confusing the students with complicated instructions…even after working on it during Delta!] The cards had questions like “What’s your favourite holiday destination?” “What do you normally do at the weekend?”
Once all of the students had arrived and they’d chatted for about five minutes I switched off the music and the light, which stopped the conversations quickly. I switched the light on again 😉 and asked them how comfortable they felt speaking to people they didn’t really know in their own language and in English. Understandably, they said it was more difficult in English.
I elicited the term ‘small talk’ and asked them to discuss the first four questions on the sheet below. For every activity during the lesson they had to work with someone they hadn’t spoken to previously during the lesson. I left the tables at the side of the room throughout, so students perched on desks and moved around a lot.
(You can download it by clicking ‘slideshare’ and logging in – it’s free to create an account, and you can link via facebook if you want to.)
Students then completed the second task (You’re now going to read about…) by looking at five short texts stuck around the room. They are on the first two pages of this document. I adapted them from the Wikipedia entry about small talk.
As they finished reading, the students compared the things which they found interesting or surprising, and talked about whether small talk operates in the same way or a different way in their culture, for example, whether the same topics are considered taboo.
The students stood in a straight line across the classroom. I stood about 1.5m from each student in turn and asked them to move towards me until they were at a comfortable distance away from me for a conversation. We talked a bit about personal space and how, for the Brazilian students especially, this could often be quite different in different cultures. We also talked about how normal it is to touch other people when you’re talking to them, and how this differs when you know them or not. One of the Brazilian students was surprised that an English person wouldn’t normally touch the other person, for example on the arm, while speaking to them.
I divided the class into A, B and C groups and gave them each one section from the next three pages of the second document above, which were adapted from Wikihow. They read their section, helped each other with vocabulary and tried to summarise the ideas. They then regrouped so that the new groups had representatives from A, B and C. The students shared the tips they had read about and talked about whether they are useful or not.
Talking about the tips
Students then thought of two or three opening gambits and wrote them in the last section of the first worksheet. Taking those, they made small talk for the last 25 minutes of the 2-hour lesson at what I told them was probably the most boring IH Newcastle party ever! That meant they needed to liven it up by meeting as many people as possible, and making sure they ended at least one conversation during the time limit – it’s often hard to know how to escape from a conversation. I also told them it was their responsibility to make sure everyone had someone to talk to – nobody could be left out at the party. I didn’t correct them or collect errors. The aim was fluency and making sure that the students would be as comfortable as possible for the other 18 hours we would spend together during the rest of the week.
Their homework was to make small talk with a random native speaker at some point during the week, then tell me about it. They had to make an effort to do this – it couldn’t just be an extension of a transactional conversation. One of the students ended up having a very interesting hour-long conversation with an old man who happened to be Jehovah’s Witness, something which my student had never heard of before (and therefore had no cultural baggage about!).
Overall, the lesson seemed to go well, and for the rest of the week whenever students had finished a task early I could ask them to make small talk. Making small talk successfully can be a difficult skill to master, but it’s an important one, and one which I don’t think we examine enough in the classroom. It’s important for students to be able to start and end conversations themselves, as we tend to control any small talk that happens in the room. I’m looking forward to hearing about the small talk experiences of the rest of my class!
With continuous enrolment, we get new students joining our classes every Monday morning, if they change from another class, on a Monday afternoon, when they’re new to the school, and sometimes on a Tuesday morning too, if they only have morning classes! This means that we’re constantly trying to make sure our students get on well together, and I’m always trying to find new getting to know you activities that still motivate and interest the students who’ve been in the class for weeks.
This is what I used a couple of weeks ago:
Ask students in pairs/small groups to decide what the connections are between the items on your own mind map.
Each pair/group writes three questions to find out more about the connections.
They then create their own mind maps – give them about 10 minutes, as it takes a while to get a good mind map.
Finally, they mingle and ask and answer questions about each other’s mind maps.
My students spent about 90 minutes on the whole process. I copied their mind maps and learnt a lot about my students in the process, something which isn’t always easy in a most of the getting to know you exercises I use. I even found out which of my students were great artists!
In my first lesson with my B2 Upper Intermediate group way back at the start of January, I found out that all of the students were fans of American TV series. We brainstormed the series they watched, and came up with about 30 different ones, everything from Big Bang Theory to White Collar (which I’d never heard of before). Because of that, I decided to base my first week on giving opinions about TV shows. (It was possibly a little too easy at times, and I think it could work with a B1 Intermediate group)
Tell each other about your favourite TV show, and say why you like it. While they were doing this, I monitored and noted examples of missing vocabulary and language would could be improved later in the week.
On the board, write as many words as you can think of connected to TV shows.
Fill in as many words as you can on this sheet:
Look at the wordcloud and match any missing words:
The teacher check the meanings and definitions with students. They drill any necessary pronunciation.
Students test each other by saying the definition, and the others in their group remember the word.
You can give students the link to the whole set on Quizlet to practise the words at home.
My favourite TV series
I then introduced the class to one of my favourite series, and one I was fairly sure they wouldn’t know, namely Doctor Who, through this very entertaining video by Charlie McDonnell:
They had to listen to the video twice and answer the questions on the first sheet, then listen again and correct the mistakes in the transcript. It bears repeated listening because Charlie speaks very quickly – be prepared for a look of shock the first time they hear him! The corrected version of the transcript is in the second slideshare document below. To download them, click on ‘view on slideshare’. You need to join to download, but it’s free.
Other people’s favourites
In the next lesson, we started off by revising the vocabulary with a board race. The aim for this lesson was for students to learn some useful phrases to talk about their favourite TV shows. We started by listening to Adam, with three questions:
What’s the show?
Why do they like it?
Do they give you any extra information about it?
Adam – The Walking Dead
Here are the phrases I pulled out of Adam’s text:
The first thing you think about when I say…
The main purpose of the show is…
There are deeper things than this in the show.
That’s why I like it.
The show really looks at the human condition.
It looks at…what happens when…
He was in one of my favourite shows.
I then divided the class into two groups (there was an empty classroom next door). One group had my iPad, and the other my phone (I trust them!). Each group listened to three of the other recordings – Vicky/Deniz/Matt or Rachel/Sian/Lea. They had the same questions as above, plus the additional job of choosing any useful phrases they could steal.
Once they’d listened to their three texts, they told the other group about what they’d heard.
They then talked about their own favourite TV shows, trying to use some of the phrases.
Deniz: How I Met Your Mother
It’s a sitcom set in…
The main character is…
In each episode…
The reason why I like this show is…
If you haven’t watched the series, I really recommend it.
I’m sure you’ll enjoy it, just like I do.
Vicky – Glee
My favourite TV series is…
I really like it because…
It deals with…
It’s also something I really enjoy because…
I really look forward to watching each episode…
Lea – The Borgias
It’s set in…
It’s all about… [described in present simple]
What I like about this series is…
You find yourself rooting for them.
My favourite character is…
[Side note: thanks to this lesson, I’m now a big fan of The Borgias and How I Met Your Mother :)]
Matt – Six Feet Under
My favourite TV show of all time is…
It’s about… [described in present simple]
It’s an amazing show because it deals with…
It can be very dark.
The opening credits are something I enjoy in and of themselves.
The acting was incredible.
Rachel – Eastenders
It’s a bit of a guilty pleasure.
It’s a soap opera which is set in…
I just love it.
One of the other reasons that I love it is…
Sian – The Killing
One series I enjoyed very much last year was…
It’s quite funny that I enjoyed this because…
…and that’s something that I’m not particularly used to…
There was a good strong central character.
By ten minutes into the first episode I was completely gripped by…
A fantastic supporting cast…
…were so good that…
[Thanks to these lovely people for answering my Twitter/facebook call for one-minute recordings about favourite TV shows. If anyone else wants to record one and post the link in the comments, that would be great!]
To finish the week, I taught this lesson from allatc, based on the first episode of The Walking Dead. They mingled at the end to tell each other about their favourite scenes from any TV show. It brought together everything we’d been discussing all week perfectly.
It’s Friday afternoon. It’s time for the last of our ten two-hour lessons this week. The last thing my students want to do is learn, especially when it’s cold, dark and snowing outside. Cutting Edge to the rescue!
This afternoon my upper intermediate class designed two soap operas. There was much laughter, a lot of speaking in English, and two great stories by the end of the lesson, with the added benefit of some much-needed revision of verb + gerund/infinitive which we were practising yesterday.
In the activity, the students get a page of photos of people. They decide on biographical details, the setting for their soap opera and a name for it. They then plan the next episode with the help of three ‘plot cards’. Finally, they write a summary of the storyline for the episode using some of the verbs which take gerund/infinitive. The activity is from New Cutting Edge Upper Intermediate Teacher’s Resource Pack, pages 142 and 143.
I can’t reproduce the worksheets here, but I can share photos of my students using them:
Here are their stories: The girls
Mark decides to kidnap Cookie (the baby) so he threatens to kill Cookie if Samantha doesn’t pay him £1 million.
At the same time Laura and Chris plan to get married after finishing school. Alice, who loves Chris, can’t stand seeing them so happy so she manages to split them up.
Richard promises to pay the money for Cookie’s freedom.
Samantha considers telling Mark the truth: Cookie is his son!
The guys
Chris manages to become a famous football player. Alice denied having had a relationship with Richard, when Mark asked. Samantha avoids telling Chris about Richard and Alice’s relationship. Mark can’t stand seeing Chris and Alice, but he loves being with Laura.
This week, my colleague Lesley and I decided to work on a short story with our (two classes of) pre-intermediate students. We chose the Sherlock Holmes story A Scandal in Bohemia. We have four hours a day with them, divided into two two-hour lessons, so we dedicated the afternoon lessons to the story.
This post is intended as a list of ideas for using a short story, rather than a series of lessons you could necessarily follow yourself. If you want to follow it exactly, you need to find an abridged version of the story – I can’t find a suitable one to link to, unfortunately.
Monday
We showed the students pictures of Irene Adler (x3), Dr. Watson (x4) and Sherlock Holmes (x4), in that order, taken from various TV and film adaptations of the story. The students had to describe the people and decide what they had in common. Until they got to the final group of pictures, they didn’t know it was connected to Sherlock Holmes. After each group, we wrote a set of sentences on the board about the characters (the names were added later).
We then brainstormed everything the students already knew about Sherlock Holmes. Of my seven students, one had read a short story and two had seen the film. This is what we came up with:
After this preparation, it was time to start reading the story. I read aloud while the students followed. I stopped on the second page of our abridged copy, so that the students had seen the description of Adler, Holmes and Watson, giving them enough information to add attach the names to the pictures.
To stop the students from trying to understand every last word of the story, I asked them to highlight every word they understood in their copies. This idea was inspired by Kevin Stein and really motivated the students. I put % on the board, and asked them to estimate how much they had understood so far, getting answers from 70-99%. They then worked together to fill in some of the gaps, highlighting any extra words they understood. Estimating the percentage again after this exercise, all of the students raised it. I pointed out that they didn’t need to understand every word to understand the story, but that it’s a good idea to focus on a couple of new words, and this is where we left lesson one.
Lesley had decided to start from the title, discussing what a scandal was. I never ended up doing this explicitly, but should have done at some point.
Tuesday
On day two we started by recapping what the students remembered from the first two pages of the story. I showed them the Watson/Holmes pictures again, and asked them to decide which Watson assisted which Holmes, based purely on the images. For example, Jude Law with Robert Downey Jr. and Martin Freeman with Benedict Cumberbatch. We talked about how they decided, using clues like the age of the photo and the kind of clothes they were wearing, as well as prior knowledge of the film. This introduced the idea of observation, and linked to a quote I had on the board: “You see, but you do not observe.”
In the next page of the story, Holmes lists four things about Watson which he has observed:
Watson is enjoying married life.
He has put on weight.
He was caught in the rain recently.
He has returned to his career as a doctor.
The students had to identify the paragraph where Watson confirmed each observation by writing a key word next to it, which the students decided would be married, fat, rain, job. They were very motivated when they realised this was easy to do, as they had initially said they couldn’t understand.
For the next sections of the story, Lesley and I had prepared pictures taken from screenshots of a YouTube video. I haven’t uploaded these, as I think they are probably covered by copyright. The students had to read the part of the story where the King describes his problem, and match what he said to the pictures. They then worked together to complete a gapped summary of his problem:
For the last ten minutes, they divided a piece of paper into four and wrote sentences describing everything they knew about the four main characters. For example:
Sherlock Holmes: He is observant. He lives at 221B Baker Street.
Doctor Watson: He is married. He works with Sherlock Holmes.
Irene Adler: She is very clever. She has a photo of the King and her.
The King: He wants to get married. He needs Sherlock’s help.
Wednesday
We started by recapping the summary from the end of Tuesday’s lesson. The students were amazed at how much they could remember! They also added to their sentences as we’d run out of time on Tuesday.
The next part was picture-based again, this time with the students predicting what they were about to read about. They had pictures of Sherlock Holmes in disguise as a tramp, Godfrey Norton arriving at Irene Adler’s house, then leaving, and Adler leaving. There was another summarising gapfill for them to complete at this point.
Once they had checked their answers, they had to guess what would happen next. They were right in suspecting that Norton and Adler would get married, but were surprised when they read and discovered that Sherlock Holmes was the witness!
To finish the lesson, we read about Holmes’ plan to get the King’s photo back from Adler.
By this point, the students were flagging a little, but I told them we would finish the story the next day and they perked up a bit!
Thursday
The students read about how Holmes and Watson put the plan into action. They then watched three short clips from the TV episode, showing:
To finish the story, the students had to say what they thought would happen in the final four pages, then read to check whether they were right or not.
They then started to work on an 8-10 sentence summary of the main events of the whole story, which they had to finish for homework.
Friday
All of the students did their homework 🙂 They worked together to decide which sentences were necessary in the summaries, as some students had written a lot more than eight to ten.
I divided the class into two groups of three/four students each. Each group had to choose any scene from the story and reenact it. They had about 25 minutes to plan what they would say and do (luckily there was a spare classroom next door). They then performed their scene, to much raucous laughter – one student played the King visiting Sherlock Holmes. In the story he is wearing a mask, but she made do with her sunglasses and headscarf, which none of us expected! It was probably much funnier being in the room, but affective filters were definitely lowered! While watching the scenes, the other group had to decide who was playing who, and which part of the story it was. The task wasn’t very difficult, but they had used a lot of English to prepare for it, and they really enjoyed it, as they told me afterwards.
For the final half hour of the week, we played Hot Seat/Backs to the Board, using words taken from the story. We hadn’t really focussed on anything in particular, but words and phrases the students had picked up and started using during the week included: witness, framed photograph, panel (which Adler hid the photo behind), tube (which the smoke bomb was made of), false alarm, observe, Your Majesty…
When I asked them to think back to the first lesson and how they felt when they first looked at the story, the students all said it looked hard, but that now they could understand. There was a great sense of achievement on looking around the room.
Doing it again
I definitely would! And I wouldn’t change much at all – the students were engaged, motivated, and picked up a lot of new language along the way. Hopefully it will inspire them to read a little more in English, and remind them that it’s not necessary to understand every word of something to get the main points. One student did go home and look up all of the unknown words on Monday evening, but that was the only time she did it.
The final lesson was one of the most entertaining I’ve had for a long time. The students were very motivated by the role play, and put a lot more energy into it than I expected. (The role play was included as part of my Delta Professional Development Assignment.)
What other ideas do you have for using short stories in class?
I spent Saturday reading all about listening in preparation for my second LSA (Language Skills Assignment). While working through Penny Ur’s Teaching Listening Comprehension, I came across a few ideas which I’d like to try out. From both that and Listening (Anderson/Lynch), I’ve realised how little ‘natural’ English our learners generally hear. They often hear scripted things from the CD/mp3/films, or ‘teacher’ English from us, but not a lot of false starts, stuttering, repetition, and all of the other features of a normal English conversation. This was my variation on a grid activity suggested by Ur which I did with pre-intermediate students.
I introduced a few adventure sports using pictures.
Students drew a grid in their books (sorry for it’s a bit of a mess!):
like | would like
________________________|____________________________
√
________________________|____________________________
x
I had a similar grid on my paper, where I had listed a few of the adventure sports:
like / would like
__________________/____________________________
√ skydiving /climbing
__________________/waterskiing_________________
x skiing /snowboarding
. rollerskating /
I monologued about the sports above, telling the students what I like/don’t like doing and what I would (not) like to try. I made it into a kind of story, mixing up the sports: “When I lived in the Czech Republic, I went skiing, and I really didn’t like it because…” The first time they listened, all the students had to do was count how many sports were in each box.
After students had compared in pairs (in true CELTA fashion!), I then monologued again, in a different order, but with roughly similar elements to my story. This time, students had to write down which sports were in each box. We then checked it on the board.
Finally, students created their own tables, and did the same two-step process – listening and counting, then listening and writing.
The only place I was happy for my skis to be
Did it work?
Mostly, yes. One of the students even said it was much more useful doing listening like this. I ended up doing the monologue four times, as the first time students thought they were counting sports for themselves – they didn’t realise it was about me! Once they got the hang of it though, they seemed to be motivated, and were concentrating hard to try and get the right answers. They also enjoyed the chance to do it themselves afterwards.
It also served as a useful basis for looking at ‘like + ing’ and ‘would like to + infinitive’ which was the main focus of the lesson.
Doing it again
I’d pull out a few more phrases from my own monologue to help students build their own stories. I also needed to make it clearer that it was a listening exercise when I started! Apart from that, I’d follow a very similar procedure again.
(This is one of a series of shared mini reflections on some of the activities I’m trying out during my Delta. The first was here, the second here.)
I’ve been investigating role plays as part of my Delta reflection. I rarely use them because I never enjoyed them as a language student, but I think some students would respond to them very well.
I put a few pictures from eltpics around the room. Each picture showed a minimum of two people, and it was relatively easy to imagine that they were having a conversation. First, students walked around in pairs discussing what they could see. To prompt them, I had the question words Who? What? Where? When? Why? How? written on the board.
Shaun Wilden brought picture role plays to my attention during his seminar at the recent IH Online Conference. You can watch his session here and read the original description of the activity here.
Did it work?
Yes and no. The quieter students were very creative in the biography, and added lots of extra details. My favourite was ‘My grandmother loves playing chess and is the world champion.’ However, when it came to the roleplay, the conversation was quite stilted. They did ‘inhabit’ the role a little, but for the quieter students this was very difficult. The more confident students really seemed to enjoy it, and were arguing quite a lot about the correct language to use.
We had been practising indirect questions during the week, and one or two of the quieter students got them into their conversations. However, I didn’t have a particularly clear aim for the activity. It was very much a ‘Friday afternoon’ activity.
Doing it again
With role plays, you definitely need some kind of clear aim. Why do the students need to imagine the conversations between the people in the photos?
Most of the language work I did with the students was in their pairs. It would be useful to work more with the language and build on it further.
We didn’t have time to repeat the role play, and this is definitely something the students would benefit from.
Do you have any other advice?
(This is one of a series of shared mini reflections on some of the activities I’m trying out during my Delta. The first was here.)
While I was doing my CELTA, and before I knew about eltpics, I saved photos from magazines in an old biscuit tin. Shortly after my CELTA, I put said tin in my mum’s attic, where it stayed for the three years I was in Brno. When I came back to the UK to work in Newcastle, I thought it was time to retrieve some of the materials banished to the attic and try to make use of them. It took another eight months for me to finally find a good use for the photo box, and they have now become a staple of my current beginner classes. You could substitute eltpics or pictures drawn by students. Here are some of the ways I have used them.
With all of the activities, I modelled first, then the students copied the model to do the activity. I have never given explicit instructions as the students would not understand them at this level.
What’s her name? What’s his name?
After introducing the structure ‘What’s _____ name?’, elicit a selection of names and write them on slips of paper. Save them after the class (I keep mine in the tin with the pictures) as they will come in useful again and again. I wrote girls’ names in pink and boys’ names in blue to help the students. They don’t have to be English names – my students just decided that was what they wanted, and all of the names shown in these pictures come from them.
Ask the students to attach names to the photos by asking ‘What’s his/her name?’ They could also pick up a photo and a name to take on the identity of that person.
Other structures we practised here were:
His/Her name is (not) _______.
Is his/her name _______? Yes, it is. No, it isn’t.
He/She is (not) ________.
Is he/she ________? Yes, he/she is. No, he/she isn’t.
(By grouping pictures or using ones with more than one person) What are their names?
Their names are ______ and ________.
Are their names ______ and ________? Yes, they are. No, they aren’t.
How do you spell _____?
What’s his name? What’s her name?
Where is she from? Where is he from?
Using flags, add an extra stage after eliciting the name. You can practise similar structures to those above, and by including pictures of objects you can add structures with ‘it’ too.
Where is he/she/it/Jake from?
Where does he/she/it/Kate come from? (introduced by my students)
Is he/she/it/Ivy from _______? Yes, he/she/it is. No, he/she/it isn’t.
Does he/she/it/Harry come from ________? Yes, he/she/it does. No, he/she/it doesn’t.
What country is he/she/it/James from?
He/She/It/Lucy is (not) from __________.
He/She/It/David comes/doesn’t come from ____________.
Where is he from? Where is she from?
Colours
Spread a selection of pictures, both people and objects on the table. Ask students to point to a picture showing a particular colour: blue/red…. You could make it harder by including more than one colour in your requirement: blue and green. You could also practise ‘What colour is it?’
Objects/Possessives
First, revise the name questions as above – I normally get students to do this as they are assigning names to the photos. Then, put an object with each name/photo pair. You can use this to practise:
Does he/she/Michael have ________? Yes, he/she does. No, he/she doesn’t.
He/She/Jack has __________.
He/She/John doesn’t have _________.
What does he/she/Anna have?
Do they have ______? Yes, they do. No, they don’t.
They (don’t) have ________.
What do they have?
We played a guessing game using the ‘doesn’t have’ structure. One person said a negative sentence, for example ‘He doesn’t have matches.’ The others were allowed one guess (only!), before the first student said another sentence. The other students had to work out which person it was using the fewest guesses.
With the same photos and flashcards, we also practised:
It is his/her/their/Jack’s _________.
They are his/her/their/Jack’s ________.
Is it his/her/their/Jack’s __________? Yes, it is. No, it isn’t.
Are they his/her/their/Jack’s ________? Yes, they are. No, they aren’t.
What does he have? What does she have?
Clothes
You could do practise any of the structures listed for ‘objects’ above. You could also practise the obvious structure of: ‘What is he/she wearing?’ ‘What are they wearing?’ I introduced colours as adjectives at this point:
She is wearing a grey jacket.
He is wearing a black jacket.
Michael is wearing a white shirt.
The course
I have managed to teach at least 50 hours of lessons over the last five weeks based largely on a combination of these pictures, some flashcards, a (non-interactive) whiteboard, and trips to the school cafe to introduce other students. The pictures have formed the backbone of drilling and repetition, while providing variety through their mix and match nature. I’ve had a maximum of four students, so this variety has been important. I will continue to use them throughout the course, and will share any more activities as and when we do them. If you have any more ideas on how to use the pictures, with any level (not just beginners), please feel free to leave a comment.
While at IATEFL Glasgow 2012, I was lucky enough to see Khulood Al-balushi’s presentation, in which she shared various ideas for using movies with your students, as well as offering advice on how to choose suitable movies, especially important in the Kingdom of Bahrain, where she works as a Curriculum Specialist at the Ministry of Education. I asked her to share her ideas via my blog, and she agreed. Over to Khulood:
How can you make your students benefit from watching movies they like ?
Since movies are a rich source for language learning and they are considered to be fun and enjoyable, here are some practical ideas that you can implement to make use of movies in the English Classroom:
Introductory activity
Make students watch a movie trailer of the movie you intend to use and present the following activity:
This will help you motivate your students to watch and respond to the movie and can tell you if the movie is favored by the students. Otherwise you can look for a different movie.
Watching movie clips
You can make your students watch movie clips if the length of your lesson is short or if you intend to present a specific language skill such as reading, speaking, grammar or writing. The following are a few examples:
Students can watch a scene of the movie “The Cat in the Hat” and write down the process the cat uses to make cupcakes.
Students watch a scene from the movie “Volcano” and answer the following question: “What would you do if you were in this situation?” to promote critical thinking and present a lesson about natural disasters.
Ask students to watch a scene from the movie” Cast Away” and ask them to think about the following question “What would you do if you were trapped on a remote island?” (critical thinking and second conditional)
Students watch a scene from the movie “Titanic” and answer an activity that involves reading and vocabulary and promotes critical thinking by comparing the actual story and the selected scene. Click to download the activity: Titanic movie task
Students watch the movie trailer of the movie “Inkheart” and answer the following question: ” What if you had the power to bring a book to life by simply reading it aloud?” to promote speaking and critical thinking.
For creative writing and speaking, you can show your students a clip from “Spy Kids 2” movie and ask them to imagine being in a virtual reality game and ask them to describe their game in writing and present it to their classmates.
Watching full-length movies
Students watch ” Charlie and The Chocolate Factory” and answer an activity that aims at discussing characters:
Students watch the movie “Oliver” and read the book and then compare between the movie and the actual story by answering a given activity. Click to download the activity: The Movie versus the Book
Student watch a full-length movie and answer the activity sheets which are designed for two different levels. Click to download an example: Harry Potter and the Chamber of Secrets
Students watch the movie “Finding Nemo” and asked to produce a creative project such as drawing, creating bookmarks, designing a puppet show, performing a play…etc.
Of course, all of these activities can be modified based on your needs and your students.
I did this activity in an IELTS class this morning as a fun way to practise listening part 1, where you have to write information down including numbers and letters. These could be product codes, reference numbers and other combinations of numbers and letters.
You could also use it with lower level students to practise the alphabet or vocabulary you’ve studied recently.
Dictate a place name, interspersed with letters and numbers. This was my example (be careful with ‘o’ and zero):
w1o3lv4e79r12h6amp8t10on
Students should write it down as just a series of letters and numbers. Tell them it’s a place which they have to find by underlining the letters. The answer here is ‘Wolverhampton’, the town where I grew up.
They then think of a place name and add some numbers to it to dictate to a partner. They could also choose some vocabulary from a recent class, names of people, or reverse it by having a date with letters interspersed in it.
This morning my students spent over an hour discussing and debating their opinions of what a Utopia should be like. All of this was prompted by a single page from the Total English Intermediate teacher’s book.
On page 124 of the teacher’s book there is a list of rules about a possible Utopia, designed to revise modals of obligation and permission (must, have to, should). Students work alone to decide if they agree or disagree with the rules, then get together to debate a final version of their Utopia.
This single sheet prompted discussion about whether taxes were necessary, whether governments really need weapons, the benefits of living in a foreign country, and whether one language should be allowed to dominate the world.
Thank you very much Will Moreton and Kevin McNicholas!
Last week I stumbled across an excellent photo article from the New York Times about immigrants to New York City and the objects they choose to bring with them. This is the lesson I created based on the article, but it is full of other possibilities too. I hope you find it useful, and I look forward to hearing what you decide to do with it.
I started off with the powerpoint presentation below. I displayed it on the interactive whiteboard, but you could print off the pictures and put them around the room instead. First, students were asked to speculate on what is in the pictures, and naturally they focus on the objects. Next, I asked them what links the pictures together, accepting any suggestions. I then told them that these were objects which immigrants to New York City brought with them. I then asked them to make notes about their thoughts on the gender, nationality, age, job and family of the owners of each object.
[To download, click ‘view on slideshare’. You may have to log in (not sure), but it’s completely free. You should then be able to click on ‘download’ above the document.]
I then gave the students the texts and asked them to read quickly to match each text to the photos. Some of them needed quite a lot of persuading to skim read and not try to understand everything!
You can find the correct answers by looking at the original article online. The students then had to check their predictions about the people by reading the text in a bit more detail. When a colleague reused the materials, she added a worksheet with a table with spaces for each item of information, which worked better than the notes which my students made.
In the penultimate step of the two-hour lesson, I divided the ‘stories’ up around the class, so that each pair of students had two people to read about. They had to create three to five questions about each person, not including the information we had already talked about (nationality, job etc) and write them down.
Finally, they mingled and asked the other students their questions.
For homework, I asked them to choose a story from the comments board, take notes on it and bring them to class the next day to tell the other students about.
A couple of days later I was working on relative clauses with the same class, and created the following gapfill to help them practise which relative pronoun to use:
The texts could also be used to practise narrative tenses, reported speech, time phrases and much more. You could also use it to lead into a discussion on immigration.
On Thursday I introduced my students to Speaking Part 3 of the FCE paper. In this section of the exam, two students have about three minutes to discuss a set of 5-7 pictures and answer two questions. The first question involves some kind of scenario where they have to refer to every picture, and the second involves making a decision. The examiners are looking for whether the candidates can have a discussion (interactive communication) rather than monologue, among other things.
We were focussing on holidays all week, so in a similar way to the Present Simple / Present Continuous activity I shared a couple of weeks ago, I asked my students to draw a picture of themselves on holiday.
Since there were 11 students, plus me, we had twelve pictures in total (I’ll leave you to work out which one was mine!) That created two convenient groups, like so:
The notes at the top show two language points which came up during the discussions. We ended up doing the task four times, using each set of pictures twice. The questions I asked were:
Imagine you are taking your family on holiday. What are the benefits of each kind of holiday when travelling with a family? Which is the best place to take a family too?
Imagine you are organising a holiday with your friends at the end of your exams. What could you do with your friends on each of these holidays? Which place will you go to?
Imagine you are going to have a week’s holiday by yourself. What are the advantages and disadvantages of travelling along to these places? Which is the best place to travel alone?
Imagine you are organising your next holiday. Why do people go on these kinds of excursions when on holiday? Which one would you go on as a one-day excursion?
We had done an example of the activity from Complete First Certificate, and I used their excellent speaking guide (at the back of the book) to give the students tips on how to approach the task. The general idea for this lesson was to familiarise the students with the format and to encourage them to converse, rather than monologue. In the end, that wasn’t really a problem as they’re very good at interacting with each other. They definitely improved as they did the task more times, although I think after doing it five times they never wanted to see it again! 🙂
(We used the class timer from the Triptico suite to keep the students in line!)
This was something I did a few weeks back with a group of Elementary students. It could probably be adapted for your students without too much trouble.
We spent a couple of days talking about types of shop and what you could buy from them. I then gave them a time limit and sent them off into the local shopping centre in pairs. They had to decide what they would spend their £100 on and take photos of each item. The pair who got closest to £100 and had the best reasons for their purchases were the winners, as decided by the other students in the group. They really enjoyed it and I hope your students do too 🙂
To download, click ‘view on slideshare’. You may have to log in (not sure), but it’s completely free. You should then be able to click on ‘download’ above the document.
I’ve just started teaching a Cambridge FCE group, so expect to see a lot of posts about my lessons over the next few months (they take their exam at the end of November). Hopefully I’ll be able to share some of the ideas I’ve been using and get some in return 🙂
For the first session I decided to focus on FCE Speaking Part 1. For those of you who aren’t familiar with it, there are four parts to an FCE Speaking exam, the first of which is an interview where the interlocutor speaks to each candidate in turn. The questions are general ‘getting to know you’ ones, along with some which are little more in-depth. They are designed to ease the candidate into the exam.
We started off by brainstorming topics you might talk about when you meet someone for the first time. The students came up with:
I then divided the topics up into groups and gave the students some pieces of scrap paper. Each piece of paper was for one topic. Working in small groups, they brainstormed as many questions as they could for each area and wrote them on the paper.
We then passed the questions around the room for other students to correct and add to.
Once the questions were as good as they could be, the students took one set of questions each and mingled to find out the answers.
As homework, they typed the questions into this Google Document, which I had started with ‘personal information’ questions. I also added the bonus topic of ‘your house’. My job for this evening is to correct them!
Feel free to use the questions with your groups, or add to them if you think of any more.


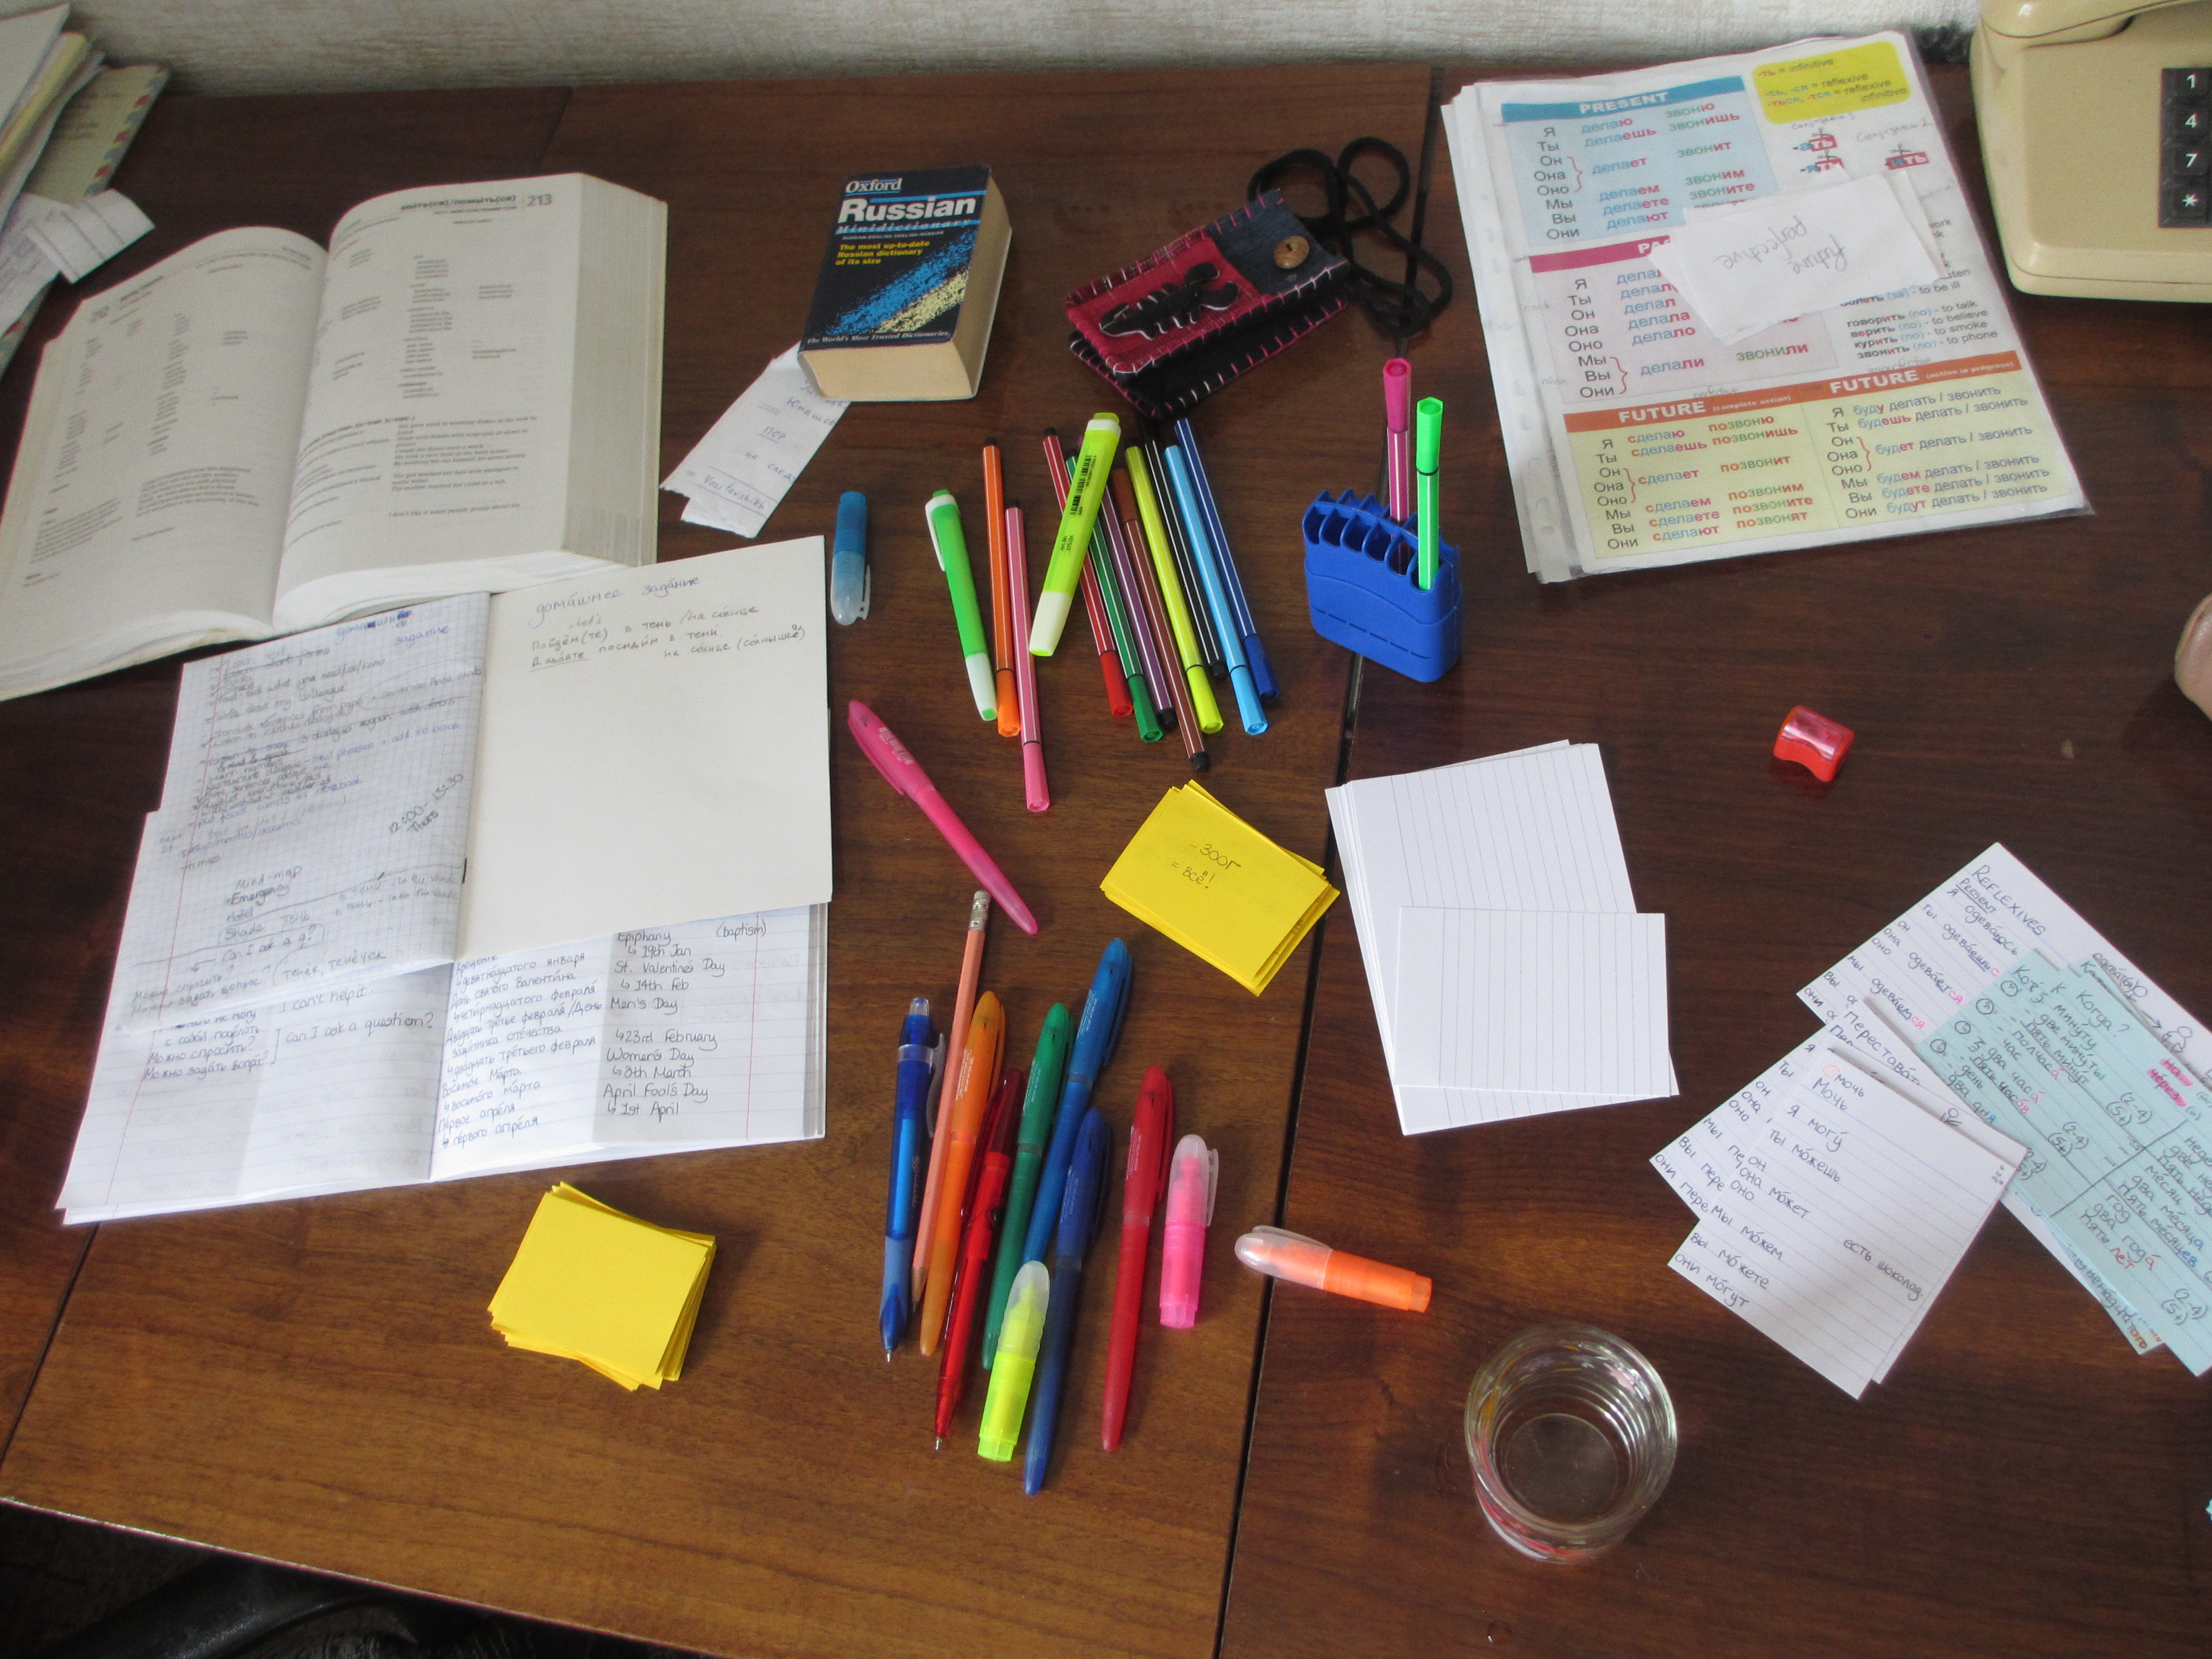
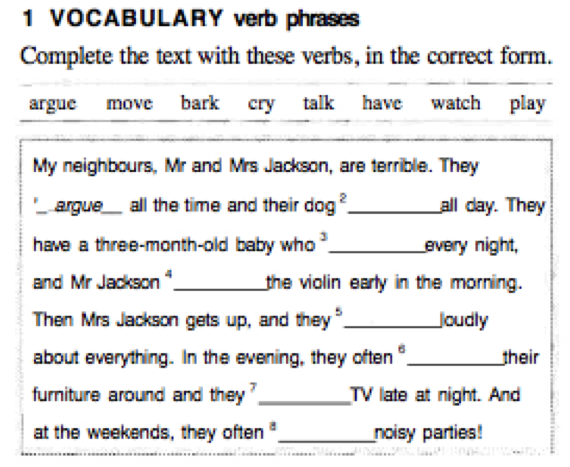
 , page 53, Unit 6C


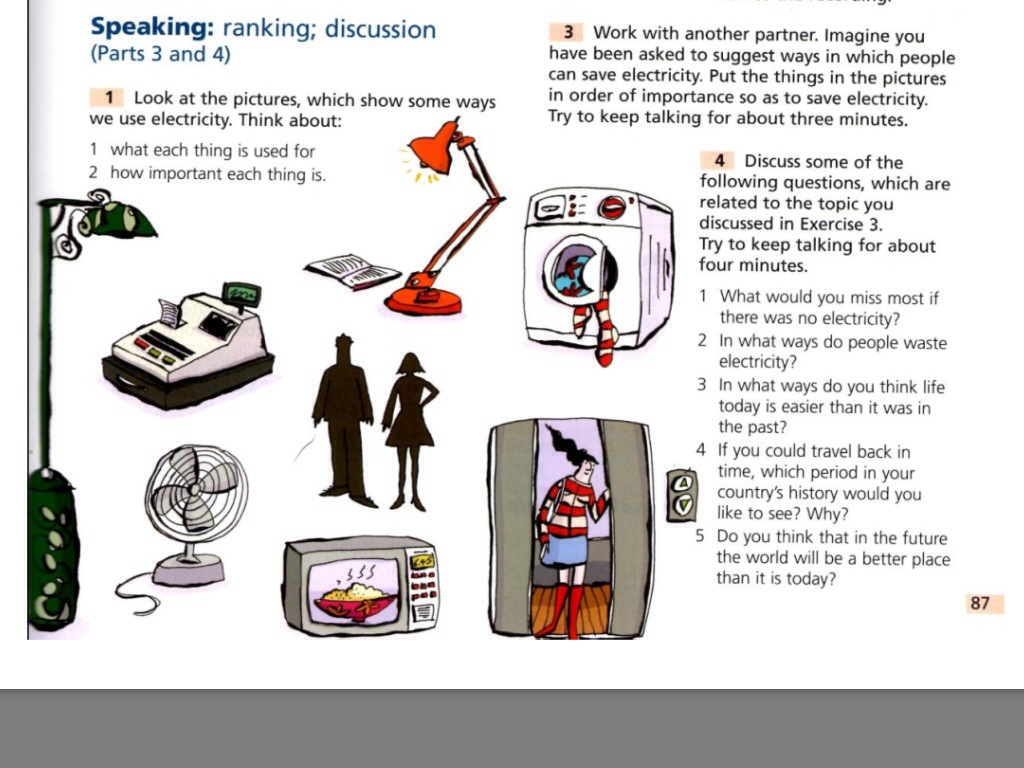


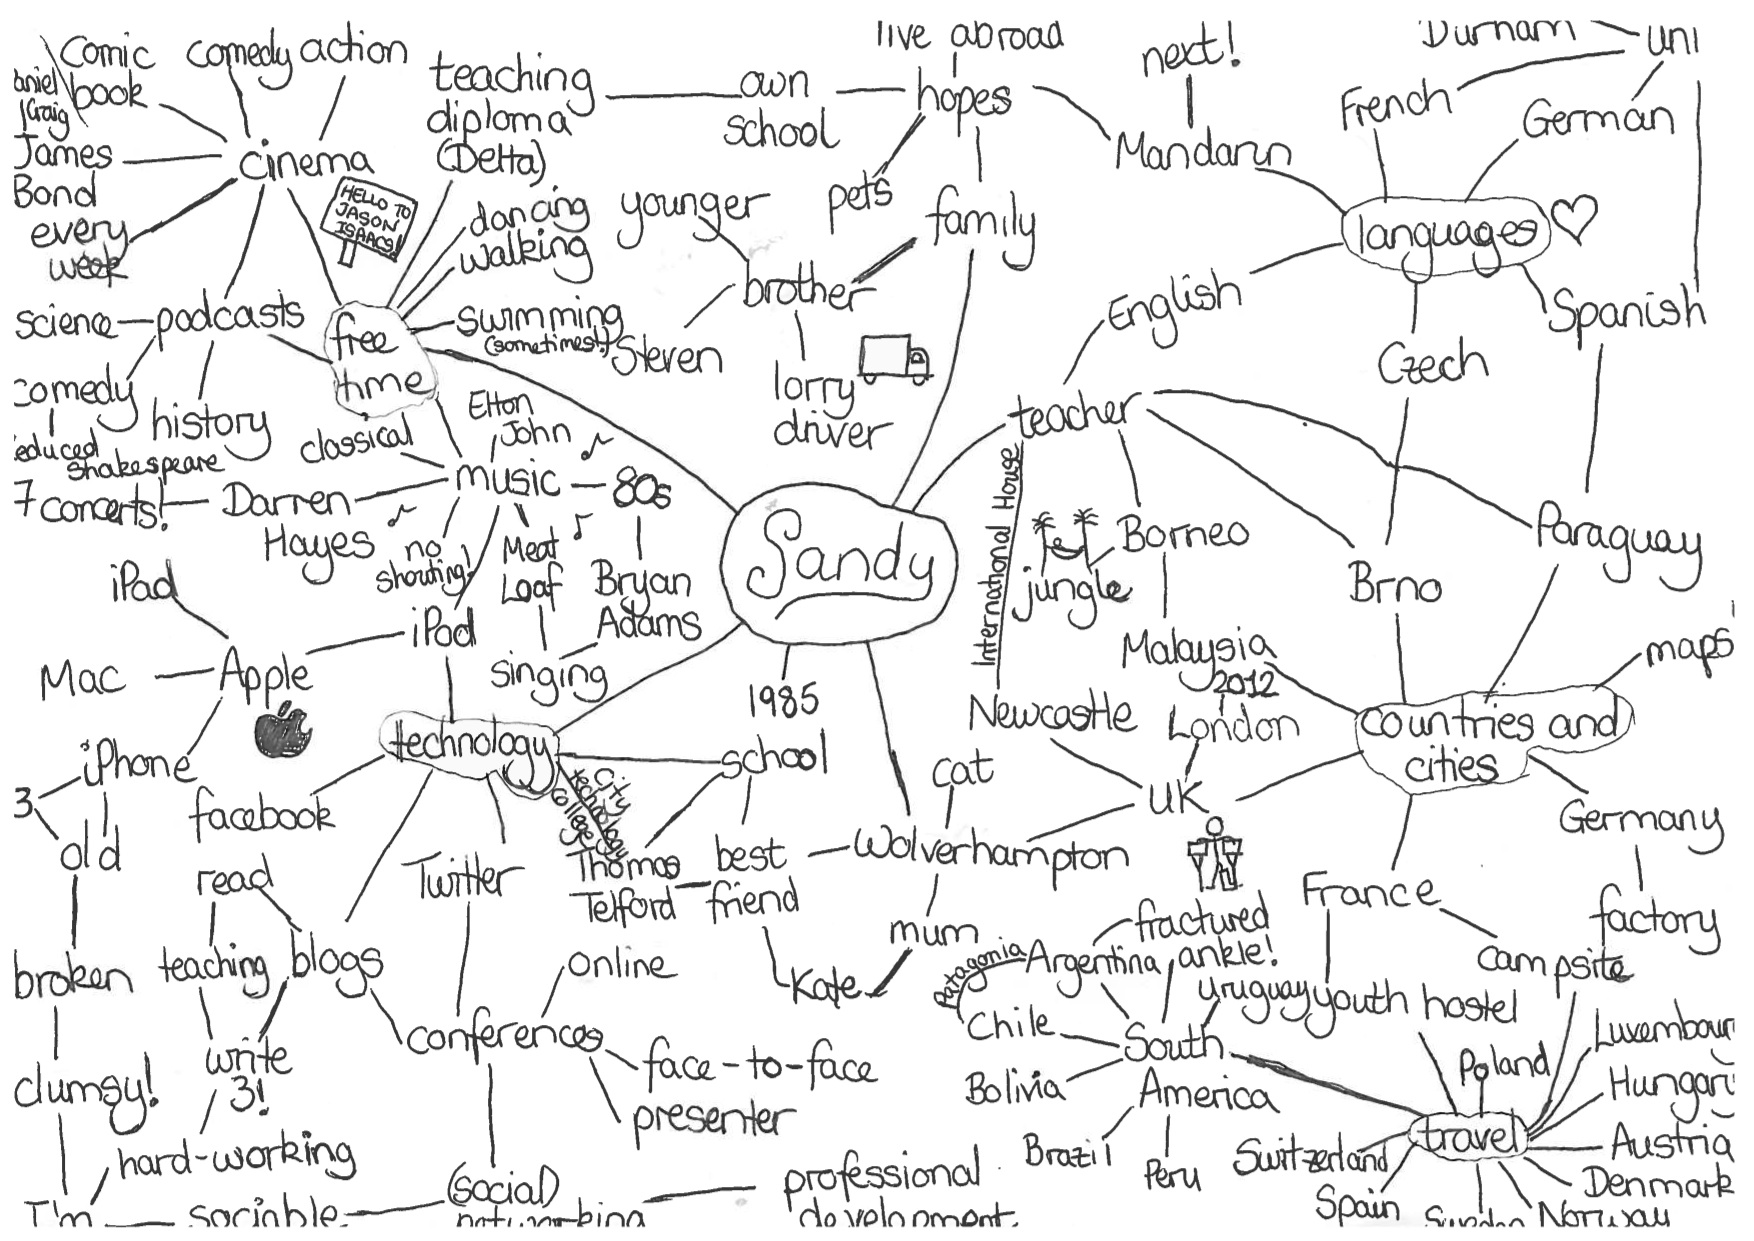


 For the last ten minutes, they divided a piece of paper into four and wrote sentences describing everything they knew about the four main characters. For example:


